I have a fun little project to share with you all today!
Remember all that old wood I dug out from this giant pile?


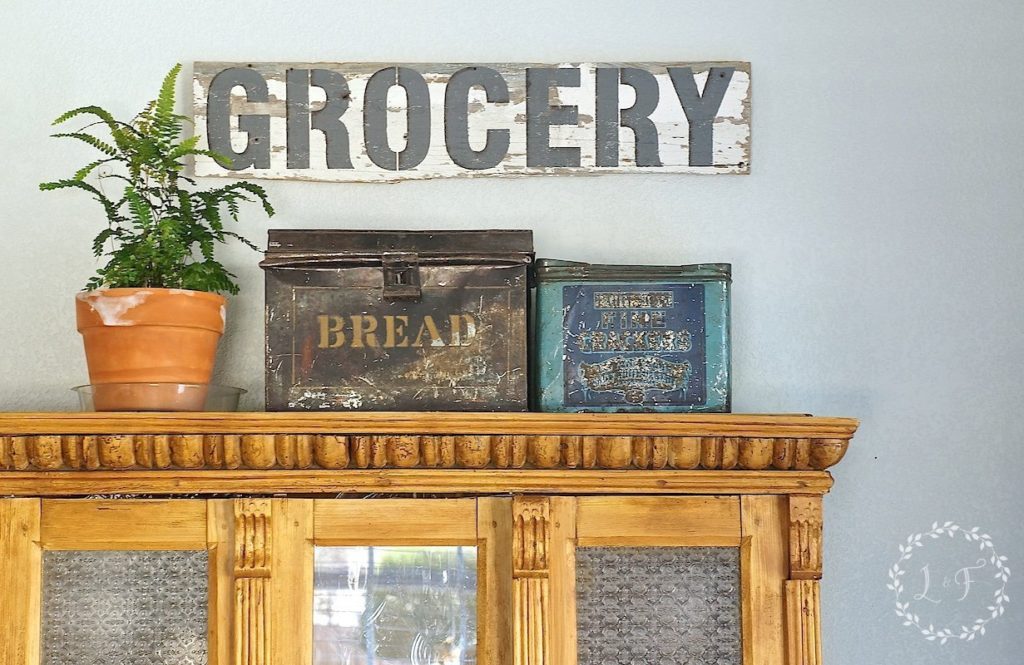
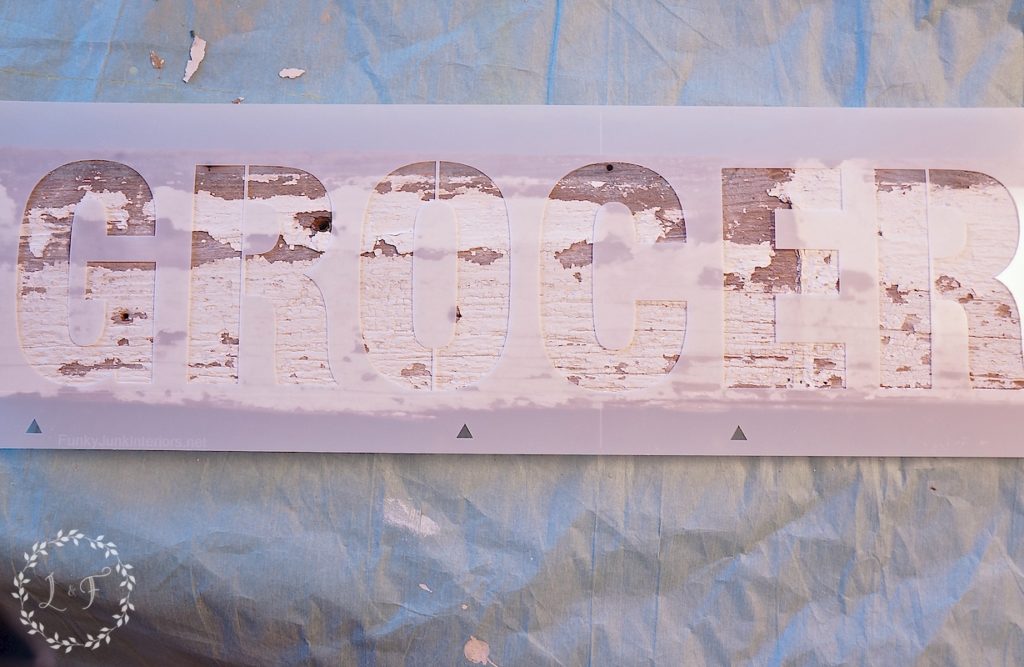
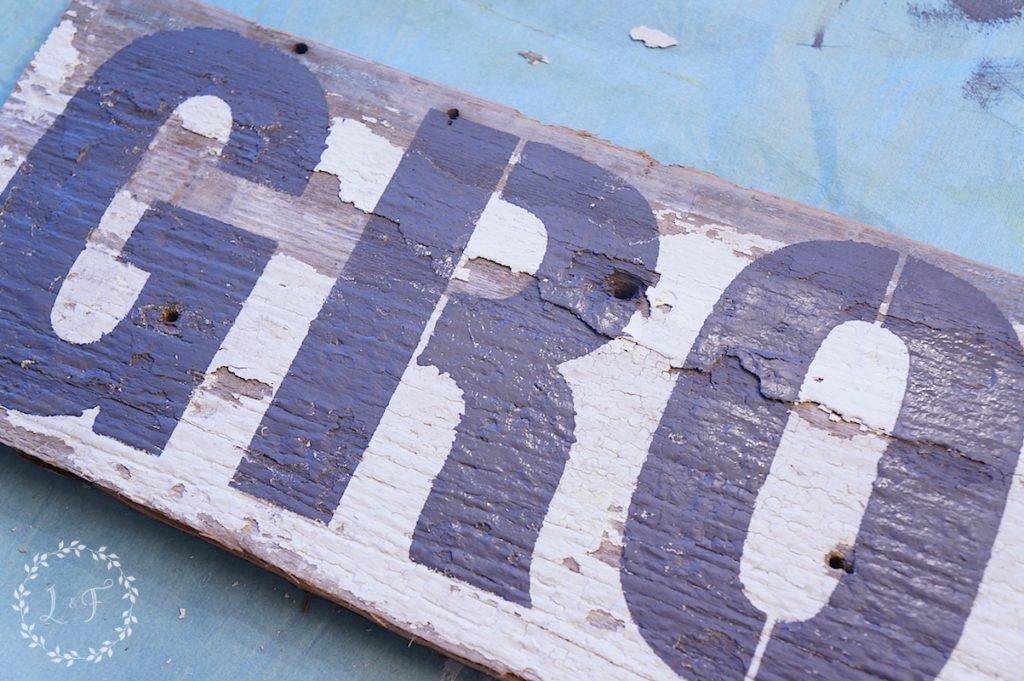
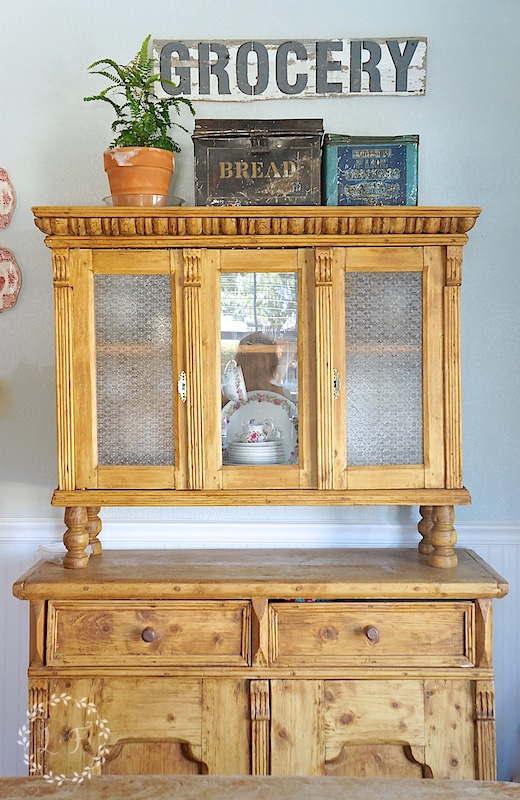
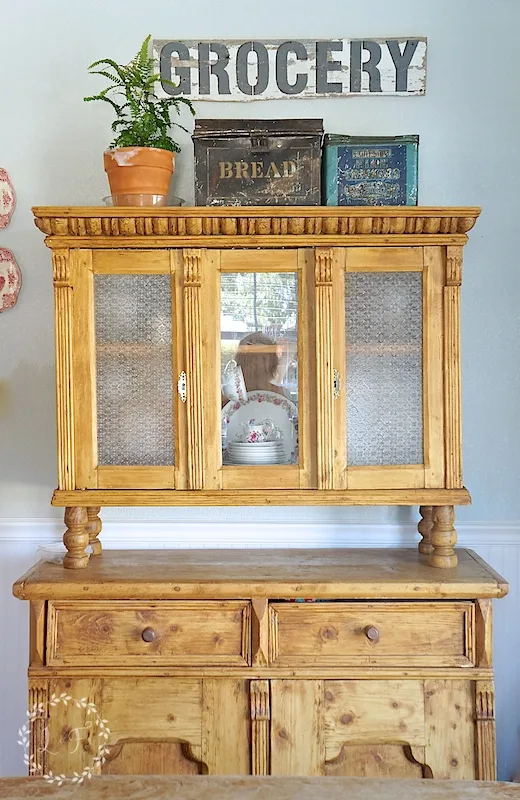
Well, I’ve gotten to work sorting it all and deciding which pieces I want to keep, and what I can sell. Earlier this week I dug through my “keep” stash and found a great piece of old siding with lots of chippy paint.
After a quick stencil, the siding is now a vintage-styled “Grocery” sign for my kitchen.

Last week I preached the virtue’s of hand-painting, so it may seem a little hypocritical of me to talk to you now about stenciling–but let me explain!
I may be able to paint designs of swirls and dots, but I cannot paint letters for the life of me! I was never one of those girls in high school who was able to doodle cute lettering all over her binder 🙂 So when it comes to painting on words, I go with a stencil. That’s what I did in making this salvaged wood sign using Funky Junk Stencils.
Have you seen the Old Sign Stencil line from Funky Junk Interiors?
If you haven’t, you are missing out! As a Fusion Mineral Paint Merchant I am able to retail these stencils in my Antique Company Mall space (sorry, I am not able to sell them online!). I’ve had the “Grocery” stencil in my collection at the mall, and decided it would be the perfect sign to make for my kitchen. I am nearing the end of my year-long kitchen DIY makeover, and am trying to to put together the last few decorative touches to add to the space. What’s better than a chippy-wood Grocery sign?
If you would like to try your hand at making one of these yourself, here are the steps:
Select your paint color and surface

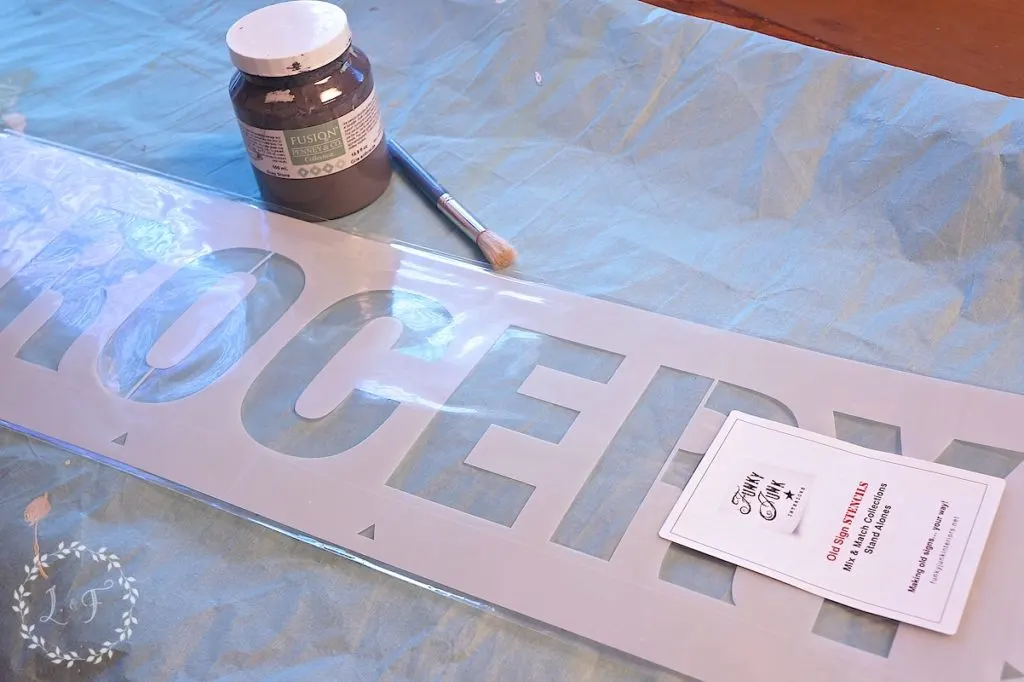
I chose Fusion Mineral Paint in Soapstone so it would coordinate with my kitchen island (it’s painted in the same color). And if you don’t have old wood on hand, try stenciling a chalkboard, or an old window, even a piece of canvas!
Whatever you use, just make sure your stencil fits!

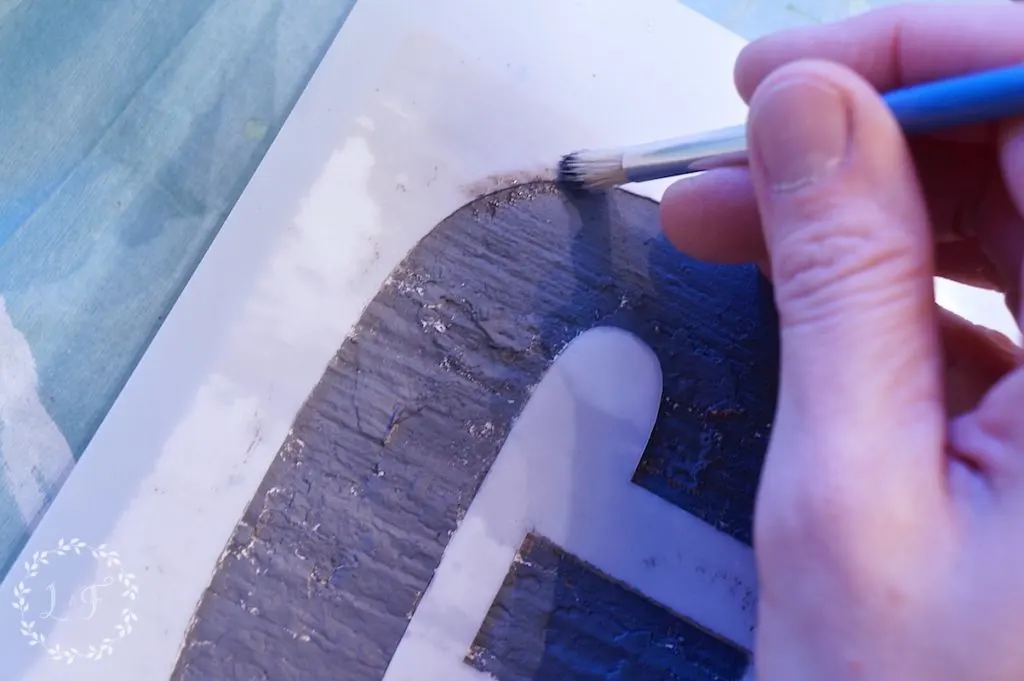
Lightly dab on paint using a stencil brush

They key to a clean, stenciled design is to not have a lot of paint on your brush. You can always go back and add a second coat, so keep your brush light on paint and hold the stencil in place while you work around the open surface.

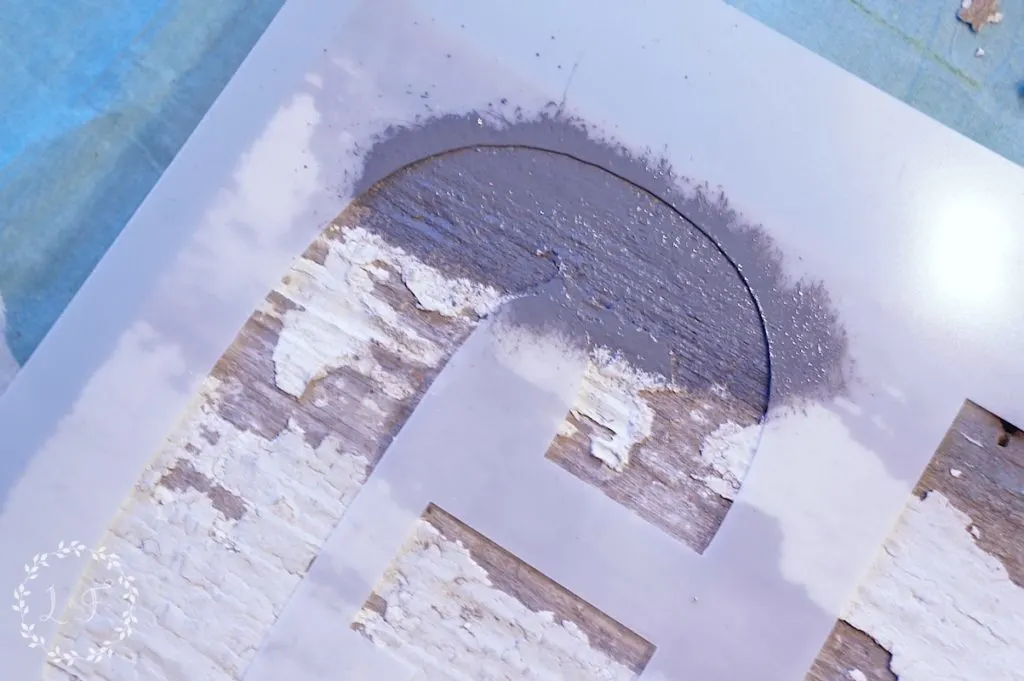
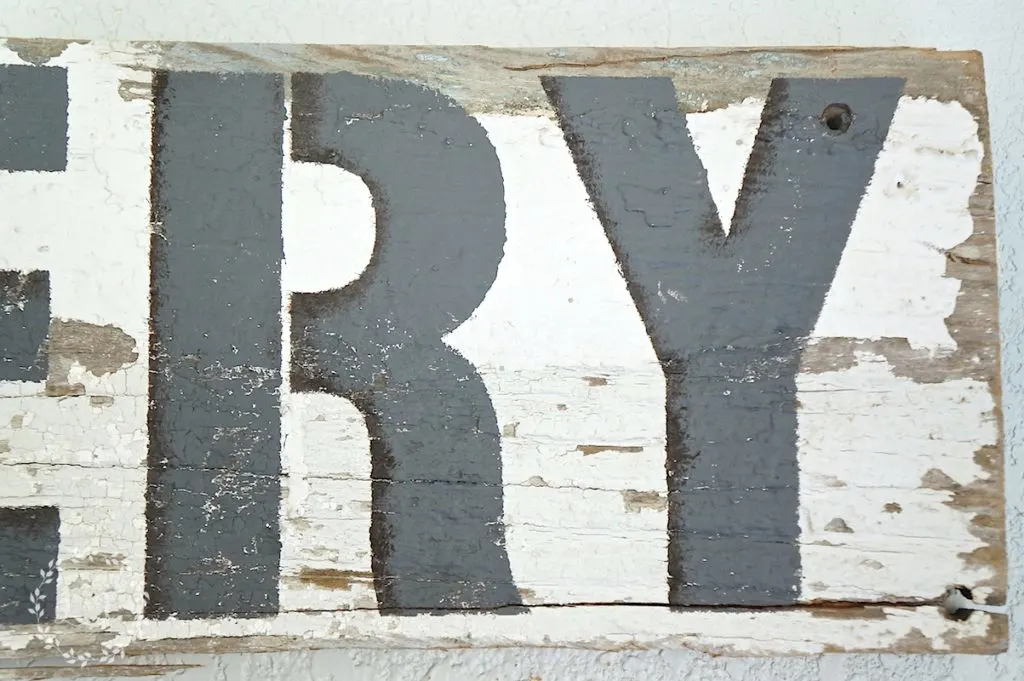
Add depth by stenciling shadows

This is a very simple step but it will add so much more character to your sign!
Pick a coordinating color (I chose Fusion in Chocolate to accent the wood tones in my kitchen), and stencil just around the edges of your lettering, picking one side of the letter to shadow.
It’s helpful to use a very small stencil brush so your shadow line stays thin.
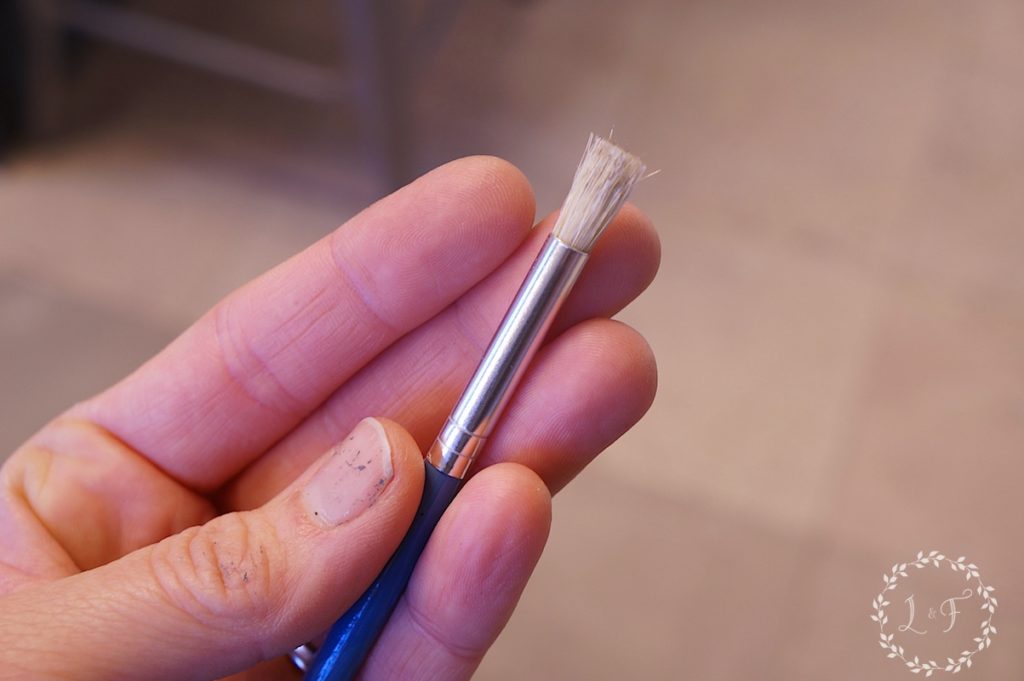
Wash your stencil and brushes, then admire your sign!
Yep, that’s my reflection in the glass 🙂
These stencils are designed to be used over and over again (hmmmm, maybe you can make a bunch for a craft fair??), so they wash off easily with soap and water. They even have their own hanging plastic bag to store them in once your finished.

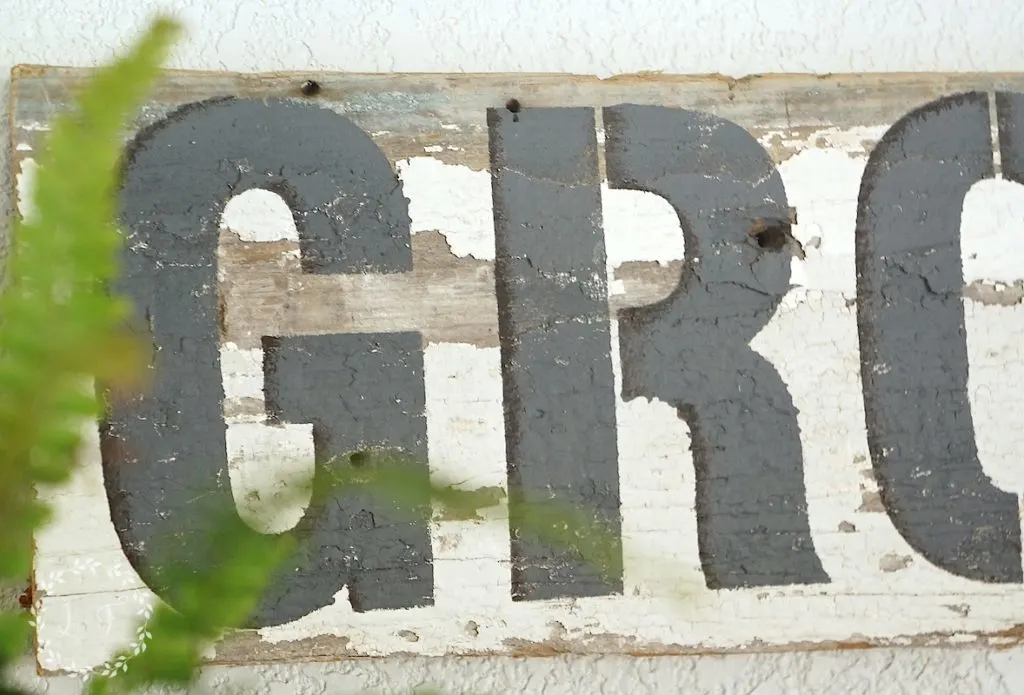
I love my little sign 🙂 And do you see how that little added shadow makes all the difference?

Once my kitchen is completely finished, I may move this to another spot. But it’s definitely a keeper.
If you would like to try making your own shop sign using a Funky Junk stencil, you can order them directly from Funky Junk’s online stencil shop, or if you’re local, I have several available for sale at Antique Company Mall.
Be sure to stop back by this Friday to link up to the Friday’s Furniture Fix Link Party . . . I hope to see you all there!


Linking up to: My Thrifty House
Christmas Stencil Project with Funky Junk Old Sign Stencils | Lost & Found
Wednesday 30th of November 2016
[…] may remember a few months ago that I made a Grocery sign for my kitchen using one of the stencils from this line, using some wood I salvaged from an old […]
Can You Make Money Selling at an Antique Mall | L&F
Sunday 5th of June 2016
[…] old wood sitting out on the curb or in a dumpster, I toss it in my car. Then I can use either a stencil or a Sharpie and make a cute sign! Free wood + a little craftiness = $$ in my […]
Toni
Saturday 2nd of April 2016
So cute, I can't wait to make my first market sign and I will remember your smart tip for adding shadowing!
Denise Bryant
Saturday 2nd of April 2016
Another great post. Thanks for linking and sharing your stenciling tips.
Cynthia Kay
Wednesday 17th of February 2016
Hi Melanie ! I really enjoy your informative blogs ! I love Fusion paint and use it alot for my clients. One client has asked me if she can paint her bathroom vanity with Fusion ? Would it need any extra finish being in a bathroom or it is ok with the durable topcoat it already has built into it ? Thank you very much !
Melanie
Wednesday 17th of February 2016
Thank you Cynthia! Fusion is really a fantastic product. Your client can certainly use it for her bathroom vanity cabinets, and it will provide great durability. I painted my boys' bathroom vanity in Fusion almost 8 months ago now with no topcoat and there's not a mark on it. The only time I recommend adding a topcoat is for the very dark colors (Coal Black, and Chocolate), since adding some sheen to them helps them not show as many fingerprints and dust marks. Outside of that, a topcoat isn't necessary. I have wiped pencil marks, coffee, muddy fingerprints, and toothpaste off Fusion-painted surfaces that have no topcoat (some of which was white paint!) and the finish cleaned beautifully. A few posts that she paint find helpful on the process of using Fusion with cabinets are here and here.