If you’ve been a Lost & Found reader for awhile, you know I have been working on my DIY kitchen renovation for a crazy long time now . . . like coming up on 18 months!
Balancing my antique booth, blogging, custom furniture painting work, home-life, and church ministries keeps the calendar pretty full, which means it just takes me awhile to complete my own house projects.
But better late then never, right?
Earlier this year I updated on where I am in the process of painting my cabinets, and shared a plan for how I wanted to customize my builder-grade island.

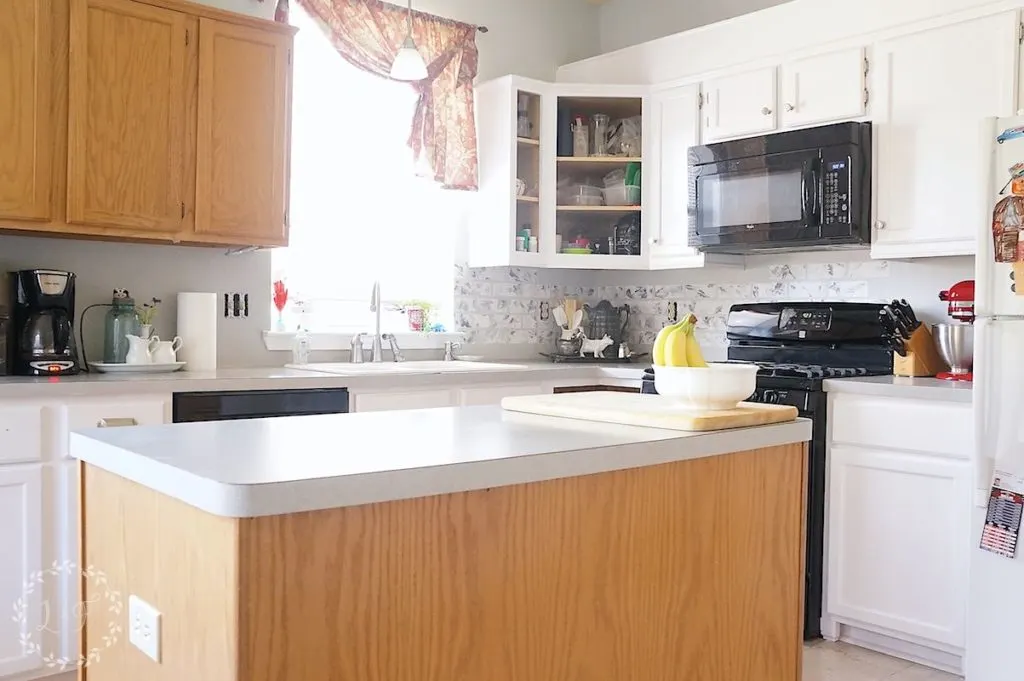
Today I want to walk you through Stage 1 of my DIY kitchen island makeover, which is adding the custom trim work and new countertop.
I promise you this is a job that someone with even the most basic woodworking skills can pull off!
This project is only the 3rd time I have ever worked with adding wood trim (the first being installing board and batten in my guest bathroom and second is my friend’s kitchen island update), and I used NO power tools for any of the 3 projects (with one exception I will tell you about in a minute).
So follow along to see how to customize a kitchen island with trim!
My plan was to mimic the craftsman-style trim look I installed on my base kitchen cabinets.
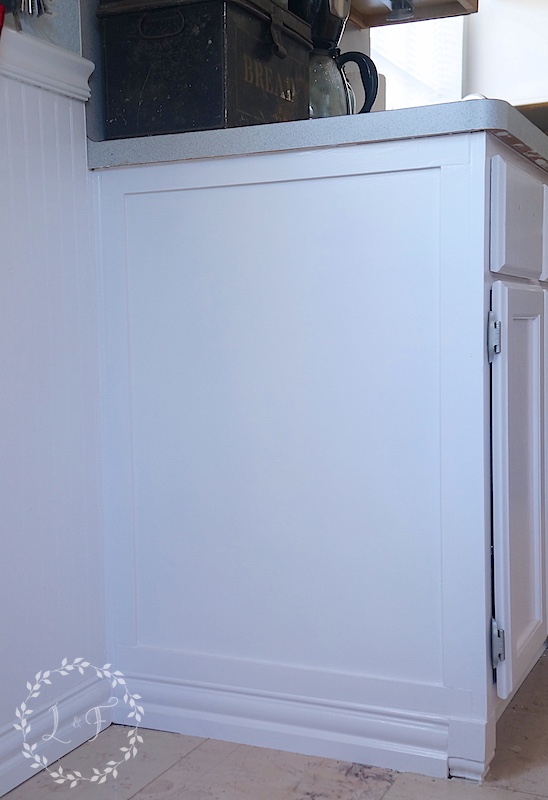

This look works really well for my cabinets, because the cabinet sides have a 1/4 inch inset where a thin piece of trim fits down in nicely.


By adding some 1/4 in. deep poplar strips inside that inset, along with baseboard trim and new butcher block countertop, the island will get a whole new look!
So here are my materials for the project:
- 2.5″ x 1/4″ poplar strips in 3 ft lengths
- 2.5″ x 1/4″ poplar strips in 2 ft lengths
- Approximately 8 feet primed MDF baseboard
- 2 wood corbels
- Acacia Wood Butcher Block Countertop
- Misc supplies: Liquid Nails, sandpaper, joint compound
All supplies were purchased from Home Depot except countertop, which came from Lumber Liquidators
First – Remove the Existing Moulding
The initial step was to remove the existing quarter round moulding that ran around the base of the island and the corner moulding. If you don’t have a trim removal tool, I highly recommend picking one up.


They really help make the job easier and keep damage to a minimum, in case you want to re-use the pieces of trim you are pulling off.
My husband also removed our existing laminate countertop to make way for the new butcher block top.


Do as I say, and not as he does . . . Wear work gloves! There are lots of little nails and slivers of wood that start flying around when you pull trim apart!
Knowing that I was going to ultimately paint the island once all the trim was installed, I went ahead and gave it a good cleaning and light sanding to prep it for paint (to read more about how I prep my cabinets for paint, click here).
I also painted on a coat of Fusion’s Ultra Grip, since the back and sides of my island are just pressboard and not real wood. The Ultra Grip would help the paint adhere to the pressboard, and is very easy to apply–it paints on milky-white, dries clear, and after 12 hours you can paint right over it. Fusion will adhere fine to the new wood trim, so it doesn’t need an application of the Ultra Grip first.
I don’t have step by step photos of the process of installing the actual trim, but follow along with me and I believe you will be able to catch the drift of the project from the after shots.
Next – Install the Baseboard & Frame Each Side of the Island
The next step was to install the baseboard around the 2 sides and the back of the island.
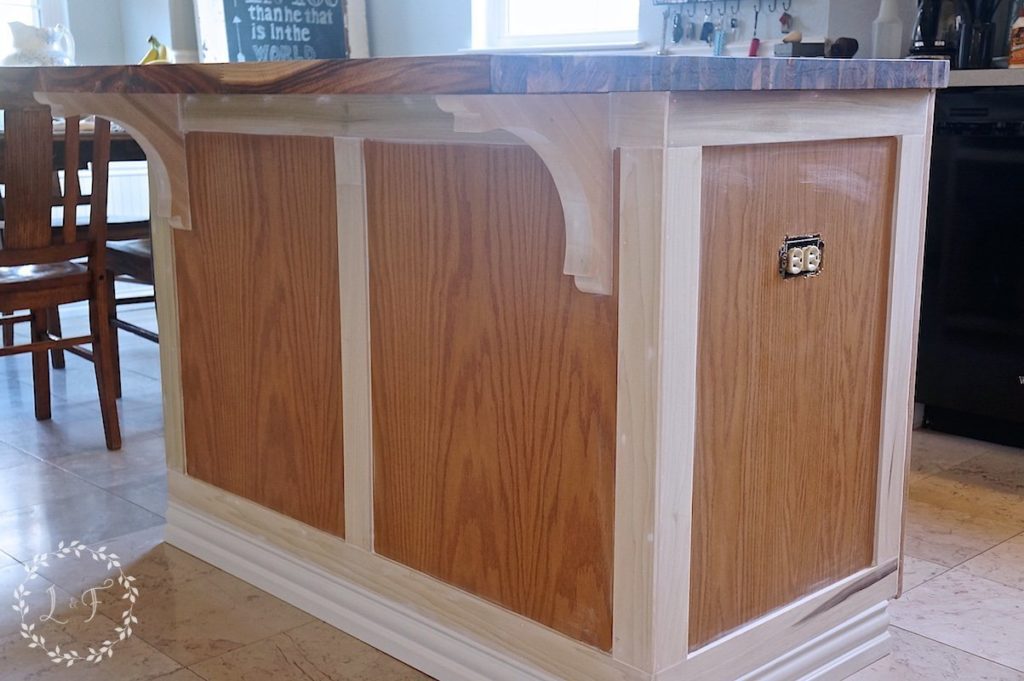
Then I framed each side of the island with the 1/4″ thick poplar strips, essentially making a box.
On the front side, the strips were pushed right up next to the front cabinet facing, and on the back side I pushed them out a little further so they would meet and make a new corner.

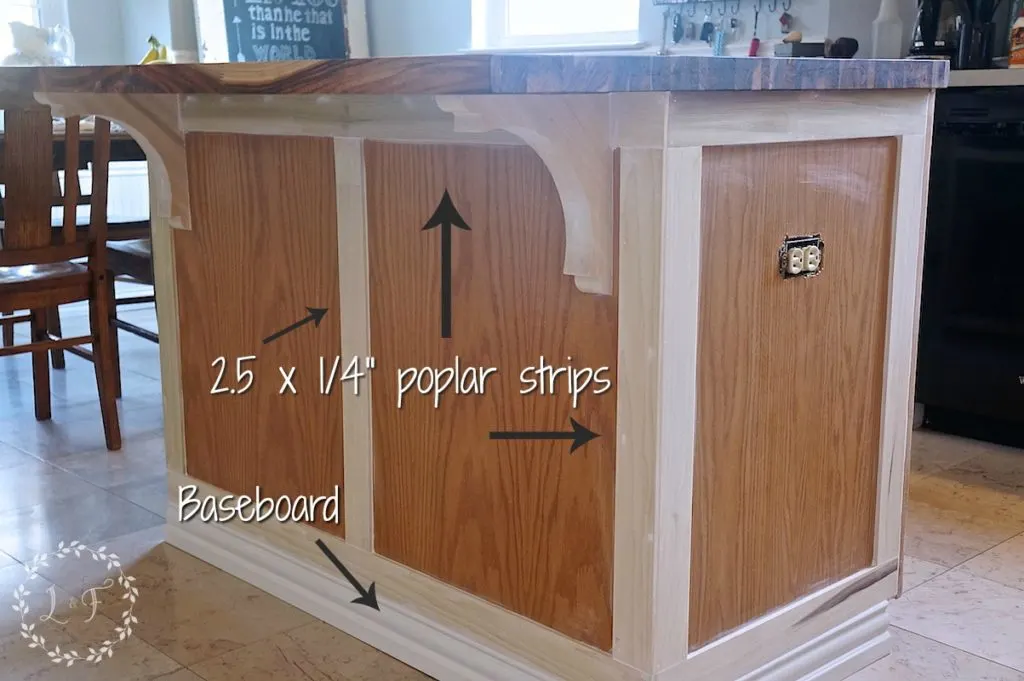
I repeated the box frame on the backside, but added a middle trim piece to break up the length of the backside.
I also cut the poplar on the top to fit around the two wood corbels.
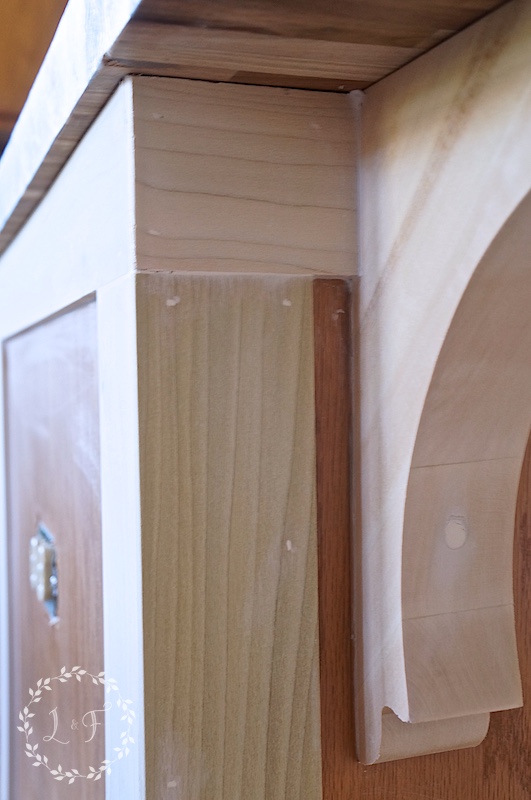
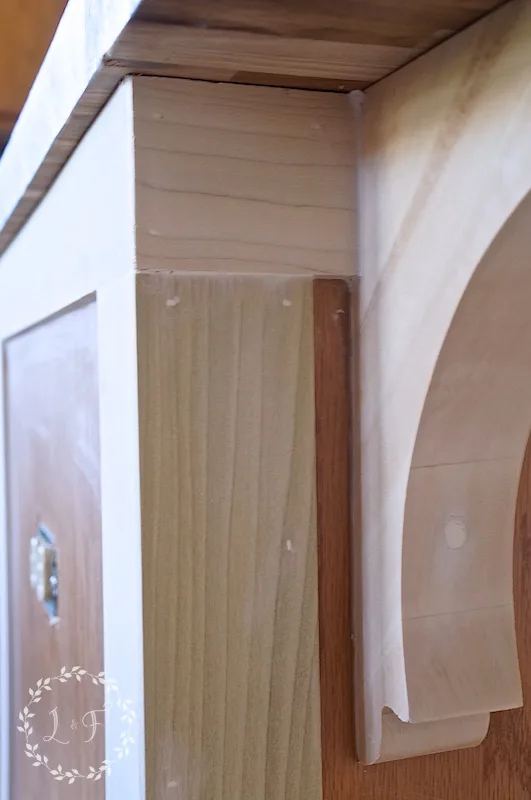
The corbels came with bracket hardware that fit on the backside of them. We installed them with just the bracket hardware first, but then decided they weren’t sturdy enough, so we attached them also at the base by drilling a screw through them right into the island.
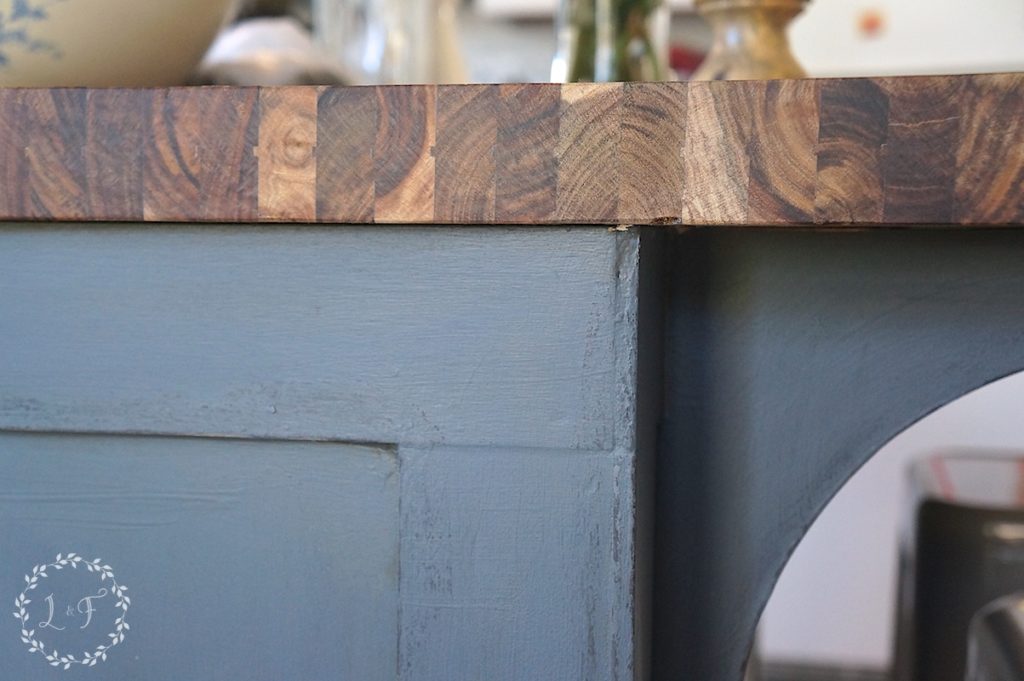
Once all of the trim was on, putting on the butcher block countertop was super easy. We ran a bead of extra-strength wood glue ran along the top of the cabinet and the top of each corbel, then laid the butcher block on top. We set a few bricks on top of it for a couple of hours just to help it really adhere to the cabinet base, then that was that.
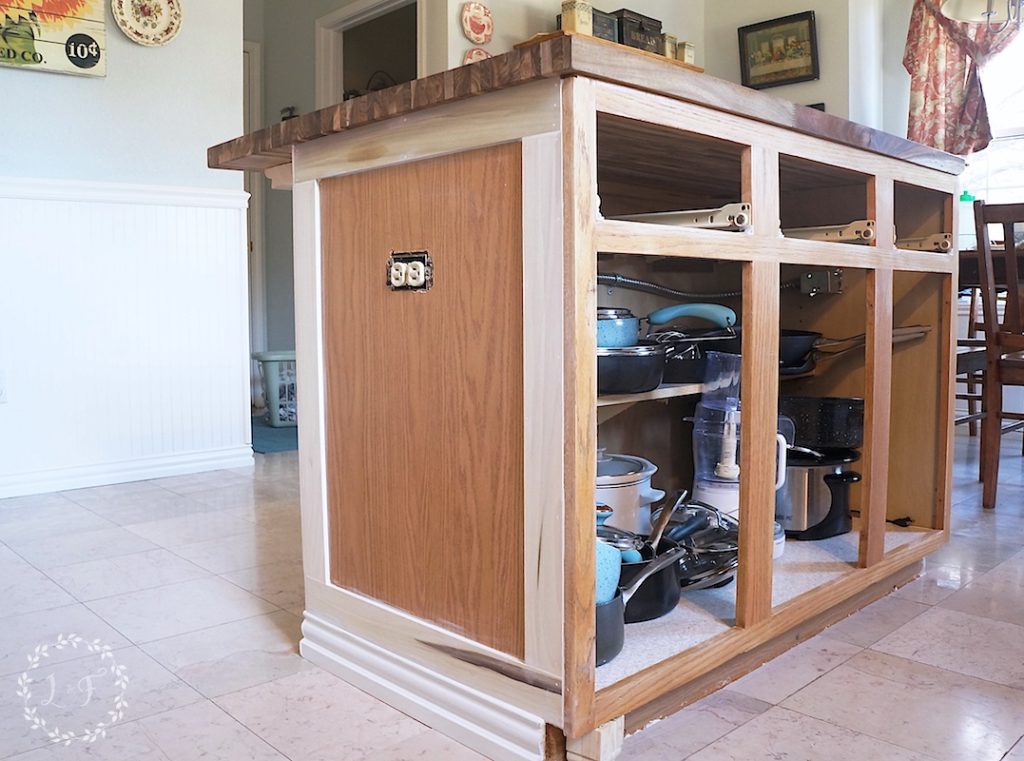

You can see in the front that I haven’t secured my faux cabinet “feet” yet (read about those in this post here), but they will go right in the corner and cover the edge of the baseboard.
The only mitre cuts I had to make were the 2 corners where the baseboard pieces meet, the rest were just plain cuts.
And here is where I did break my “no power tool” streak . . . I did use a brad nailer (aka nail gun) to attach the baseboards and poplar strips. But, if you don’t have a nail gun, you can attach all of the trim pieces by applying some Liquid Nails to the back side and tapping them in with some finishing nails and a hammer.
Last – Do the “Finish Work” to Make it Professional
The key to making trim work look professional is to finish it out properly, which means:
- Filling every nail hole
- Filling every seam
- Caulking every joint
- Sanding smooth

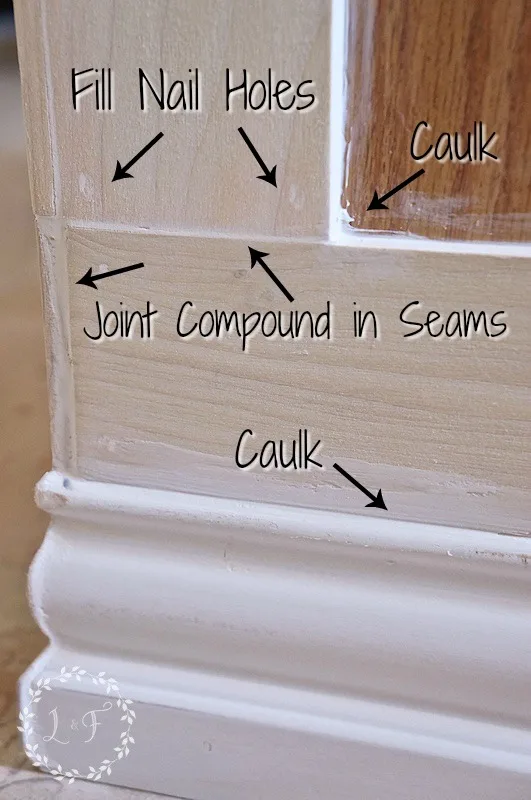
Every space where the trim meets together or where a trim piece meets the underneath wood needs to be filled. You can use wood filler on the nail holes and spaces, but personally I prefer joint compound because I feel like it sands down smoother.
Once the compound is dry, sand, sand, and sand some more with a fine grit sandpaper to get the joint as smooth as possible. And caulk is your best friend when it comes to filling in all of the gaps where the new trim butts up against the existing wood.
Once all of your joints, holes, and seams are filled and sanded, your paint will go on smooth and all of those connections will look seamless!

Here is a cost breakdown of my island project so far:
- Poplar Strips $20
- 2 Wood Corbels $22
- 8 feet of baseboard $9
- Acacia Wood Butcher Block $250 (on sale)
You can see the new countertop is the major cost in this makeover, so if you want to add a custom look to your island but keep your existing countertop, this can be a really inexpensive project!
Here is a sneak peek of the island finished out with new paint:

But you’ll have to come back next week to see how I got this look and photos of the full reveal! * Update, you can now see the full reveal and how I got this paint look here! *
This post contains one or more affiliate links to websites outside of LostandFoundDecor.com. Links are provided for your convenience and comply with all affiliate and advertising program standards.


DIY Kitchen Island Trim Ideas - homesweetsierrah.com
Friday 6th of September 2024
[…] Join Melanie from Lost & Found Decor, as she upgrades her basic builder grade island into a fabulous custom kitchen island with trim. […]
Chic Kitchen Island Trim Ideas for Your Home
Wednesday 13th of March 2024
[…] https://www.lostandfounddecor.com/how-to-customize-a-kitchen-island-with-trim/ […]
12 Creative Trim Ideas To Take Your Kitchen Island To The Next Level!
Monday 24th of April 2023
[…] Customize a Kitchen Island with Trim from Lost and […]
Michelle
Wednesday 8th of February 2023
I love the silver nickel pulls on your drawers! Where did you get them?
Melanie Alexander
Friday 10th of February 2023
Thank you! They were from Pottery Barn.
How to Makeover Kitchen Island with Shiplap and Trim
Saturday 17th of December 2022
[…] if you’re a little more ambitious you may want to try refresh your kitchen island with trim moulding or even […]