It’s been almost two full weeks since I set-up at the Vintage Market Days show, but I am still not fully recovered. I have been struggling to get motivated to do anything business-related (hence the lack of blog posts)!
I’ve been filling my time instead with home projects–working in the yard, reorganizing kids’ stuff, and trying desperately to make some progress on the DIY renovation of my upstairs boys’ bathroom.
Remember two months ago I shared with you about the most vicious wallpaper ever? This stuff just doesn’t want to come off the walls!


After working on it and working on it I finally got the entire vanity area stripped of wallpaper and the walls sanded smooth. Yay!
Board and Batten
So it was time to start installing the board and batten to dress up the space.

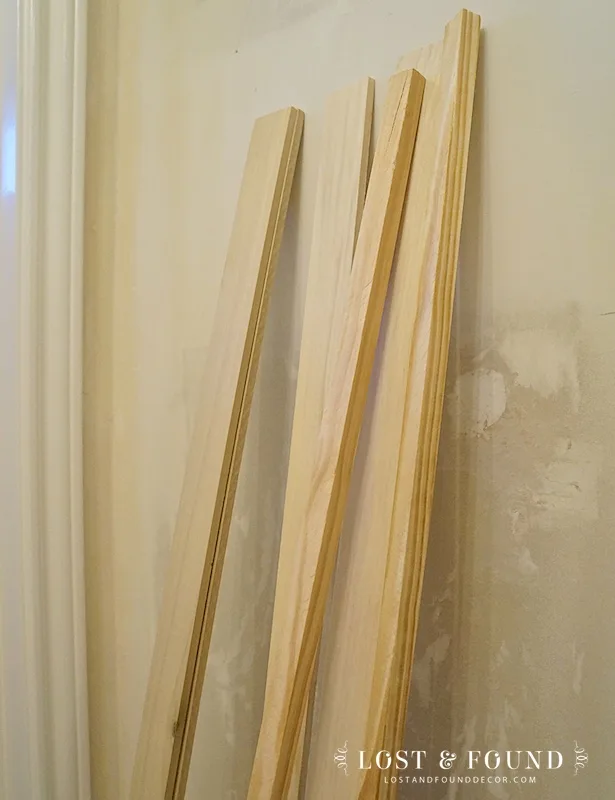
I purchased the wood from Home Depot. For the board and batten itself I bought pre-cut strips of poplar, 1/4″ thick and 2″ wide by 4′ long.
To trim off the top, I bought 1″ by 1.5″ pine trim and cut it into 4′ pieces at the store so I could get it home more easily.
Since the poplar boards are so thin, they line up well on top of our very thin, builder-grade baseboards, which saves me from having to take off the baseboards for this project.
Attaching the boards just on top of the baseboard is not the super-professional way to go, but the look is smooth enough for my taste.
Attaching the Boards
I attached the boards to the wall using Liquid Nails on the back and also tacked them with small finishing nails.
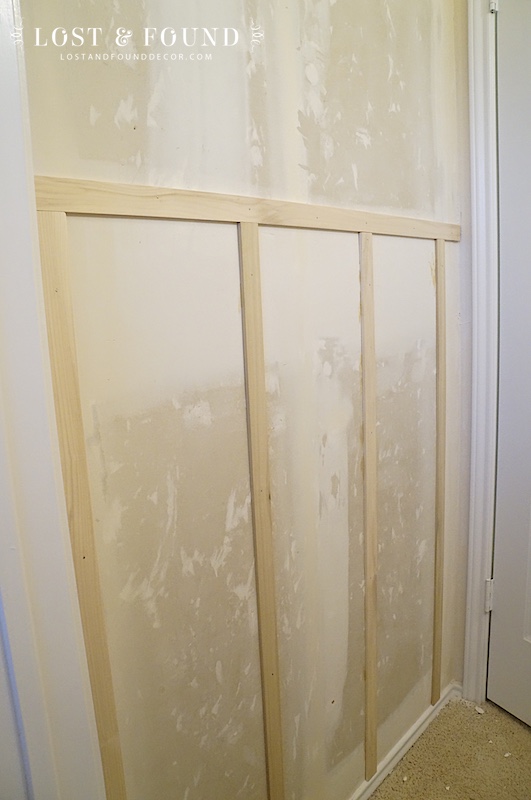

The vertical boards are spaced 12″ apart and topped with the same poplar 2″ wide piece.
Filling the Seams
Now if there is one thing that you absolutely must do when attempting DIY woodworking, it is to fill in your seams!
Paint seeps into cracks but won’t fill them, and so filling in all of the seams of your woodwork with caulk, wood filler, or joint compound is a must if you want your woodworking to look professional at all.
I know it’s an extra step and it’s not part of the real fun . . . but it really is necessary.
I used joint compound to fill in where the wood pieces meet as well as over the nail holes.

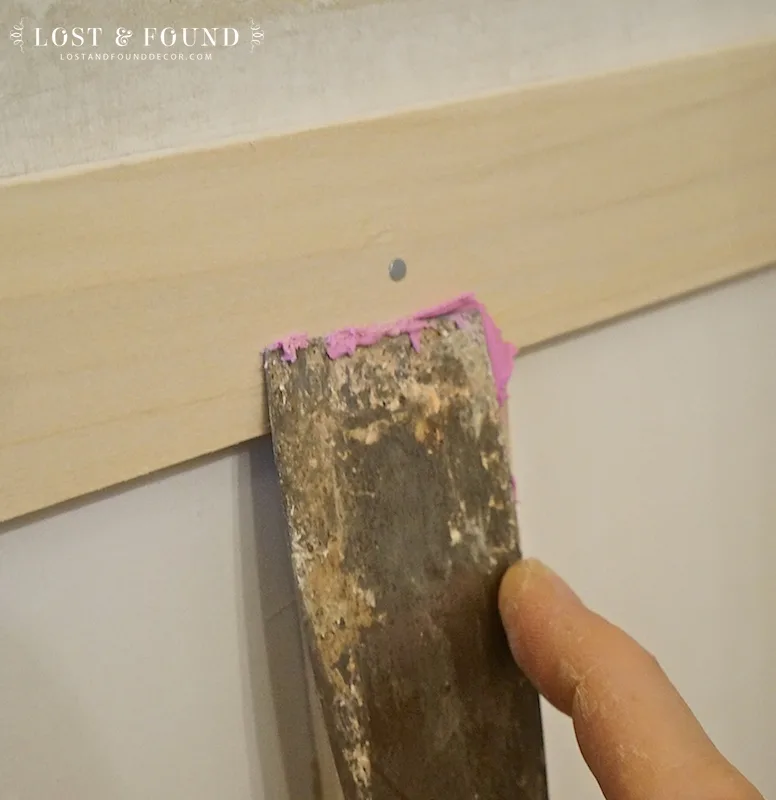
Apply the compound liberally with a putty knife, then spread smooth and remove the excess.
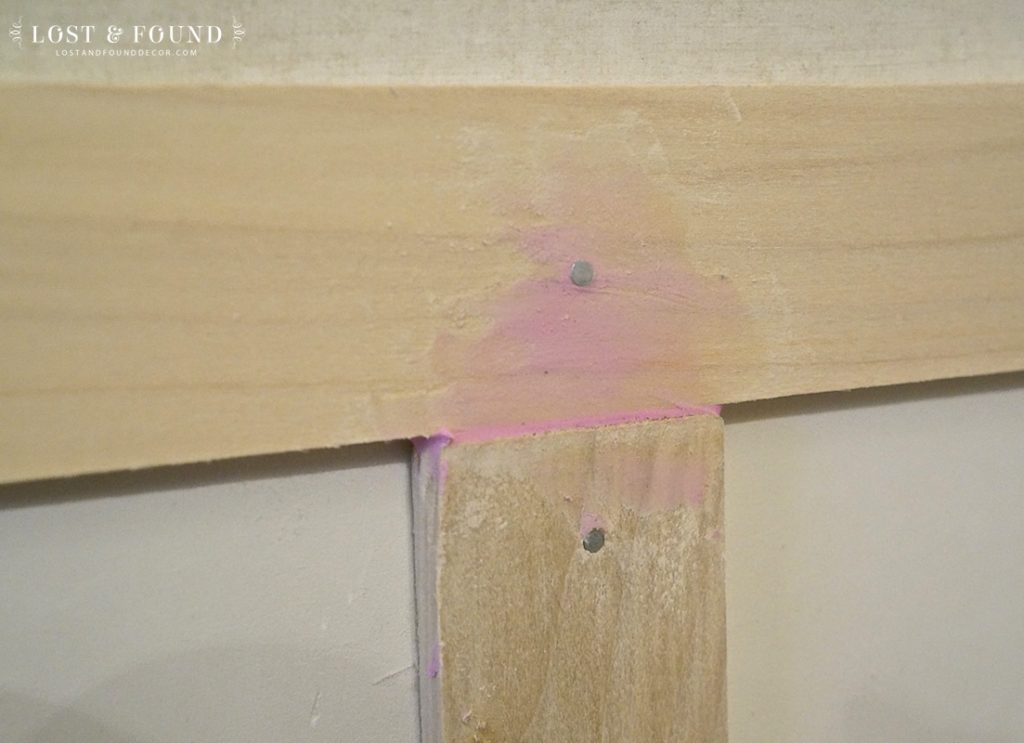

Now the paint won’t seep into that little crack and the finish will be seamless.
For larger areas, like along the vertical edges of each board and underneath the top board, I sealed the seams with clear-drying caulk. Caulk, wood filler, and joint compound can really make a so-so job look like a great job!
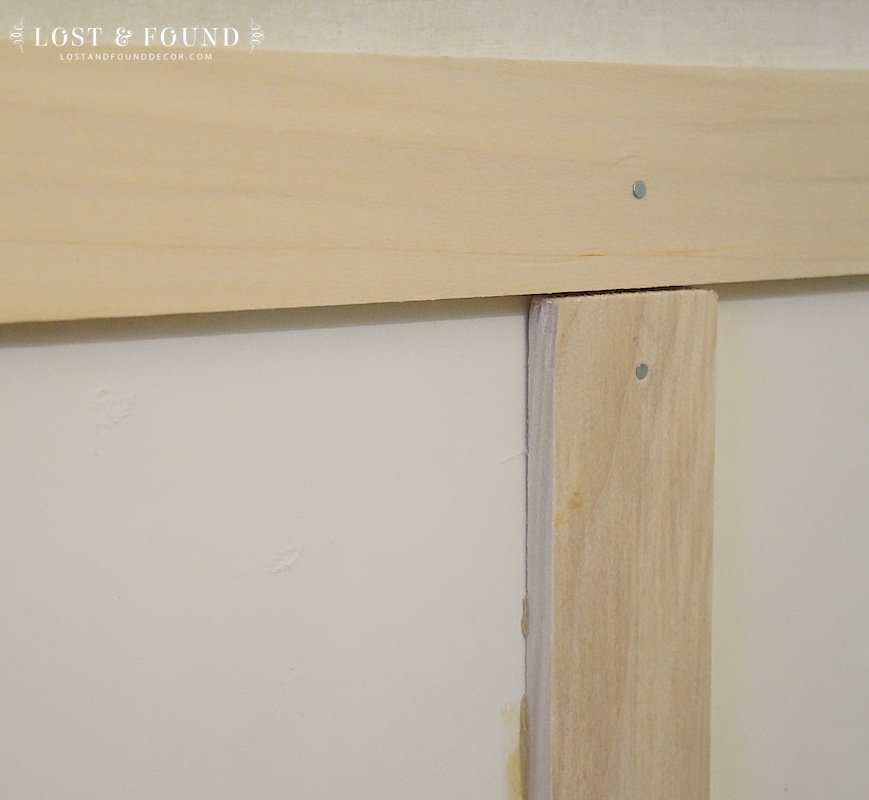
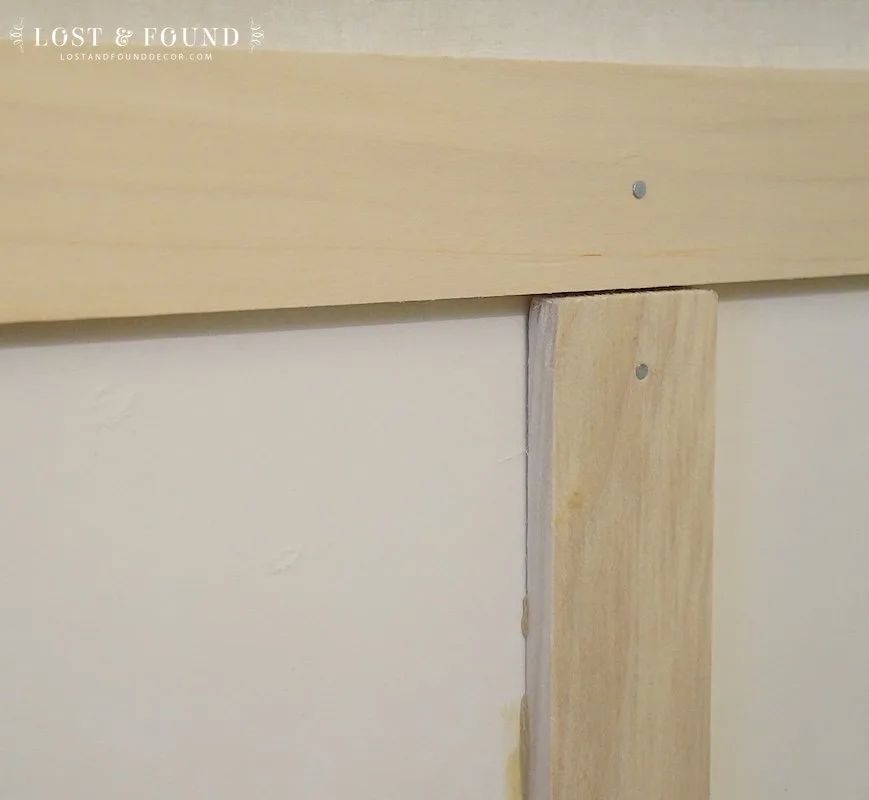
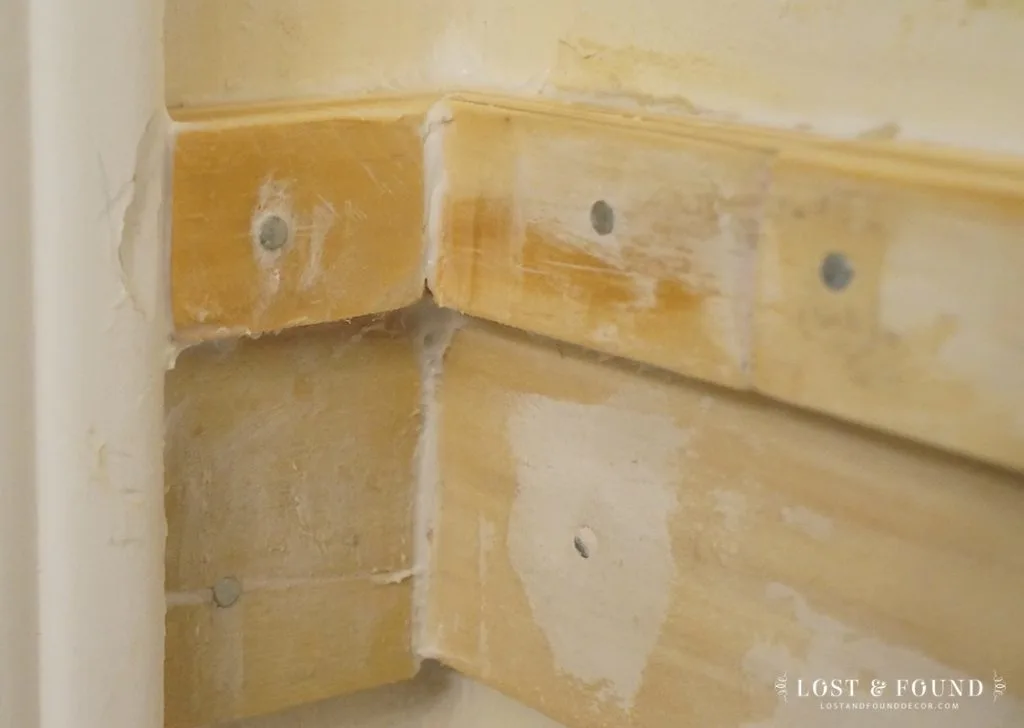
In this photo you can see my fancy mitred corners! No mitre saw used here though, just a regular skill saw that could adjust to a 45 degree angle.

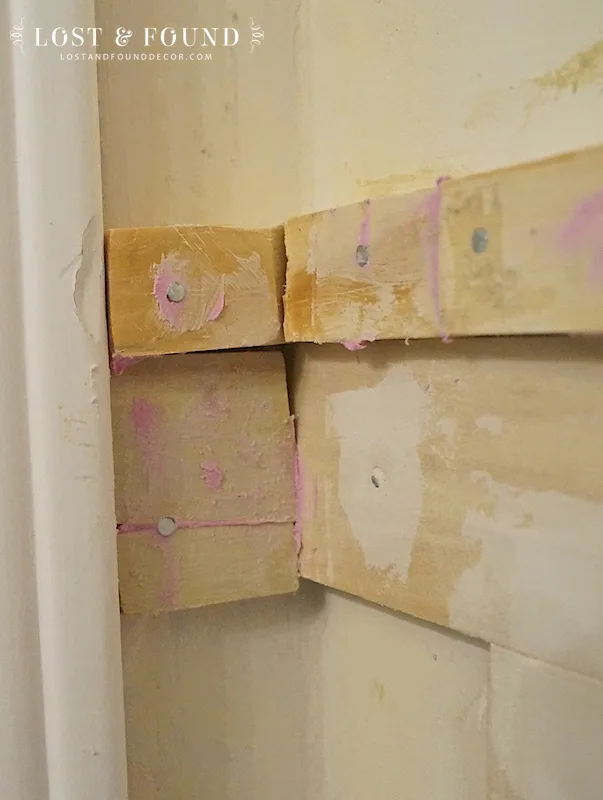
It’s only mildly-terrible! But again, some caulk in the seams covers over the worst of my errors. You can also see the top pine board in this photo and how it functions as the trim out for the board and batten.

Priming for Paint
The last step in this process is to prime the wood trim, and I think I will go ahead and prime the walls also since they are basically bare sheetrock.
I have made more progress with the vanity base and top that I can’t wait to show you! So check back soon to see more photos 🙂
Update–My DIY bathroom renovation is complete! See the finished bathroom here.


How to Customize a Kitchen Island with Trim | Lost & Found
Monday 4th of April 2016
[…] project is only the 3rd time I have ever worked with adding wood trim (the first being installing board and batten in my guest bathroom and second is my friend’s kitchen island update), and I used NO power […]
Kelly McCants
Friday 22nd of May 2015
It's going to look great, Melanie! Paul is doing the same thing to our bathroom this weekend! Well, maybe....nothing that we originally planned is panning out, so we'll see what the final product actually ends up being for us. But yay for freshly done bathroom walls, whatever the final product!
chris aka monkey
Friday 22nd of May 2015
i know what it means to be dog tired and i think that's what you have, you just take your time and work on your home and we will still all be here xx
Queen Patina, aka Rachel
Thursday 21st of May 2015
I completely understand your lack of motivation--just finished a major junk show, and while fun, successful, and necessary, so exhausting! You'll find your rhythm again, I'm sure. In the meanwhile, enjoy doing something different! : )