It’s been a little over five years since chalk paint first became popular, which is a lifetime in the world of home decor.
Five years is enough time for color trends to change 3 or 4 times, for “Farmhouse style” to transition to “Boho”, and for navy to become the new gray.
It’s also plenty of time for new types of paint to come on to the market–paints like Fusion Mineral Paint that promise the same ease of use but work a bit differently than chalk paint.
So a lot of folks are starting to look at those chalk-painted pieces from five years ago and asking what it would take to paint them again. Maybe their tastes have changed and they’re ready for a new color scheme, or maybe that chalk painted desk isn’t proving to be as durable as they want it to be and a new paint job promises better results.
It makes sense then why one of the most frequent questions I get these days is “Can I paint over chalk paint?”
Well . . . I’ve got good news for you! The answer is YES, you can!
Whether you want to just change the color with a new coat of chalk paint or try out a different type of paint, it’s important to ask a few questions before you start so you can take the right prep steps.
Steps to Paint Over Chalk Paint For a Lasting Finish
1. Was a wax applied as a topcoat?
The typical topcoat recommended for chalk-painted pieces is paste furniture wax (wondering what that is? You can read more about that here). Before you start painting over chalk paint, it’s super important to figure out if a wax was applied or if the chalk paint is bare.
It’s pretty easy to figure out–just scrape the piece of furniture with our fingernail. If wax builds up under your nail or you can see the scratch mark in the finish, there is wax on the piece.
So here’s a bit of bad news . . .
Before painting over the chalk paint, the wax MUST be removed.
Wax acts as a resist, and just about any paint you put over wax (with one exception–which I’ll tell you about later) will not adhere well. The new paint may stick initially, but long term it will have poor adhesion and may come off with the slightest scratch.
How to Remove Furniture Wax
Taking off furniture wax is not a difficult process, but is a little time-consuming and a bit messy.
The best way to remove the wax is to scrub the piece of furniture with a slightly abrasive sponge and mineral spirits. The mineral spirits will break down the wax and as you scrub the wax will start to pull away from the paint.
After you scrub the whole piece, wipe off any residue with a wet rag. Then you will need to give the entire surface a good cleaning with a degreaser, like TSP, to clean off the residue left behind by the mineral spirits.
My favorite TSP is the Fusion TSP Alternative. It’s biodegradeable, not harsh on your skin, but still does the job well of cleaning off greasy residue.

2. Is the finish free of grease or dirt?
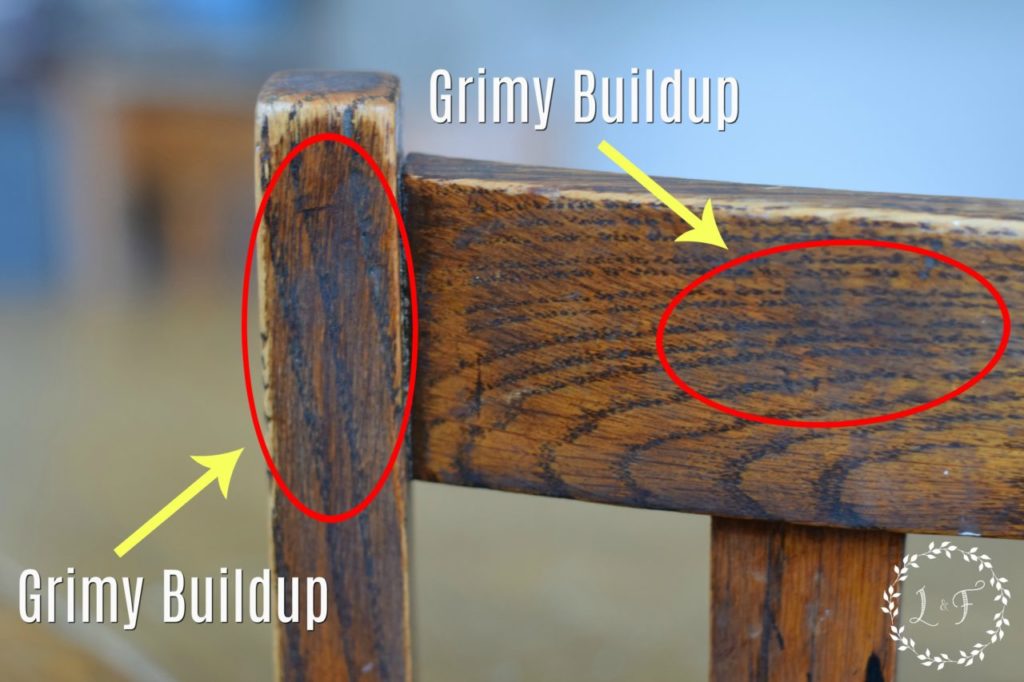
If you’ve done the wax scratch test and you didn’t find evidence of any wax, there still may be something else on your furniture that may cause you problems.
Over time, grease and grime tend to build up on furniture and if not properly cleaned before painting, the new paint will have problems sticking.
So let’s go back to the end of Step #1 . . . I always clean my pieces with the Fusion TSP Alternative before I paint. Even if I have not had to remove any wax, I still clean first before putting on any new paint.
You want to spray down your piece and with a mildly abrasive sponge, scrub the entire surface. Pay careful attention to any areas that feel like there is a residue or where the finish looks dark or discolored–those are likely areas of built-up grease and grime. Also, kitchen furniture is notorious for being greasy! Be sure to clean kitchen tables, chairs, stools, etc. extra well!

After you scrub the piece with your cleaner, wipe off any residue with a water-dampened rag.
3. Is the finish glossy?
Even though wax is the recommended topcoat for chalk paint, sometimes painters use polyacrylic products or other glossy topcoats instead.
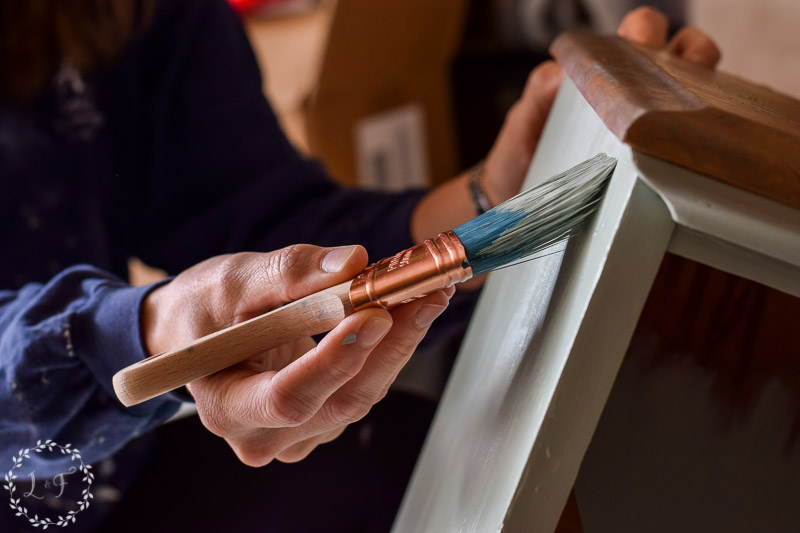
If you can see a shine or gloss on your piece, it will be helpful to give it a quick scuff with a mid-grit sandpaper (180-ish grit) to open up the pores of the finish. If you’re using another DIY furniture paint to paint over the chalk paint, it really can be a quick sanding– 5 minutes, quick scuffs in the direction of the grain should do the trick.
Now you’re ready to paint!

After you work through these 3 questions, your piece is ready for a new coat of paint!
But there is one short cut . . .
Remember when I said above that there was one exception to the rule about having to remove wax before you paint?
If you used a hard, paste wax (which is often the kind sold with chalk paint brands), you may have success painting over the wax, but only if you use more chalk paint!
![]()
![]()
Not all waxes are composed of exactly the same thing . . . Most waxes sold along with chalk paint brands are more of a paste-type wax, which means they have a lower oil content. That is why they tend to be a bit thicker and take a bit more elbow grease to apply.
There are also cream-waxes, which have the consistency of room-temperature butter (the MMS and Fusion waxes are cream waxes).
They are easier to apply, because they have a higher oil content than paste waxes do. But that additional oil means that virtually no paint–including more chalk paint–will adhere on top.
If you are unsure of exactly what type of wax was used, it’s probably better to be safe than sorry, and remove your wax first.
There you have it!
If you have a chalk painted piece you’re ready to repaint, I hope you found this helpful.
As always, you can find the full range of products from our 3 paint lines–Fusion, Jolie, and Miss Mustard Seed— in my online shop.
Happy Painting!

Painting over chalk paint - 5 step
Sunday 9th of April 2023
[…] Painting paint over chalk can result in an uneven finish and poor adhesion of the new paint. This is because chalkboard paint is a porous material that may absorb moisture from the news paint, causing it to crack or peel. It’s important to properly prepare the surface and use a primer before applying news paint to ensure a smooth and long-lasting finish. Read also… […]
Becky
Monday 2nd of January 2023
Hi Melanie, I painted my bathroom vanity with chalk paint four years ago. It has chipped off over the years and I would paint in the chipped area and wax over it. I want to repaint it with another color and paint that will not chip off. What would be the best type of paint? Can I paint over the chalk paint with a different type of paint?
Awesome Developer
Monday 9th of January 2023
Hi Becky! The only way I know of to get good, lasting results is to use Mineral Spirits or another Odorless Solvent to remove all of the wax you have applied--that's your first step. No paint is going to adhere well over wax :) Also, if your chalk paint is chipping off, then that means that probably there was something on the surface of your vanity (maybe Pledge, or hand oils, some other dirt, etc) that was not cleaned off well enough and has resisted the chalk paint. So really, if the chalk paint isn't adhering well, anything that goes on top of it won't make much of a difference because that chalk paint will still chip and take the new layers of paint with it. Sorry to be the bearer of bad news! If it was me, I would remove the wax, then take a power sander and sand off as much of the chalk paint as I could. Then clean the entire surface well with a degreaser, scuff sand, then paint again.
Cornelia
Wednesday 7th of March 2018
Great information. I have an old antique bench with a cane back and I want too paint it but I’m concerned about how well the paint will effect the cane. Will it make it too stiff and crack? What’s the best way too Paint and seal it? Any advice would be great!! I love your blog ?
Mary
Tuesday 27th of February 2018
Hi Melaine, Annie Sloan says that her paint and wax can be painted over with her line of chalk paint as long as the wax has cured. Did you find this isn't the case?
Melanie
Tuesday 27th of February 2018
Hi Mary! I can't speak exactly to the product capabilities of AS, but in my experience, yes, it is best to remove wax. It may adhere for a time but long-term durability can be a bit tricky. Of course, if you're painting something for yourself and in your own home, you can experiment and try out anything you like--sometimes I do! But if I paint a piece to sell I always go the extra step to make sure the wax is removed so it will have the highest level of durability.