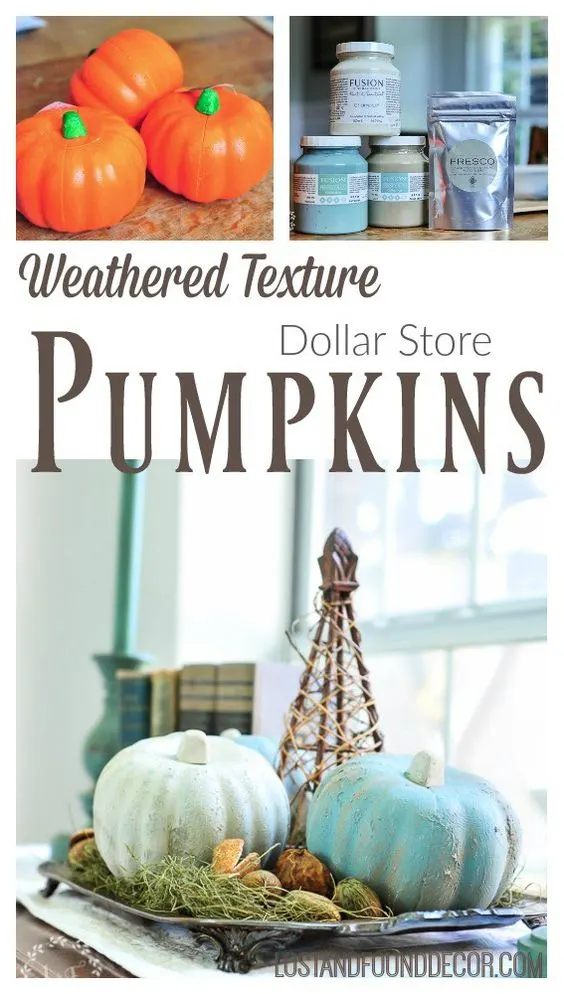
Today I have a super easy fall craft to share with you, using Dollar Tree Foam Pumpkins.
I have so much fun each year decorating my home for the fall season, but let’s be honest–seasonal decor can be expensive!
And I just can’t get too excited about spending a lot of money on items I may only have out for a few weeks each year.
So the best part about this easy tutorial is that it doesn’t cost much to create these rustic look pumpkins.
This is one of those easy craft projects you’re gonna wanna save!
DIY Pumpkin Decor
This post contains links to websites outside of LostandFoundDecor.com. These links exist for your shopping convenience. It does not cost you any more to shop through these links, but I will receive a small commission off your purchase.
Supplies Needed for DIY Dollar Tree Pumpkin
- styrofoam pumpkin from the Dollar Store
- acrylic paint in a variety of colors (I use Fusion Mineral Paint)
- texturizing powder
- paint brush
A while back I wandered into the craft section at my local Dollar Tree and saw these bright (almost fluorescent!) orange faux pumpkins.
Their size was just right–perfect for layering on a mantel or for so many other fall decor ideas! But their color was a little ick.
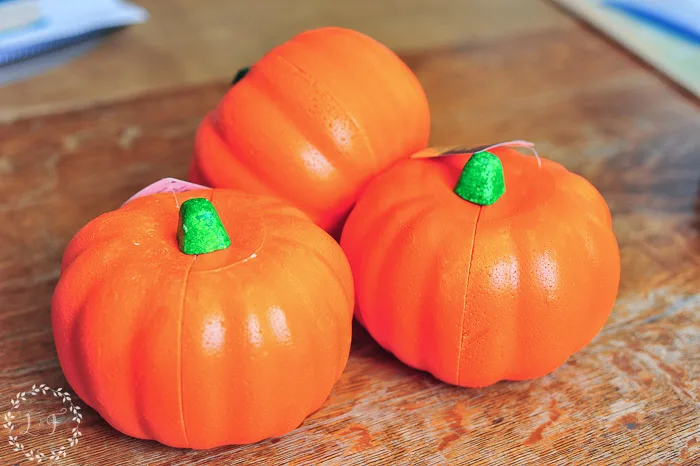
I knew a little paint would be an easy way to give them a new look that’s more in line with the rest of my home decor.
And for $1 a piece, these were perfect for a new painting technique I wanted to try.
How To Make Dollar Tree Pumpkins Look like Real Pumpkins
I wanted these small pumpkins to look more like a real pumpkin, which meant I would need to try and camouflage their styrofoam texture.
By mixing a texturing powder into my paint, I could hide the styrofoam and create a rustic look by layering a few different colors.
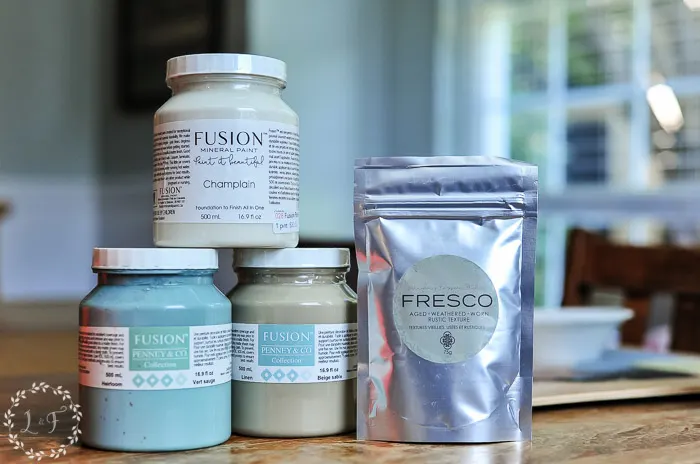
I used Fresco from Fusion Mineral Paint for the texturing powder. It’s a mix-in powder that changes the texture of the paint and can be used to create a variety of distressed and weathered paint finishes.
If you aren’t able to get your hands on Fresco, you could try substituting baking soda. It will give you a similar look.
The key to working with Fresco and getting a rustic look is to layer different colors of paint.
So I raided my craft supplies and picked out a creamy white, a dark beige, and a light blue paint.
These are all paint colors from Fusion Mineral Paint, which you can shop for here.
DOLLAR TREE DIY PUMPKIN FULL TUTORIAL
So, do you think we can make these neon orange, styrofoam pumpkins look great?
Let’s walk through the steps:
Step 1
The first step is to pick a color to be the base color for your pumpkin (I chose white paint for 2 pumpkins, and light blue for another).
Then mix the Fresco into your base color, at roughly 2 parts paint to 1 part Fresco.
If you want the texture lighter, then mix a little less, and vice versa.
Measure . . .
Pour . . .
Mix . . .
You can see the Fresco stays a little lumpy in the mix, and that’s ok. You can work to smooth out as many of those lumps as you like for a smoother texture, or you can leave it clumpy.
Step 2
Paint the entire pumpkin in your textured base color, and allow it to dry thoroughly.
Can you see the Fresco clumps on the pumpkin?
As those dry, they get really hard, so you don’t have to worry about them flaking off over time.
If you want a softer finish though, now is the time to go back over those lumps with your brush or a trowel to knock them back and smooth them out. I chose to let them be because I wanted that rustic look.
What about the bottom of the pumpkin? Well, you can wait to paint it until the top is dry, so you can flip it over for drying.
Or you attach a few screws to a piece of scrap wood and sit the pumpkin on top of the screw heads. That’s what I did to help the pumpkin base dry without sticking.
Step 3
After the first coat dries to the touch, then paint on the second color right over the texture.
You don’t need to mix any Fresco or baking soda into this second color. This top color you want to be smooth.
Step 4
After the top color dries, take some fine grit sandpaper (I used a 220), and lightly rub the pumpkin’s surface.
This will sand back the top coat, revealing the base color and textured bumps.
Step 5
Apply a tad bit of your beige color on the ridges of the pumpkin using a dry-brush technique.
This is optional! It just helps add a bit more color depth.
Finished Beautiful Pumpkins!
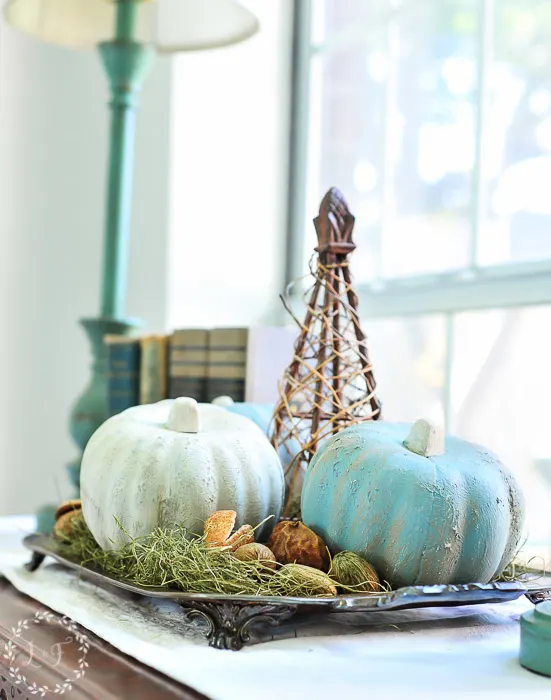
What do you think? Did we succeed in making the neon orange pumpkins look great?
I think they turned out amazing 🙂 The addition of the Fresco to the base coat is what makes all the difference in this project.
One small tester size of each color and a small bag of Fresco is all you would need for this project.
I think it would be fun to gather some friends and paint some $1 pumpkins together!
There are so many creative ways you can add to this craft project even more!
- Cut out the center of the pumpkin and fill with faux florals for a pumpkin vase centerpiece
- Accent the stems by tying on cinnamon sticks or other natural elements with jute twine
- Replace the pumpkin stems all together by cutting off and then gluing on wooden sticks
- Use mod podge and cover with a pretty paper napkin
- Turn 3 pumpkins into a Pumpkin Topiary
Fall Inspiration with Dollar Tree Crafts
This time of year is perfect for slowing down and enjoying an afternoon craft. Taking something basic and customizing it to fit my own tastes and styles is one of my favorite ways to decorate on a budget.
With so many dollar store pumpkin crafts out there, you’ve got enough ideas to fill up the whole season!
So the next time you stop by your local store, be sure to grab a whole stack of orange foam pumpkins, so you can get crafting.
Happy Fall!
Other Fall Inspired Projects you May Enjoy
Metallic Painted Magnolia Leaf Wreath
Fall Mantel Styled With Vintage Finds
5 Perfect Fall Paint Colors for Furniture


24 Best Painted Pumpkins that will be in Style in 2024
Thursday 14th of March 2024
[…] Source: lostandfounddecor.com […]
Home Imagined Link Party #26 - The Antiqued Journey
Friday 17th of November 2023
[…] Painted Metallic Magnolia Wreath Dollar Tree Foam Pumpkin DIY […]
Home Imagined Link Party #26 - Master"Pieces" of my Life
Tuesday 5th of September 2023
[…] painting dollar store pumpkins – how to get a weathered textured finish with fusion fresco painted magnolia leaf wreath with fusion metallics […]
Anna
Monday 4th of September 2023
I love the tip of putting screw heads in a board to allow the pumpkins to dry. The baking soda texture looks great! Also three cheers for DIYs that involve products from the Dollar Store.
Melanie Alexander
Monday 4th of September 2023
Thanks Anna!
Rachel-The Antiqued Journey
Friday 1st of September 2023
Amazing!! They look so pretty with all that painted texture!!
Melanie Alexander
Saturday 2nd of September 2023
Thanks Rachel! I was really happy with how they turned out