Hey friends!
Mid-Century Modern is a fantastic style, but it’s also difficult to “do right” when you’re trying to update the sleek modern style. I thought this would be a great opportunity to talk specifically about how to paint mid-century modern furniture. Afterall if something is worth doing, it’s worth doing right 🙂
HOW TO PAINT MID CENTURY MODERN FURNITURE
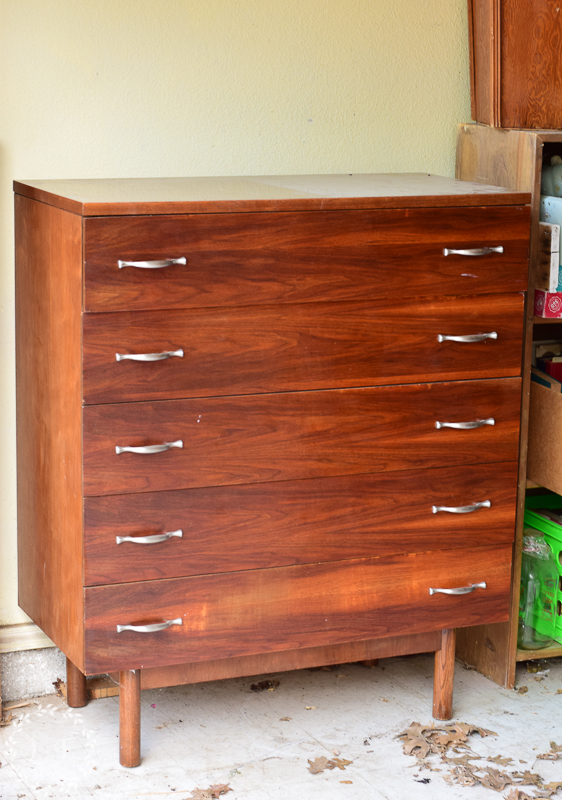
I’ve been working on these 2 fantastic authentic mid-century Stanley pieces that were gifted to me by a friend.
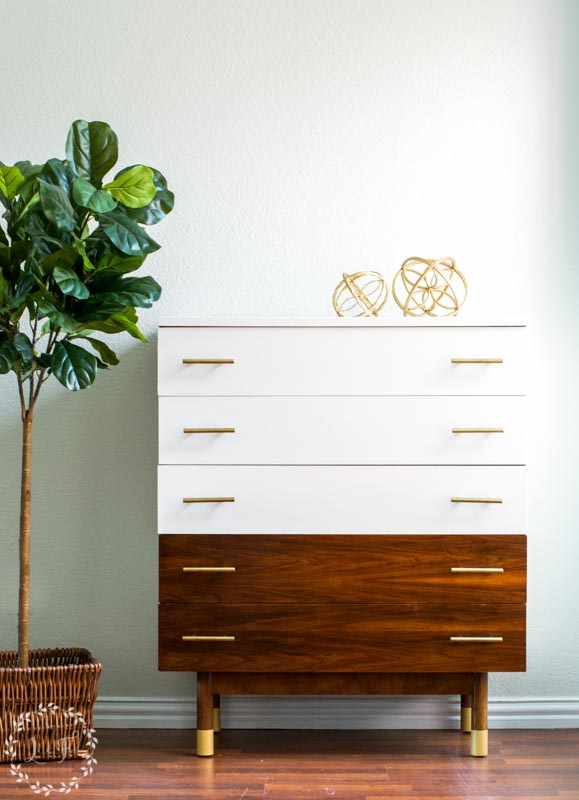
There’s a chest . . .
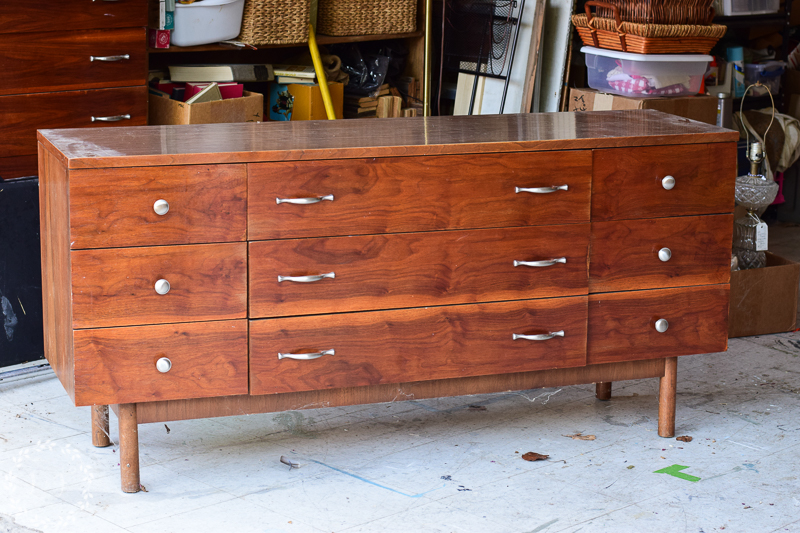
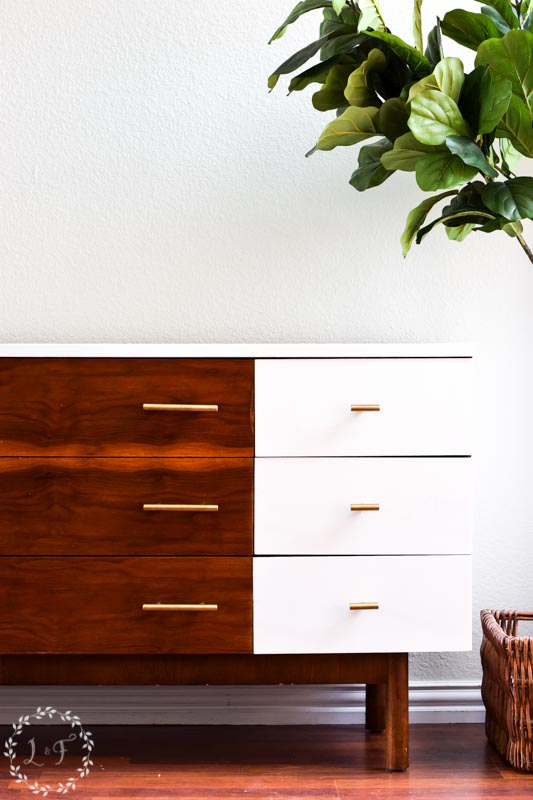
And a long dresser.
My friend had inherited these pieces from her parents, who had inherited them from another family member, who originally purchased them in Chicago way back in the day. My friend and her husband had used them for awhile when they first got married, then moved them into a spare bedroom.
In an effort to make them more their style, they decided to swap out the original hardware for something newer, a decision which she now totally regrets–we know how rare is it to find those original MCM handles!
With some moving and changes coming along, my friend had no more need of these pieces and offered them to me, and as you can imagine I said a very quick yes! I have only worked on one or 2 other mid-century style pieces ever (mainly because they are hard for me to find!) and so I was anxious to try my hand and updating one of these beauties.
The chest and dresser were both in overall great shape, including the gorgeous patterned wood on the drawer fronts. I knew I wanted to keep some of that wood showing, so that left me with figuring out just what else exactly I should paint!
I do think when making over these types of pieces, it’s important to keep the original sleek, modern style in mind and to try and fit your new color and design scheme into that already existing design. I’ve written more about those thoughts in my post MCM Makeovers Done Right, if you want to hear more.
After doing a lot of Pinterest searching and Google browsing, looking at other painted MCM pieces, I settled on using Fusion’s Casement (a bright, clean white) to paint the frames of the pieces and only some of the drawers.
Prep Work
To get these pieces ready to paint, I removed the old hardware, cleaned them with my TSP Alternative Degreaser, and gave the areas I was going to paint a light sanding with 220 grit sandpaper.
A lot of times with pieces from this era, you will find that the frames and drawers are solid wood, but the tops are actually a plastic wood laminate.
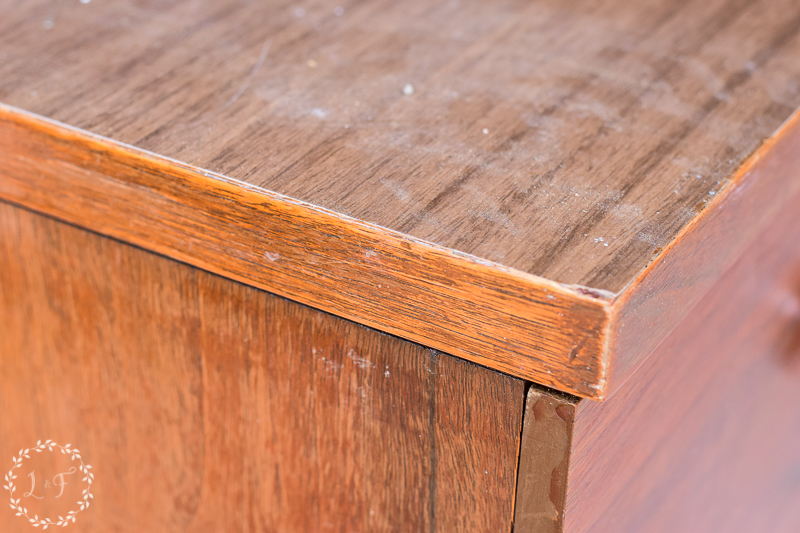
I know it’s a little hard to see in this photo, but can you tell how the wood on the top is a totally different color than the rest of the wood? And how the grain looks a little too uniform? Well, that’s because it’s not real wood!
*Tip* If you tap on those tops with your fingernail, and then tap on the sides where it’s real wood, you will be able to hear the difference. The real wood sounds a bit deeper and hollow, while the laminate sounds more high-pitched and like you are tapping plastic.
I don’t know why they made pieces this way–maybe for durability sakes? But those wood laminate tops require a different prep than the rest of the solid wood areas of the piece.

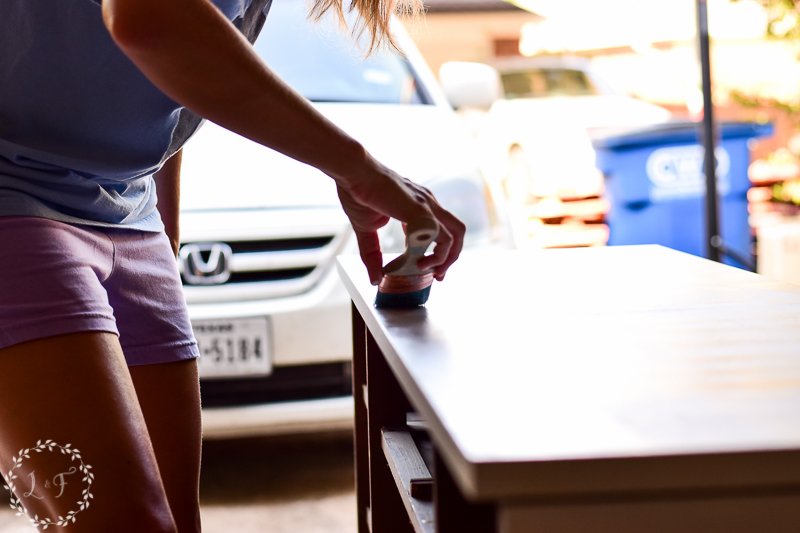
So, on the tops of each piece, after cleaning them I rolled on a basecoat of Fusion’s Ultra Grip. This is a pure acrylic that goes on milky white and dries clear. All you need is to apply a thin coat on your hard to paint surfaces (like wood laminate, plastic, metal, and glass), and then let it set overnight–then you can paint right over it and your paint will adhere just fine.
Painting the Dresser
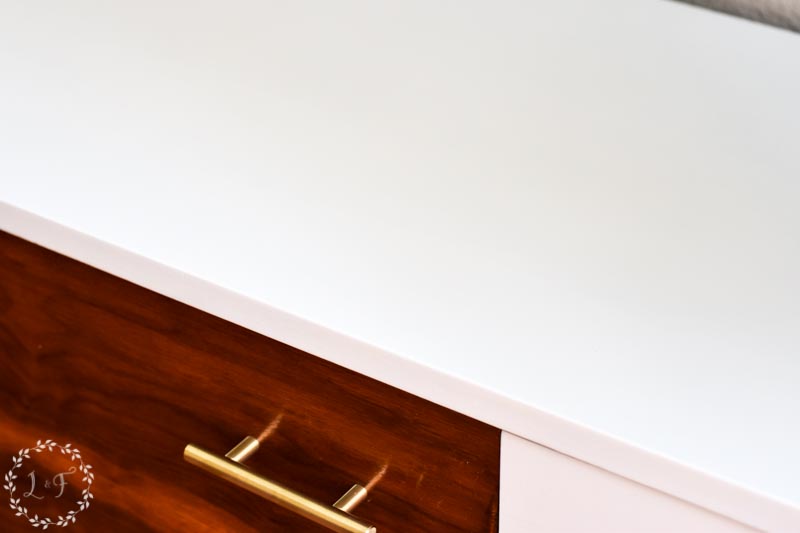
My goal for these pieces was to have the painted finish be super smooth. I didn’t want to see any brush strokes, but to really go for a sprayed look–just without the sprayer!
So I decided to apply the paint with a microfiber roller and then lay off the paint using my angled synthetic brush. This is a technique you can use when you find that applying the paint with the roller still leaves a bit too much texture and you want to smooth it out completely.
Basically, working very quickly, you roll on the paint in one area and then, going in strips, lay your brush at an angle and very light swipe it across the finish in straight lines.
I actually did a Facebook Live video of this process, and I think it may be helpful to watch it in action.
*Note* Before you watch the video though, I want to correct a mistake I made while filming. Rather than rolling the paint on in sections, it works best to roll the entire section you’re working on before you start laying off. I don’t know why I did it that way in the video–call it a brain misfunction!
So like I said in the video, the key to this working well is to work very quickly and to be doing your painting in an environment that isn’t too hot. You’re rolling on very thin layers, and if they start to dry (because it’s hot outside) you will actually create more texture while laying off. Of course sanding with a 220-320 grit sandpaper in between your coats will help fix any texture you accidentally create.
All in all these pieces took 5 coats of Casement. But they were very thin coats–had I been painting with a brush it probably would have been more like 3 coats. And 5 coats on each piece only equaled one pint! So not too bad for 2 pieces of furniture!
After painting, I freshened up the wood I left unpainted by rubbing in some Hemp Oil, which brightened up the finish and concealed any minor scratches. I did decide too to add a little Gold Metallic paint to the legs of the chest, to mimic the look of the brass toe caps you often see on these pieces. Once I did that on the chest, I wasn’t sure I was 100% excited about it, so I chose to leave the legs of the dresser plain.
The last step was to wipe on 3 coats of Fusion’s Tough Coat to all of the painted areas of each piece. Since these pieces were clean without any distressing, I wanted to provide as much protection as I could against any sort of chipping or dings in the finish. If you’re looking for a poly that won’t yellow over your bright white paint, Fusion’s Tough Coat is a great choice. The white still looked just as clean and bright after the poly as it did before.
Oh yeah–I did swap out the “newer” hardware with some reproduction modern style pulls that I found on Amazon (you can see them here). They were super affordable and I think wound up fitting perfectly with the style of the piece.
This post contains affiliate links to sites outside of LostandFoundDecor.com. Links are provided for your convenience and do not result in you paying any additional for products. Shopping through these links however, does help support this blog. Thanks for the love!
After Photos!
Chest . . .

I just love the wood on the drawer fronts! It’s so warm and has movement to it, which contrasts so well with the cold, smooth white.
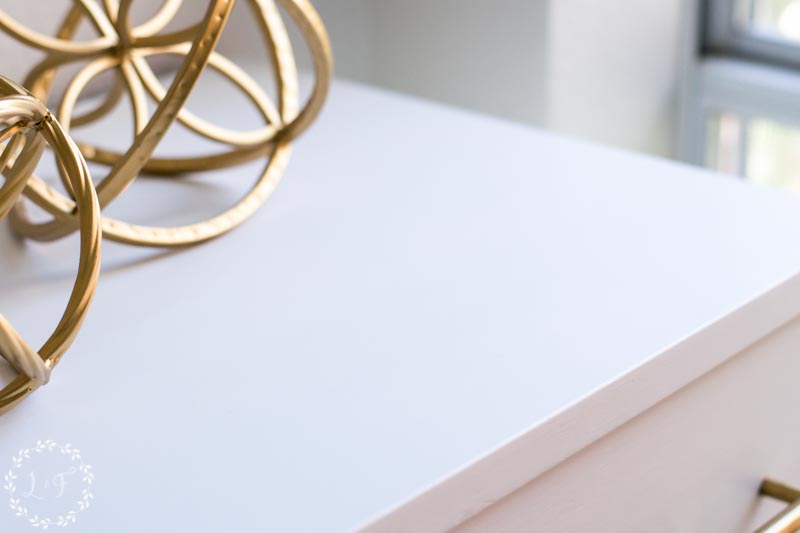
It’s hard to capture in photos the smoothness of the finish, but the rolling on/laying off technique ended up working really well for these pieces! It gave me that sprayed on look I was going for.
Dresser . . .
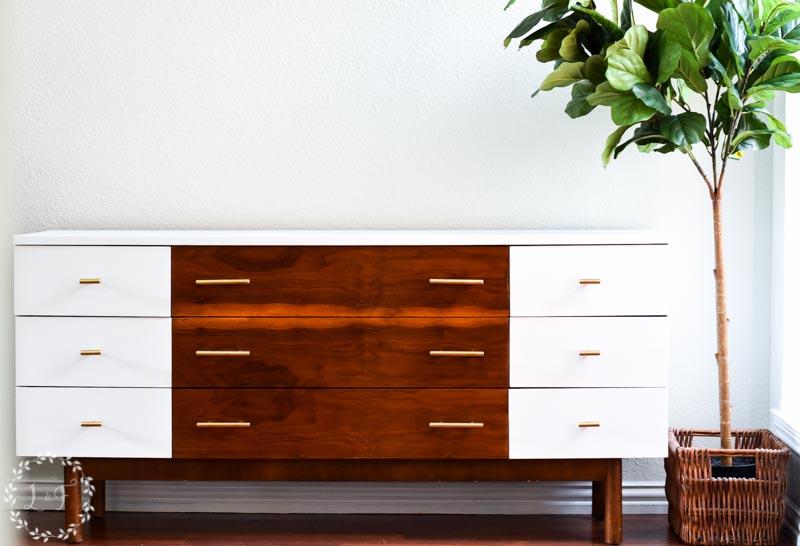
My goal was to have each piece complement the other in their design, so that if they were both purchased by one person they would be able to fit together, design-wise, into one space.
The ended up being purchased by 2 different people, which kinda made me sad. I was really hoping to keep them together, but you have to go with the sale!
So I think my first big dip into MCM pieces went pretty well, how about you? Do you like working on these pieces? Or do you find them difficult?
Thanks for joining me today! And as always, if you don’t have a local Fusion Mineral Paint retailer you can shop here online for all of the products I used on this makeover.
Happy Painting!


Painting Techniques for a Mid-Century Modern Home
Monday 27th of May 2024
[…] https://www.lostandfounddecor.com/mid-century-furniture-makeover-fusion-mineral-paint-casement/ […]
Dee Sailstad
Friday 3rd of November 2017
Thank you for providing the information on your beautiful work. I appreciate hearing about your effort to eliminate brush strokes. Is there anything that can be added to the fusion paint to keep it from drying quickly? I'd like to try out painting dinning room chairs in a deep black and I fear that the ornate areas will be too thick and show the brush strokes.
Bethany J Lee
Tuesday 31st of October 2017
Wow! When I saw the "before" I thought, "oh no, these are gorgeous as is, why is she painting them?!" But I have always seen your posts only show improvements in the pieces you restore. I will say, I absolutely loved their new do!! I decorate my house in MCM so it was neat to see what you did with them!! Great job!!
Quandie
Friday 27th of October 2017
These pieces turned out fabulous! Awesome job Melanie. The hardware you chose is perfect, and I do like the gold toecap!