While preparing for the Vintage Market Days back on May, I decided to try and create a few antique signs out of some scrap wood I had on hand in my garage.
I will confess that I am not very good though at the art of lettering, so creating signs with pretty writing on them seemed a little daunting.
I knew there had to be a way to make signs without having to free-paint words, and with a little research and some personal ingenuity, I found one!
So here’s my little “how to make an antique sign” tutorial and walk through. Enjoy!
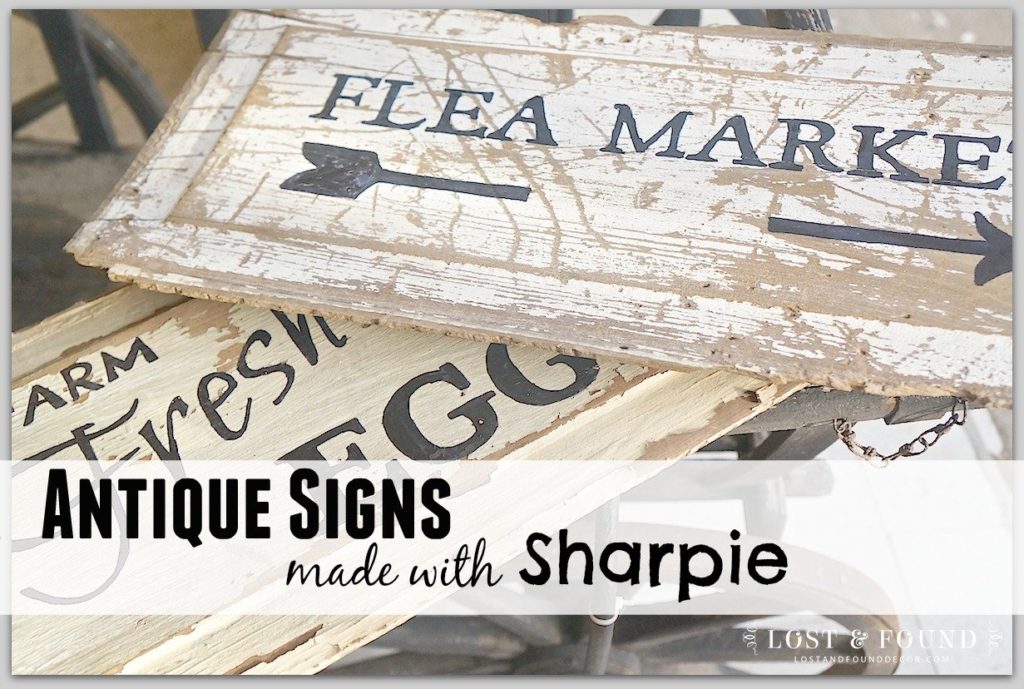

If you are lettering-challenged like I am, here is a process you can use that doesn’t require free-hand painting the sign words. Instead of paint, the words are traced onto the sign using a Sharpie marker–so simple!
Let’s walk through the process 🙂
Find a Piece of Old Wood
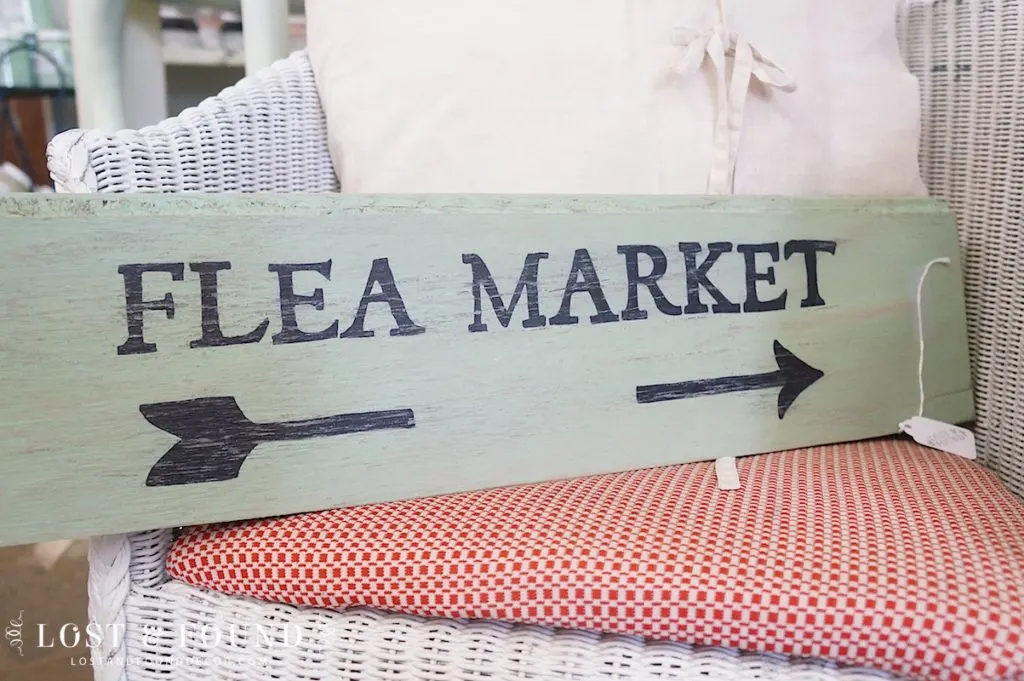
The first step is find your old wood–the more beat-up the better. For my sign, I grabbed a piece of pallet wood from my garage and painted on a sloppy coat of Fusion Mineral Paint Lily Pond. (Do you know about Fusion Paint yet?)
Create Your Sign Template
*Update–as of September 2017 Picmonkey is no longer a free service. You can create your sign but will not be able to download it without a subscription. Good news though! You can start a 7-day free trial to download your image, then cancel it.
While your painted board is drying, it’s time to get on the computer! Using Picmonkey.com, you can create the words and image you want to transfer to the sign. Picmonkey is a free online service (you can upgrade to the Royale version for a fee but I have found it unnecessary) where you can play around with lots of different fonts and image embellishments. It’s quite honestly a little bit addicting!
You can set the dimensions of your image on Picmonkey, so keep in mind the shape and rough size of your board while you are making your sign words (i.e if your board is long and thin or more square-shaped).
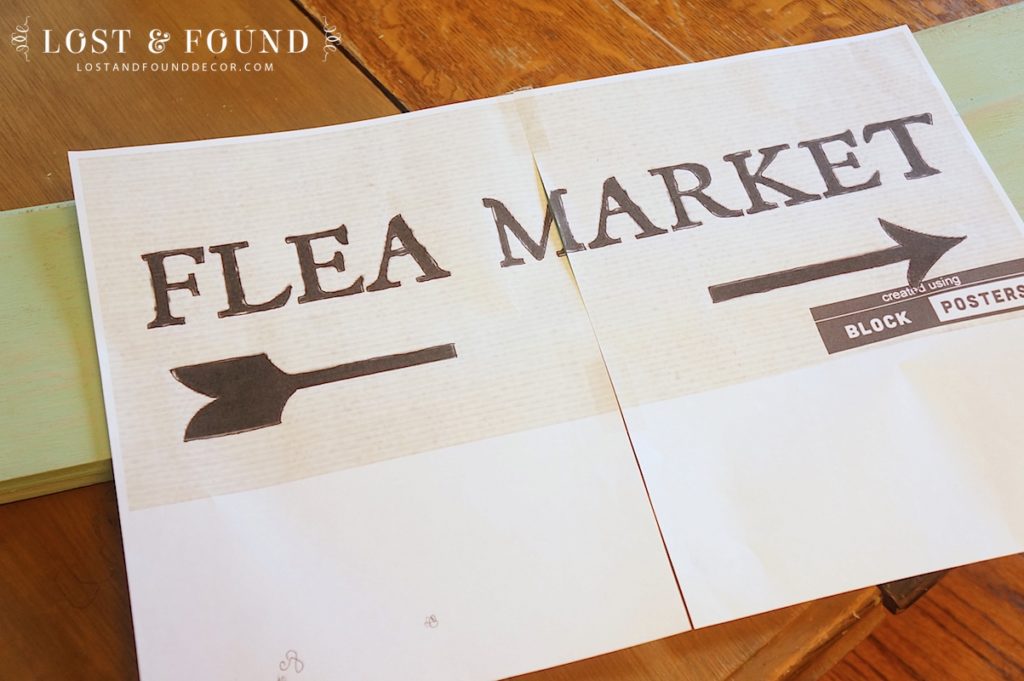
Once you are satisfied with your word art, save your creation to your computer, then venture over to BlockPosters.com.
BlockPosters is another free online program where you can take a small image and format it to print as a larger image, over multiple sheets of paper.
Again, keeping in mind your board shape and size, you will select over how many pieces of paper you want your image to print. This may take a few tries to get it right . . . one tip is to lay paper onto your sign to get an idea over how many sheets you want to spread out your image.
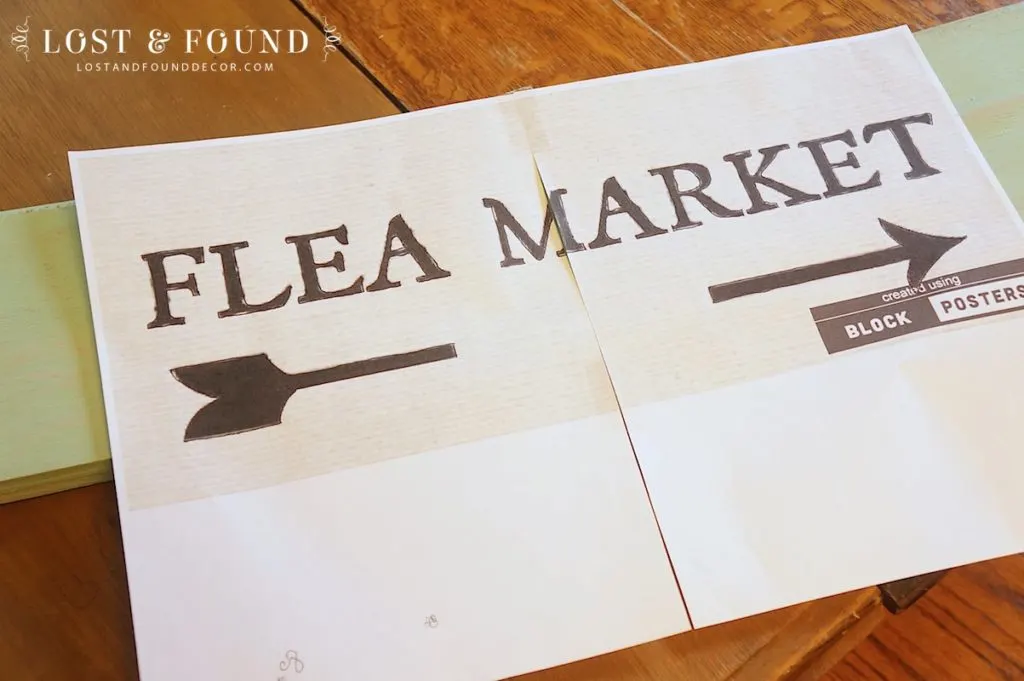
Confused? Well, take a look at my printed BlockPosters image:
Does that help it all make more sense?
I created the rectangular shaped “Flea Market” word art (including the arrow) as an image on Picmonkey, then set it to print over two sheets of paper on BlockPosters.com. Now the words are large enough to trace onto my piece of wood.
I promise it’s not as difficult as it sounds. If you aren’t familiar with computer design, just spend some time playing around with the programs and I am confident than you can figure them out!
The good news is that from this point on you are done with computers.
Let’s start the process for transferring your lovely image to the board.
Transfer Your Printed Text to the Board
Once your word art is printed, flip it over and cover the entire wording with chalk.
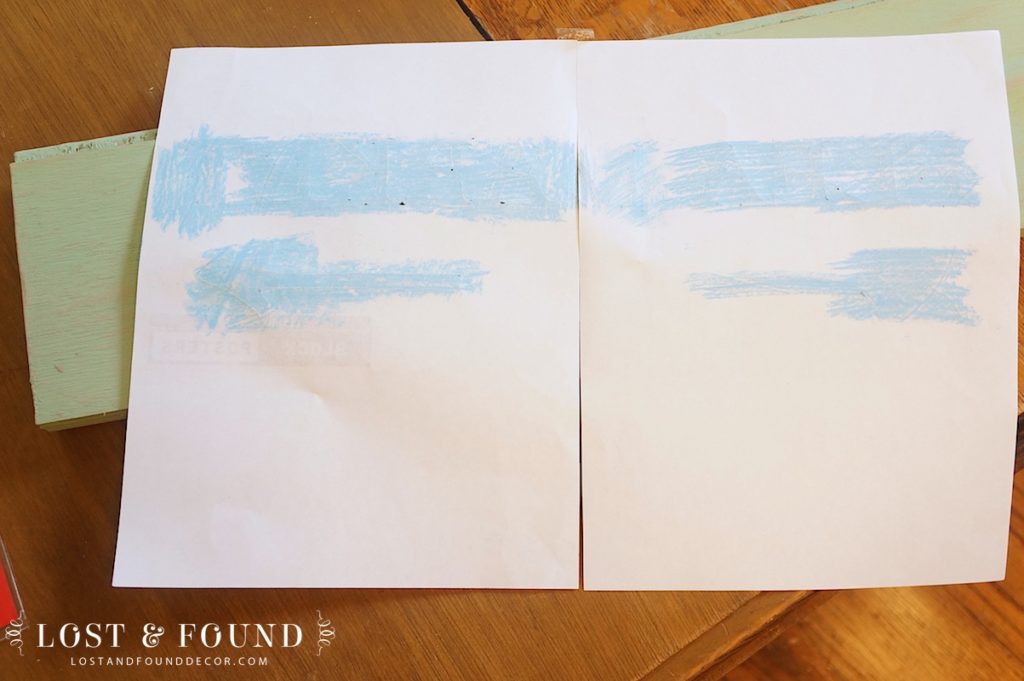

Give it a good scribble. Once all wording and art is covered, flip the sheets back over and position them onto your board (you may want to use masking tape to help secure the paper).
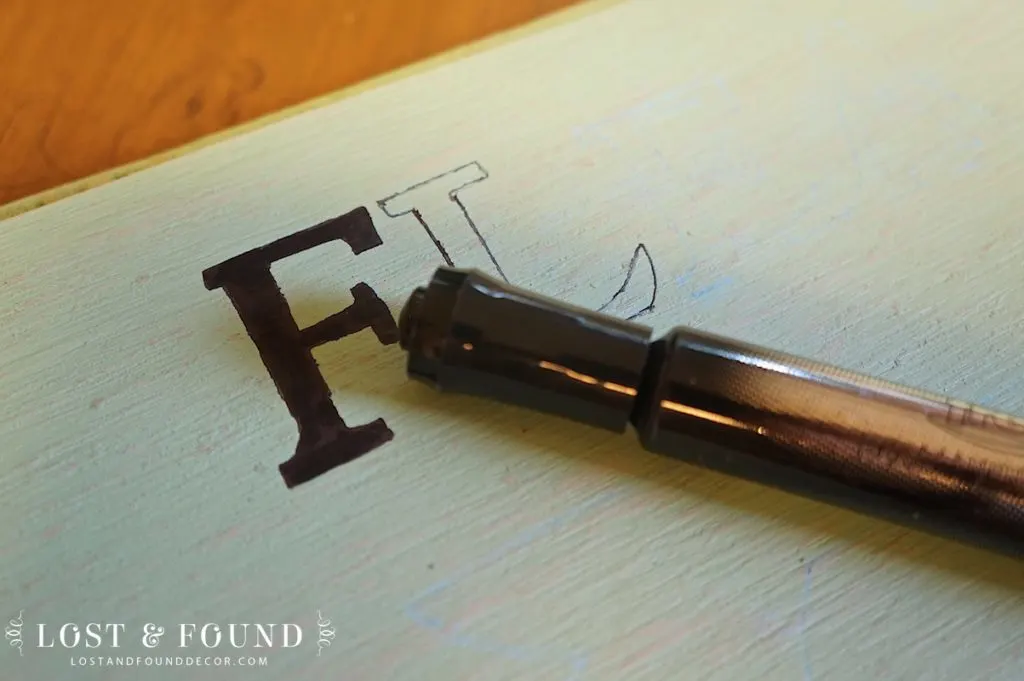
The next step is to take a ballpoint pen, and trace each letter on your printed sign.

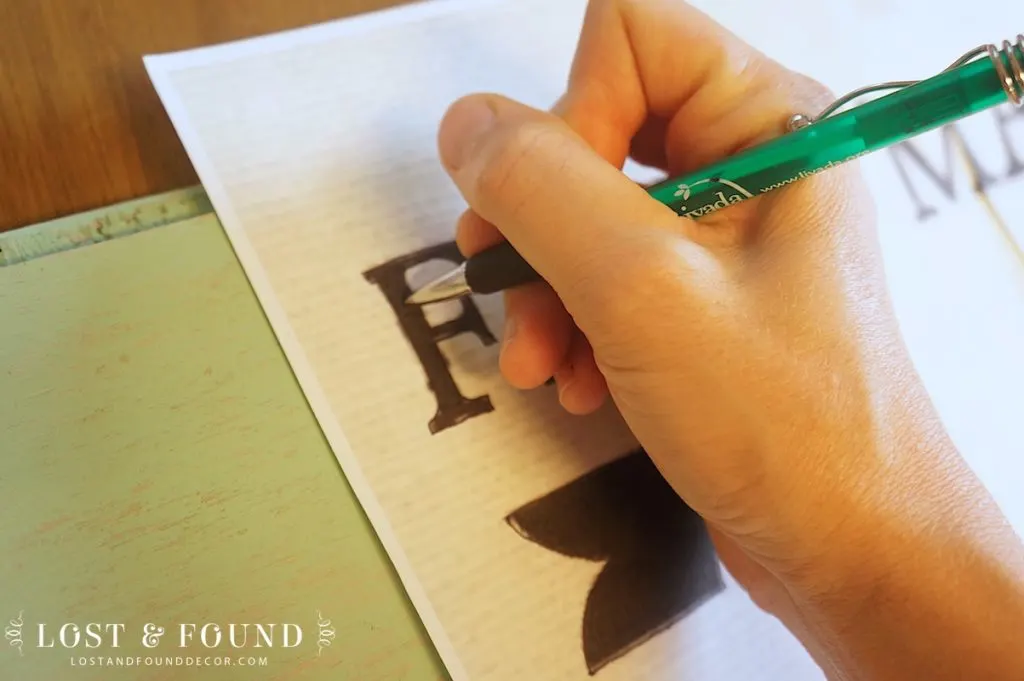
As you trace, the chalk will transfer onto the board, leaving a faint outline.

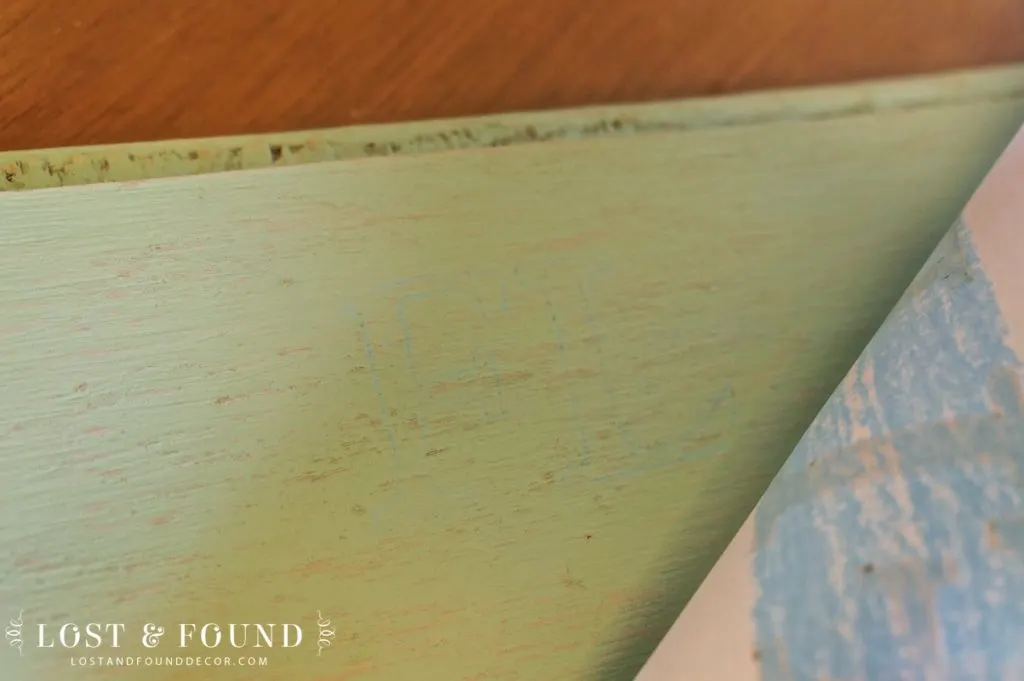
Pretty cool, huh?
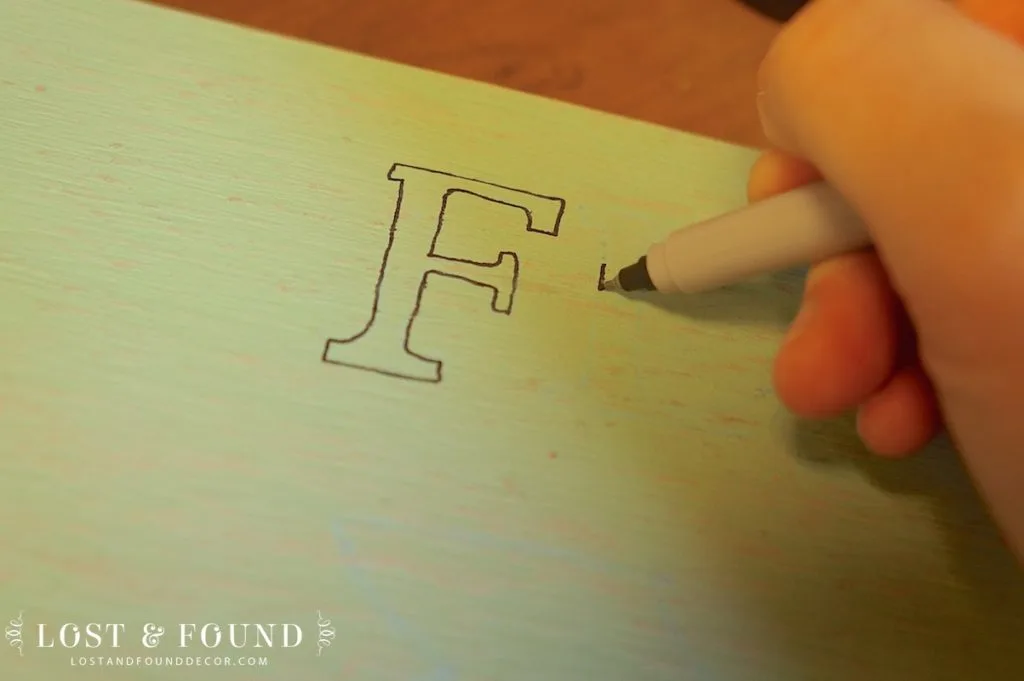
Outline & Fill Your Letters
Once your entire sign is traced onto your board, it’s time for the Sharpies. Use a fine point Sharpie to trace the outer edges of each letter, so you can keep the design as clean as possible.

Then, fill in the letters with a regular, fat Sharpie.
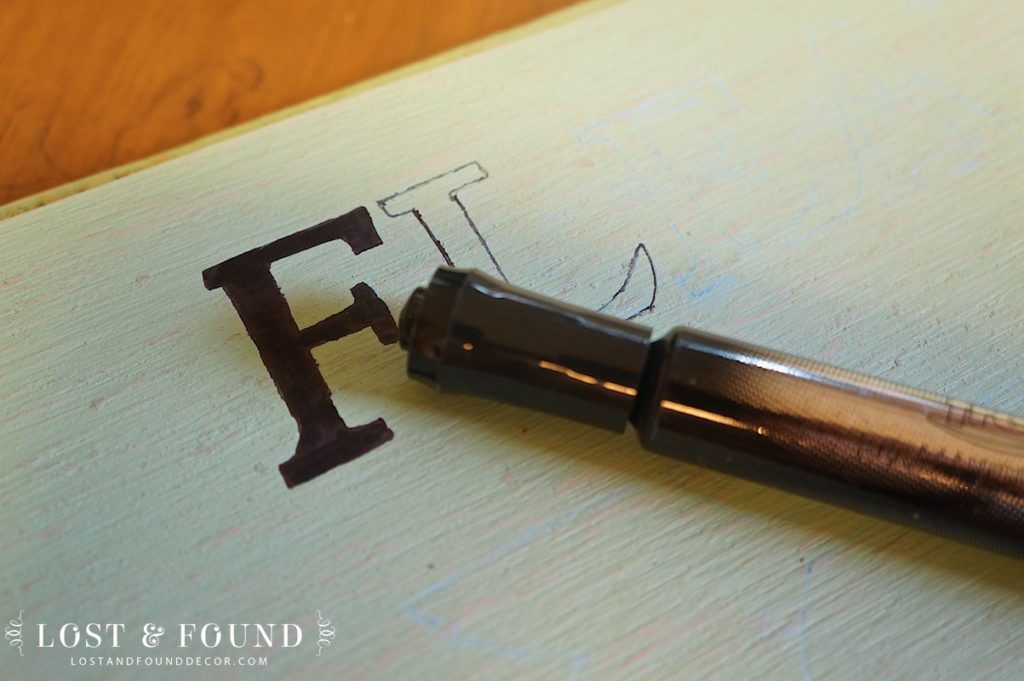
Ta-da! Look at that beautiful lettering!
At this point you could be done with your sign, but to really give it that antique look, you can add a few more steps to the process.
Give It an Antique Finish
Give the whole sign a good sanding with some medium-grit sandpaper (to help make those Sharpie letters not look so fresh), and then add some antiquing glaze for added effect.

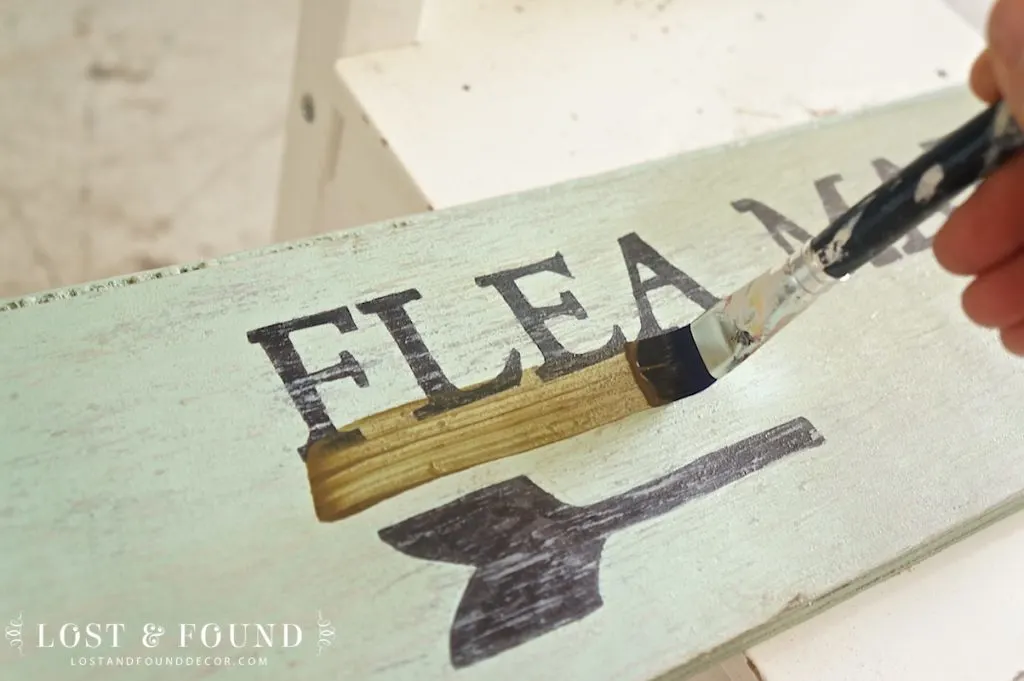
I use the Fusion Antique Glaze, and it is such an awesome product! Just paint it on with a brush, then wipe off the excess with a rag.
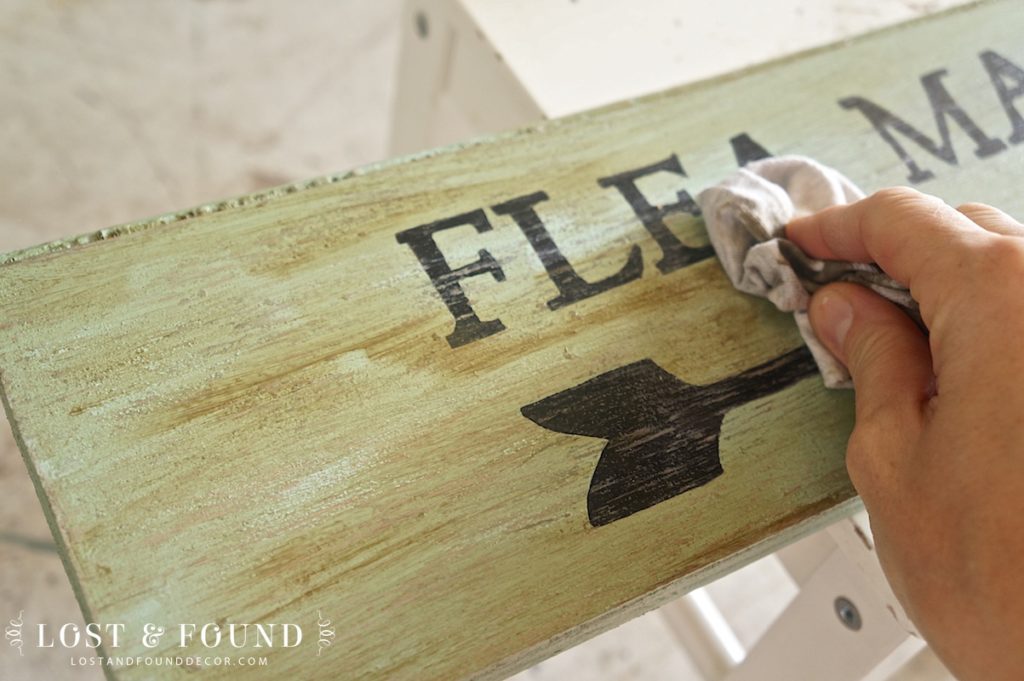
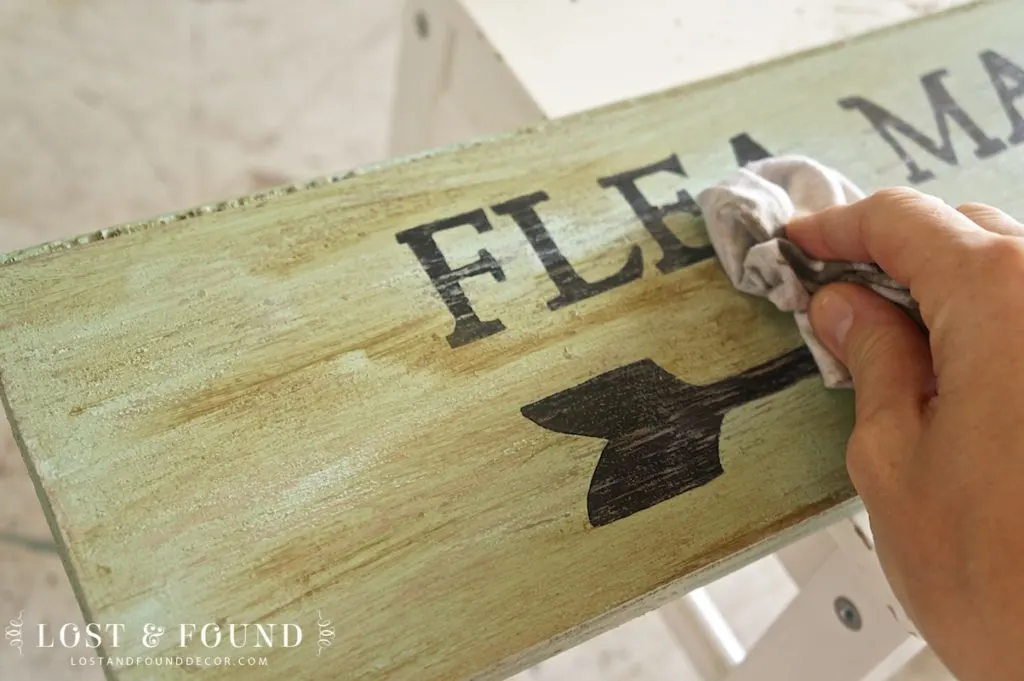
The sanding and glaze will give your sign a great weathered look with minimal effort.
Now it’s time to stand back and admire your work!

With Picmonkey, the design ideas for your sign are virtually endless. Take some time looking through Pinterest or Etsy for inspiration, or copy the design from an authentic old sign for sale on Ebay. Have fun creating great accent pieces for pennies 🙂
I would love to see some of the signs you create!


Linking up to: Metamorphosis Monday, Project Inspired, Wow Us Wednesdays
Wendy Jamieson
Tuesday 30th of August 2016
Everything you write and post just amazes me. You are so talented and always share with those of us who have to work a little harder, at our passion, but you always make it so much easier. Life is not a competition and you never make it feel like one!
Theresa Bride
Wednesday 27th of July 2016
This actually looks do-able to me ! ! Your detailed instructions along with the resources you list , actually make me excited to try this. I will be sharing this with my two daughters and 3 daughter-in-laws, all of whom are home owners and love to make crafty decor for their homes.
Lily Kreitinger
Wednesday 29th of June 2016
Nice tutorial, Melanie! So glad I found your site!! I'm for sure a new follower! Have you tried using www.canva.com for creating your signs? Like picmonkey, it's addictive, free and FUN!
Can You Make Money Selling at an Antique Mall | L&F
Sunday 5th of June 2016
[…] out on the curb or in a dumpster, I toss it in my car. Then I can use either a stencil or a Sharpie and make a cute sign! Free wood + a little craftiness = $$ in my […]
Nicole Q-Schmitz
Monday 27th of July 2015
I love this technique to transfer letters! Now I need to find a project to try it out...