Your kitchen table is one of the hardest working pieces of furniture you’ll ever have in your home!
Whatever finish you get on your kitchen tabletop needs to be able to stand up to regular wiping down and lots of everyday wear.
For that reason, staining your kitchen tabletop is usually a better move than painting it–over time, a stained wood surface is going to hold up better than a painted surface will (and that goes for whatever kind of paint you use!)
But let’s be honest . . . the process of stripping and sanding down a tabletop to re-stain it can be kind of a pain!
What I wanted to find was an easier way to update a table, but still have a beautiful, wood-look top that also would have great durability.
And I think I’ve got it! I’m excited to share this makeover with you today because I know you will be able to use this technique to update your own kitchen table using just paint and stain, without the messy and time-consuming process of totally refinishing it.
This post may contain affiliate links · This blog generates income via ads
The Kitchen Table to Makeover


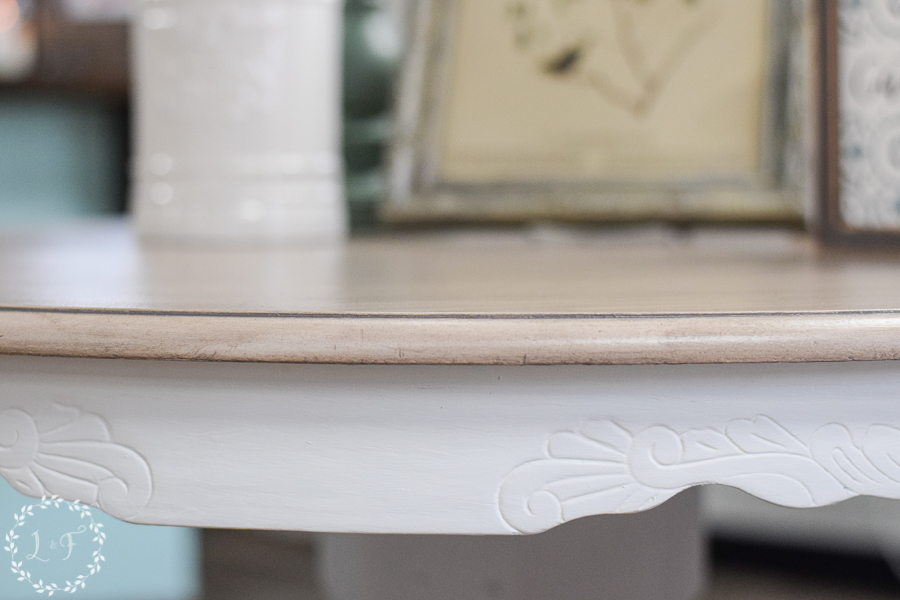
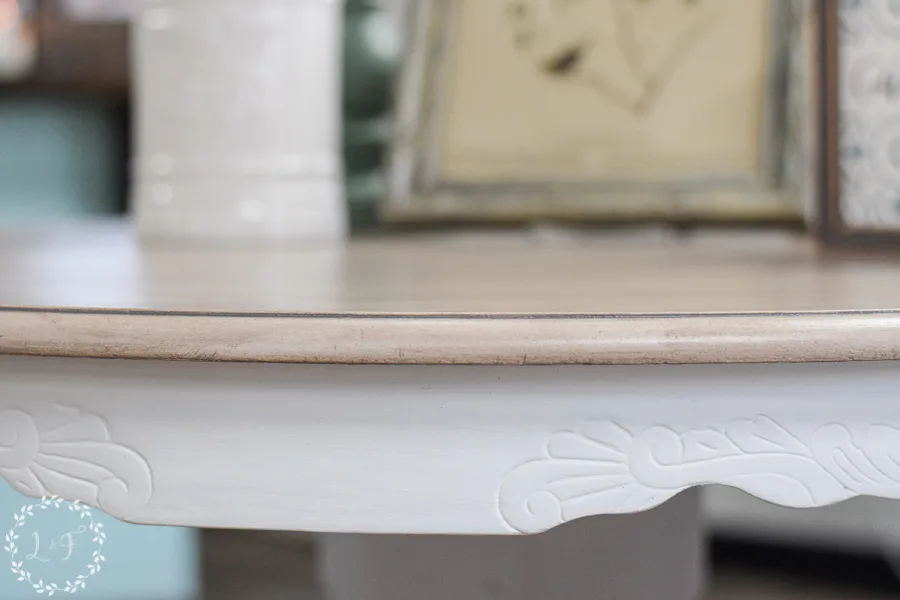
These round oak tables are a dime a dozen at the thrift stores and garage sales here around me (you may have one in your kitchen right now!).
They are great, sturdy tables, but unfortunately, that dark oak wood is not the look most people want in their kitchens these days. It’s easy to update the table base with paint, but the top is what is a bit more challenging.
Follow along though, and I can show you how to get a whole new look with just 2 steps!
Materials & Preparing to Paint
- Fusion’s TSP Alternative
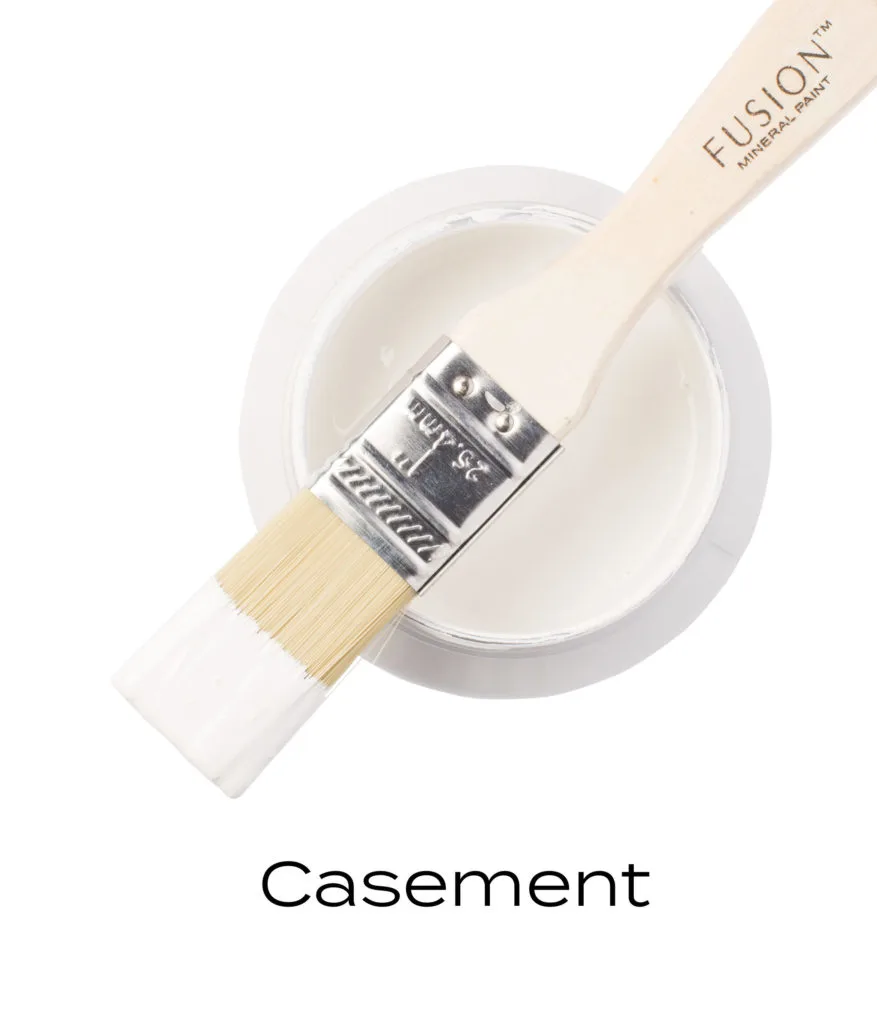
- Fusion’s white paint color Casement
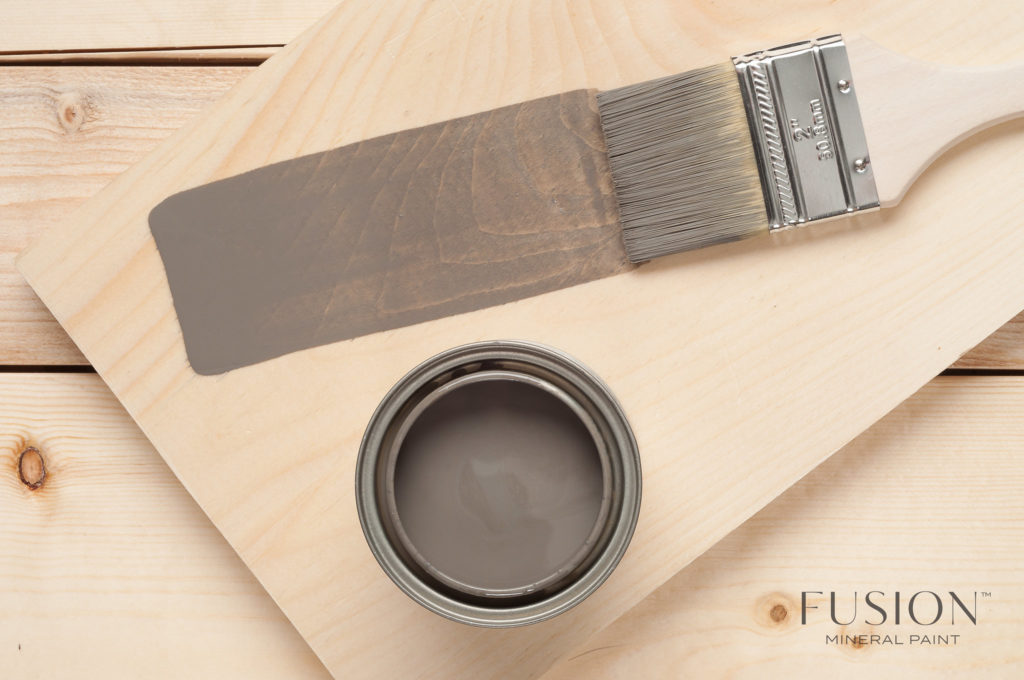
- Stain & Finishing Oil in the color Driftwood
The first step is always to properly prep your furniture before you paint.
I start by scrubbing my pieces down with Fusion’s TSP to get rid of any grease and grimy buildup (read more about why you should clean your furniture here), then wipe off all the residue with a rag damp with water.
Next, it’s good to give your surface and good scuff with some mid-grit sandpaper (180 ish) to give the paint something to grip to. Your sanding doesn’t have to be extreme–just 5 to 10 minutes roughing the surface up a bit.
If you’re painting a surface that’s super slick or that is not real wood (like a wood laminate top), then a base coat of Fusion’s Ultra Grip will help your paint adhere better.
Painting Your Kitchen Table
Once the table was prepped, I painted the entire table with the bright white color Casement.

When painting bright white on a dark surface, be prepared to use 3-4 coats to get full coverage. That’s completely normal for bright white, in any paint line!
Read more about challenges painting white here.
I believe I painted, in total, 3 coats on the base and probably 2 coats on the top. With the top I wasn’t worried about 100% full coverage, since I knew I was going to add another element of color on top.
Adding the Gray Weathered Wood Look to Your Kitchen Tabletop
Now comes the fun part!
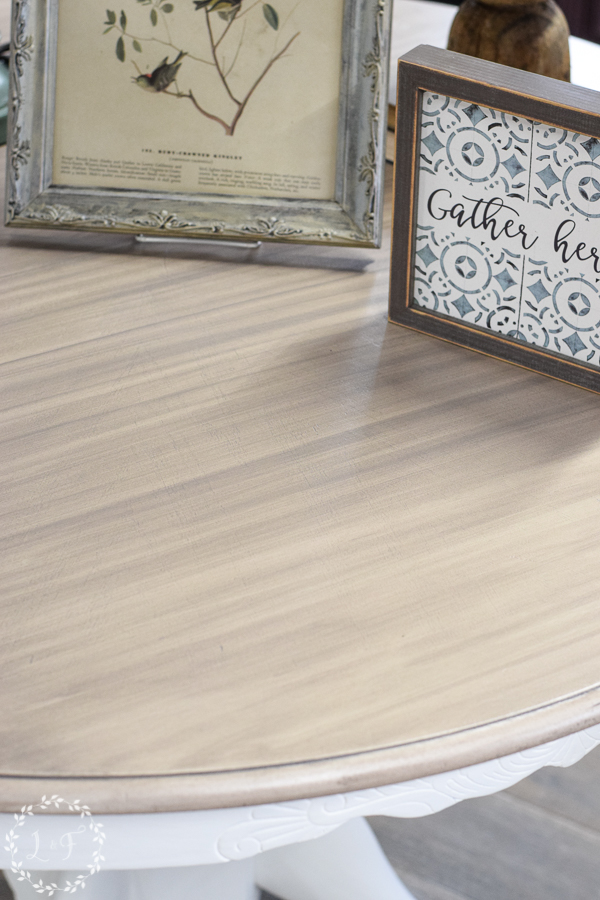
Once the paint was dry on the top, I poured directly onto the surface a bit of Fusion’s Stain & Finishing Oil in the color Driftwood.

This stuff is really forgiving and easy to work with! And it has a low odor, so you can use it inside with no problem.
Once I got a bit on the table, I brushed it all over using a chip brush, then started wiping it back in long, smooth strokes going all one direction.
I just folded up an old t-shirt in my hand, and ran it along the tabletop from one side to the other, working my way across the whole table.
Wiping it in one direction like this helps mimic the look of grain lines, as your stain winds up being applied slightly unevenly.
Don’t worry if the first coat doesn’t look so hot! It took me 4 coats in total, waiting 8 hours in between each coat, until I got the look I wanted.
The great thing about the SFO is that not only can it give you this cool wood-grain look when applied like this, but it also is a very durable product.
It is a stain and oil-based topcoat in one product, so there is no need to apply anything else on top to seal the surface.
Four coats on top of the white paint will give the durability of a stained tabletop without having to actually strip and re-stain the whole thing!
Would you like to try Fusion Mineral Paint for your next furniture project?
They have generously offered my readers a 10% discount on all Fusion products when you click and purchase here.
The discount will automatically be applied in your cart. Yay!
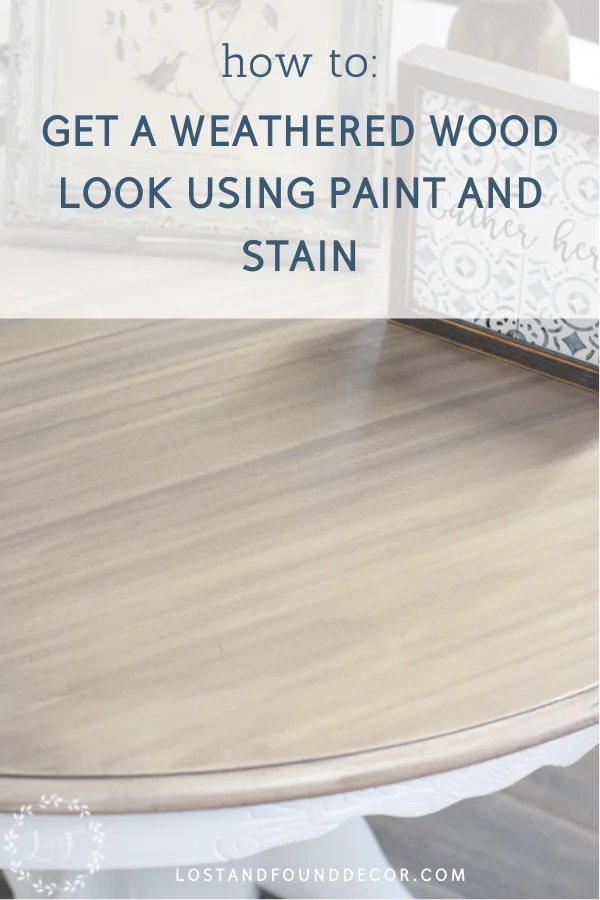
Finished Look
Here is the new top–all done with just white paint and stain!
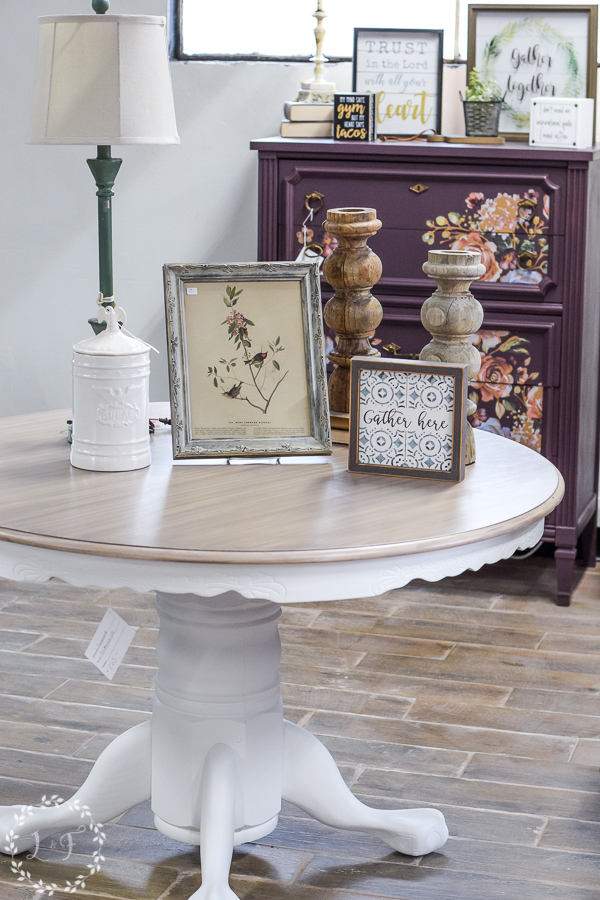
Can you believe the difference? A fresh, on-trend, light wood-look top and all without breaking out the heavy sander or stripper!


The key is wiping off the SFO in those straight lines–and then walking away and letting each coat dry! That’s how you get that wood look.
So fresh and clean now, AND durable!

I really encourage you to give this technique a try! It can work on coffee tables, dresser tops, nightstands–any place where you want to create a lighter, wood-look top without stripping and re-staining the furniture.
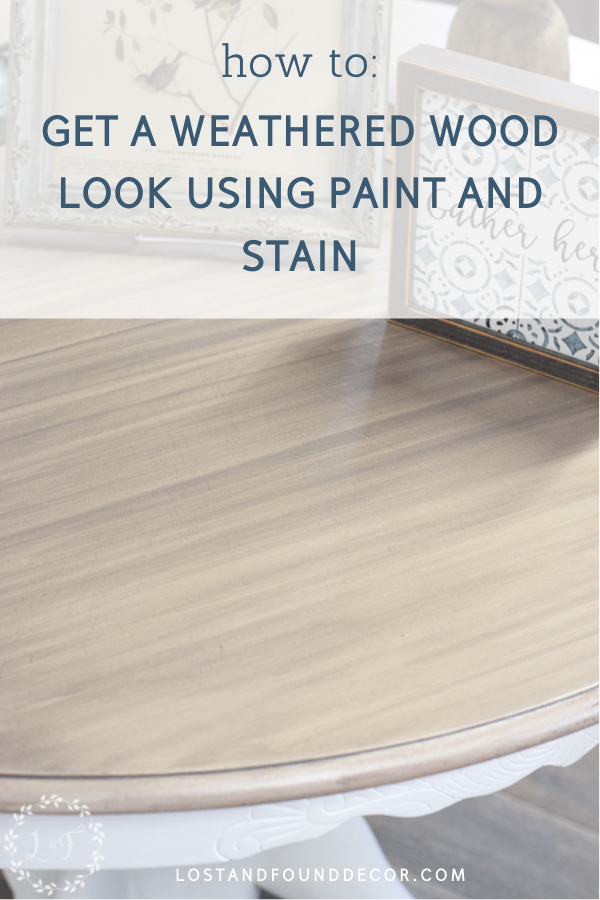
Pin this Resource!
Thank you SO much for joining me today! I hope you give this technique a try!


Lulu
Saturday 7th of March 2026
Hi. This is great! I received (free) a Broyhill Fontana coffee table and 2 end tables set — orangey solid pine. They have a topcoat with a slight almost matte sheen that was put on by Broyhill. Should I sand off the topcoat or will your method work without sanding? Thanks!
Lulu
Saturday 25th of July 2026
@Melanie Alexander, Thanks for responding to my question about using this on Broyhill Fontana. As I said, it has a low sheen top coat of polyacrylic that was factory applied. I’d like to clarify the steps because your response to me above mentioned wax. I’m not sure where that step would be in the following sequence: TSP cleaner, then a light scuff sanding, then Fusion’s white paint color Casement, and last - - finish with Stain & Finishing Oil in the color Driftwood? Thanksl
Melanie Alexander
Monday 9th of March 2026
I would clean it well with a degreasing cleaner, give a light scuff sand, then apply the wax lightly and allow to fully dry.
Krista
Sunday 21st of September 2025
Hello! I love the color of the tabletop! I have a small antique hutch that I would love to achieve this look on. Do you think this method would work to refinish an old (hardwood) hutch that I’ve now sanded down? Thank you!
Tammy
Saturday 31st of May 2025
How much of the casement would I need to do a 58x41 table?
Michelle
Wednesday 31st of December 2025
@Melanie Alexander, Can I use this on stair banisters and spindles with using kilz first to adhere?
Melanie Alexander
Monday 9th of June 2025
Depends on how dark the table is and if you want to use a basecoat of a primer to help with color transition. Without primer, you may find yourself needing a second jar, but again depends on the current color of your table and how opaque you want the white to be.
Erik
Sunday 16th of June 2024
Hi Melanie, I've tried the technique on a piece a piece of scrap wood (about a 3 foot long flat beam left over from a slat I cut for the bed). I sanded it and used a white acrylic paint and then a Verathane water based stain (its all I could get my hands on) called smoked grey. I'm on my fourth coat and the piece looks noting like your finished table top. It is mostly grey with some white streaks (it's pleasant enough, but not what I was going for), whereas your table top has a serene cream base with foggy hints of grey: is that the underlying wood showing through ? I woud've thought that was completely covered by the white paint. Why am I getting primarily a grey base ? The stain I'm using is a soft grey. What is driving the cream tone underlying the other colors on your finished table ? It's beautiful and I would love to be able to re-create it.
Erik
Thursday 13th of June 2024
Hi Melanie, regarding the application of the grey stain you say that:
"Once I got a bit on the table, I brushed it all over using a chip brush, then started wiping it back in long, smooth strokes going all one direction. I just folded up an old t-shirt in my hand, and ran it along the tabletop from one side to the other, working my way across the whole table."
Is this a special technique for this particular look or does it describe applying stain in general (i.e., apply and wipe off excess) ? I'm just trying to figure out if I'm missing something. Thank you and I'm looking forward to trying this; I thought the result was an understated, more elegant patina than the "weathered", barn-yard results so soo often see.
Erik
Sunday 21st of July 2024
Me again. I hope it's ok to post a link to another site, but I found this quick tutorial on YT that addresses some of the queries raised here so I thought I'd share. Seeing how the stain needs to be wiped off in the proportion of the desired look will, hopefully, address my problem. I think the wood from the pallet that I was using as a test scrap was absorbing the stain to quickly for me to wipe off a needed amount. She's no Melanie, but I found it to be helpful, especially because of the visuals. The overall look of the final product is very similar. Apologies if I shouldn't be linking another site.
Erik
Sunday 21st of July 2024
That's very helpful, thank you. How long did you leave the stain on ? Im trying thos for the second time and, again, Im left with a fimish where they grey predominates. Not the creamy look you got. Any thoughts?
Melanie Alexander
Monday 8th of July 2024
Hi Erik! I brushed on the stain with a brush, then rolled up an old t-shirt in my hand and wiped off all excess, going one direction only. I worked in rows, making my way across the table then allowing what was left to thoroughly dry out before adding another coat.