Pine Coffee Table Makeover
Do you have a dated coffee table you want to refresh but aren’t sure how? Then you are going to enjoy this fun makeover I’m sharing today.
I’m showcasing a brand new color and new wood technique, so gather around and get some ideas for your own coffee table makeover!

How can I make my coffee table look better?
If you have a table that you like the shape of but not the color, or you just don’t have the budget to buy something new that fits your changing tastes, I’ve got the answer.
It is so easy to give new life to any piece of furniture with a coat of paint and a new stain, and I’m going to show you how.
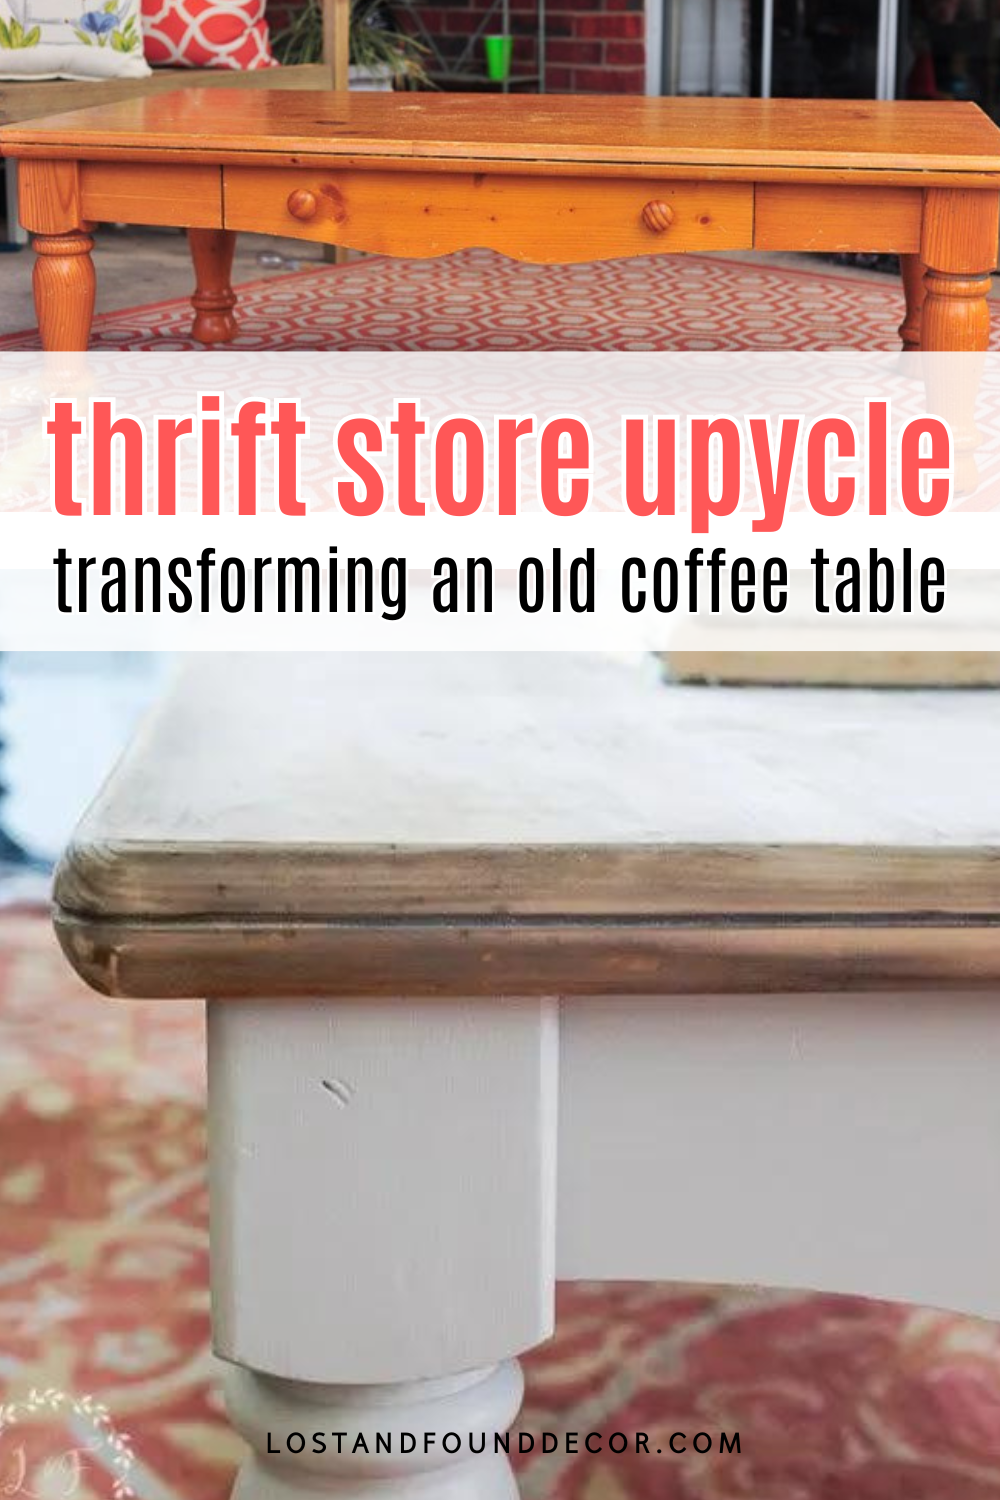
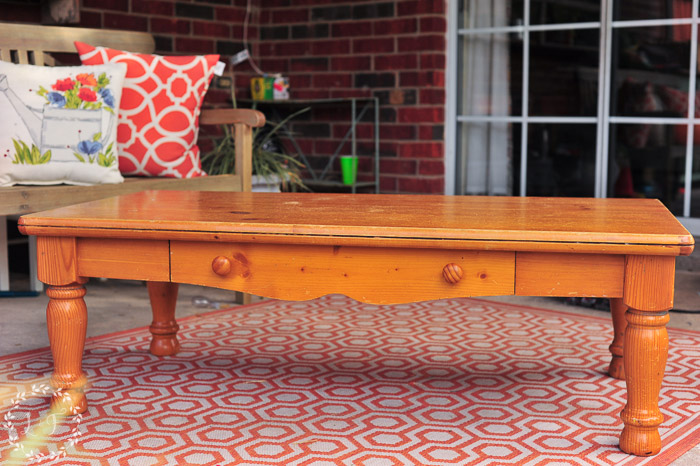
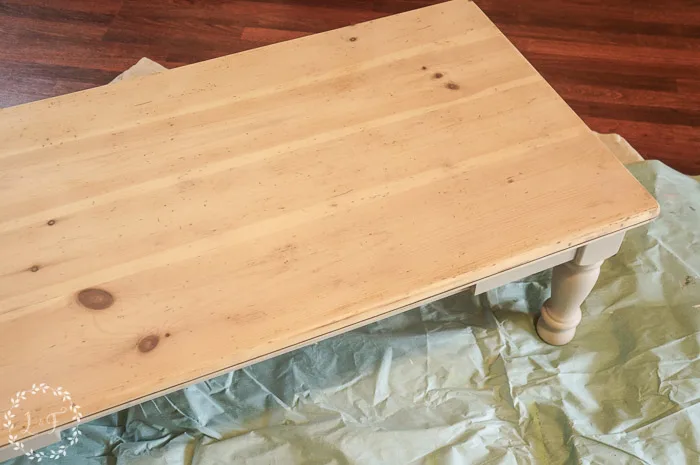
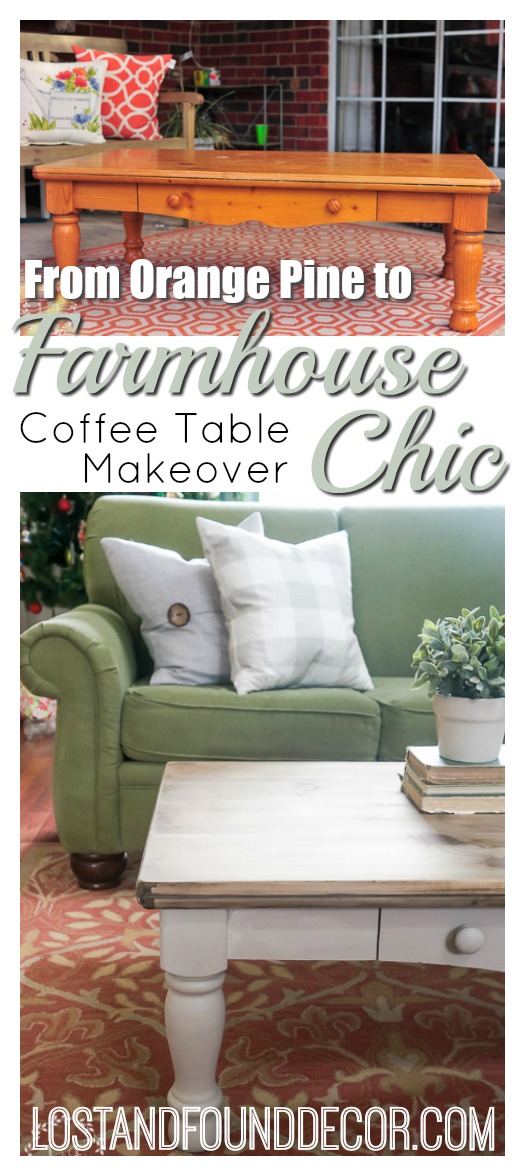
Say hello to this lovely orange pine coffee table I picked up at my local thrift store.
This solid wood table is sturdy and the perfect size–nothing wrong with it except it’s that terrible orange pine color!
It was the perfect candidate for a makeover, and I knew I wanted to try and take it more in the farmhouse style direction.

How do you renovate a coffee table?
So how exactly do we do this? My plan was to paint the base and re-work the wood of the top.
Picking the right paint color was an easy choice.
Getting the right technique for the wood top? Not quite so easy! More on that later though.
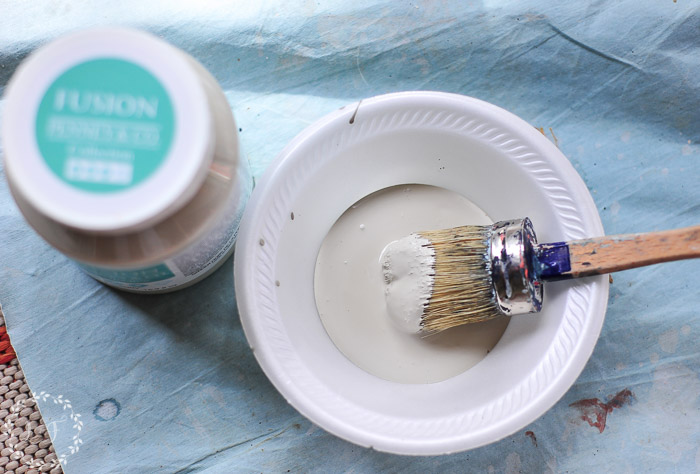
Fusion Mineral Paint in Putty has that perfect, farmhouse-neutral feel. It’s not white, but not quite gray or beige either–somewhere in between all 3 of those colors.
I knew it was the perfect choice for the base of the table. If you are a big fan of white, you could try this color for a slight change.

The first thing I had to do was give the table a quick wipedown with a degreaser.
Cleaning your furniture before you refinish it is an absolute must.
Can I paint a coffee table without sanding it?
I didn’t need to sand this table base because the wood was pretty old and dry, but that is rare. You should plan a light sanding if you are attempting your own makeover!
A sanded surface will help the paint stick better, and it’s worth a bit of extra trouble.
Then, on goes the paint. The round-brush I use for these types of projects lays the paint down so nice and smooth, and works wonders on the curved legs.
This color (Putty) has fantastic coverage, and took only one solid coat plus a second touch-up in certain spots.
If you’re feeling nervous about leaving brush strokes for the world to see, don’t worry!
Use my tried and true technique for a nice smooth finish with minimal brush strokes, and you’ll be ok.
How to refinish the coffee table top
Now that the base was painted, I got to work on the top.
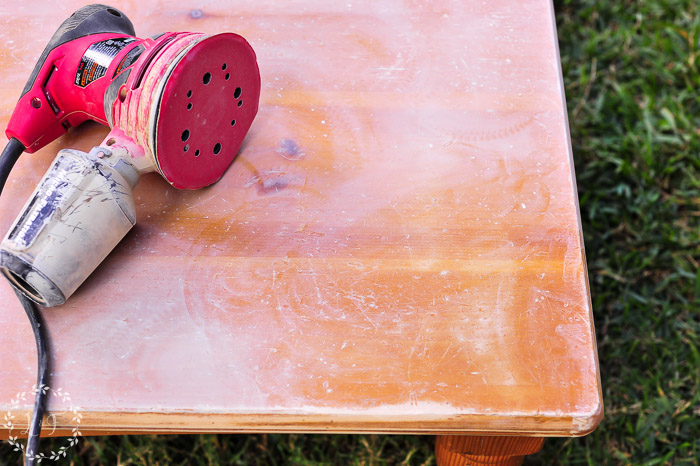
To be completely honest, I wasn’t sure what my plan was when I started on it! But I knew the varnish had to go, so I started by taking it off with my orbital sander.

This post contains links to affiliate sites outside of LostandFoundDecor.com. Links are provided for your convenience and comply with all affiliate program rules and regulations.
The wood on the top had a lot of scratches along with some dings and wormholes, so I decided to work with them rather than trying to smooth them all out.
If you want a totally smooth finish with no scratches, read my tips on repairing scratches and general wear and tear right here.
I read recently about a new wood-aging staining technique that can create a weathered, barn-wood look on new wood, so that became the plan. I thought it was perfect for a farmhouse-style coffee table!

I sanded the top all the way down until the pine was back to being raw. Then it was time to age the wood using an oxidizing solution.
I did not invent this technique, so don’t be too impressed 🙂 I read about it on several other sites, including here and here. This process is some science, some art, so there is a little leeway in exactly how you go about it.
I will walk you through the way I did it, and you can check out the other posts for those slightly different techniques too.
To make your oxidizing solution you will need:
- White vinegar
- Steel wool
- Glass mason jar with lid
- Black tea (optional)
- Foam brush and rag
Pour the white vinegar into the mason jar until it is about half full, then drop in 2-3 pieces of steel wool. Push them down into the vinegar, then put the lid loosely on the jar and let sit overnight or for several days, depending on how strong you want it.
You will start to see bubbles popping up inside the jar as the 2 ingredients react to each other. This is why you leave the top loose: you don’t want an exploding jar!
The longer you let it sit, the more potent it will become. Mine sat for just about 24 hours and worked great.
Before I brushed the solution onto the table, I brewed some black tea (it has to be black, green won’t work) and poured a little of the brewed tea into the mixture.
This is an optional step–it makes your stain a little darker, and I decided to go for it.
NOTE: if you’re a little worried about the end product, be sure to test the solution on a scrap piece of wood (same type as the piece you are refinishing, preferably) or on a hidden part of your current project. How the solution will play out with your specific wood can be a little unpredictable, so testing it first is not a bad idea.
Once your solution is all ready, just brush it onto the surface of the piece you’re working on, let it set for a minute or two, then wipe off the excess.
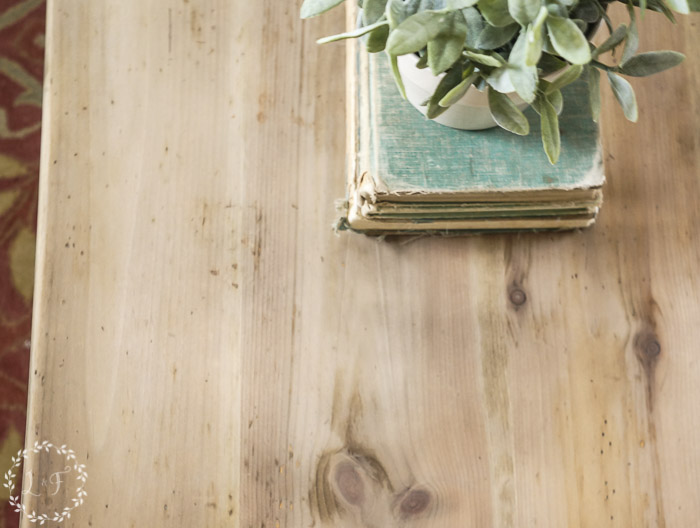
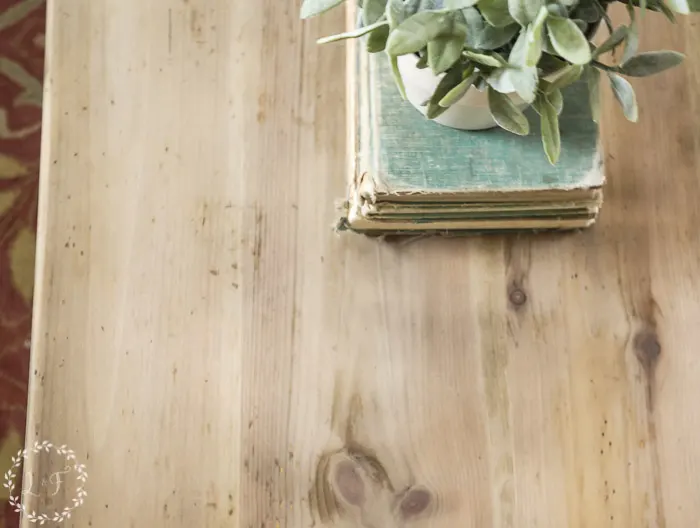
At first, it won’t look like it’s doing much. But don’t worry! The appearance of your wood will soon begin to change as the solution works to oxidize the wood.

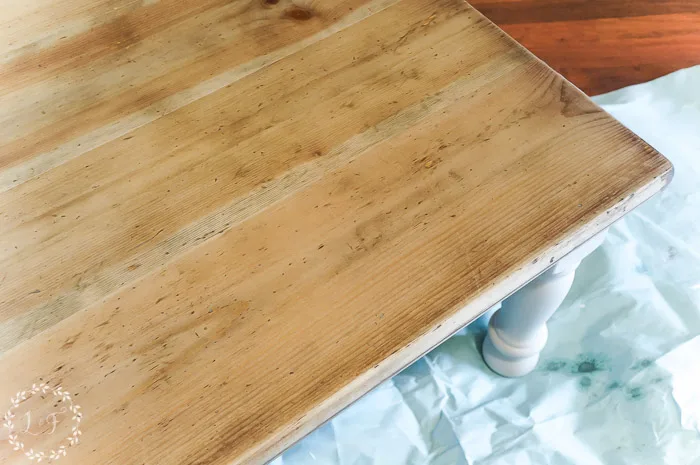
This is what the top looked like about 5 minutes after applying the solution. It changed the look of the top a little, but not drastically.
NOTE: when using this technique, be patient with your wood! It really will darken more over the course of 30 minutes to a few hours, so don’t be hasty in applying too much solution because you don’t think it’s working.
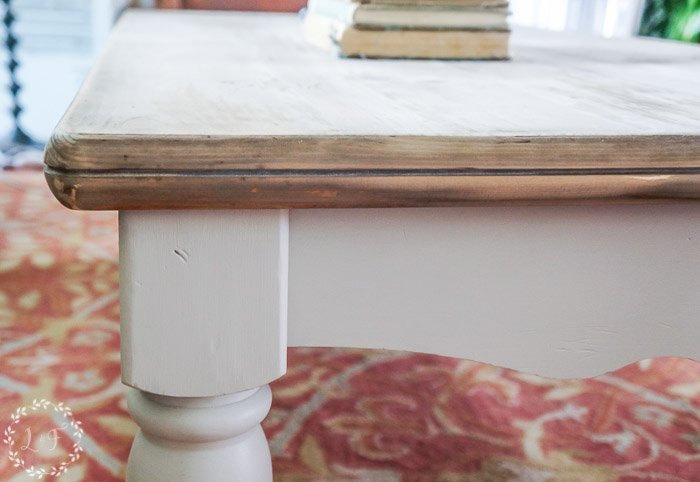
By the time I staged the table and had it ready to photograph, the top had darkened up quite a lot. It started to develop that lovely gray tone of old barn wood and was looking fantastic!
I wanted to keep the rustic look on the top as much as possible, so I just rubbed on a light coat of Beeswax Finish, rather than Tough Coat, to give the wood a little protection without changing the look of it too much.
With the painted Putty base and the new oxidized top, that perfect farmhouse look was pulled together!
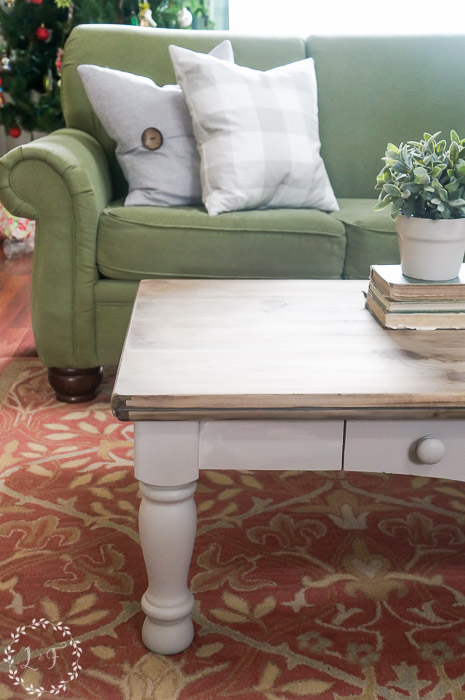

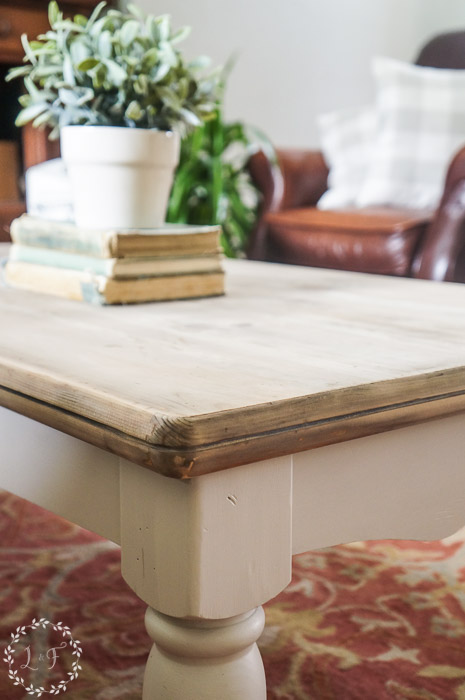
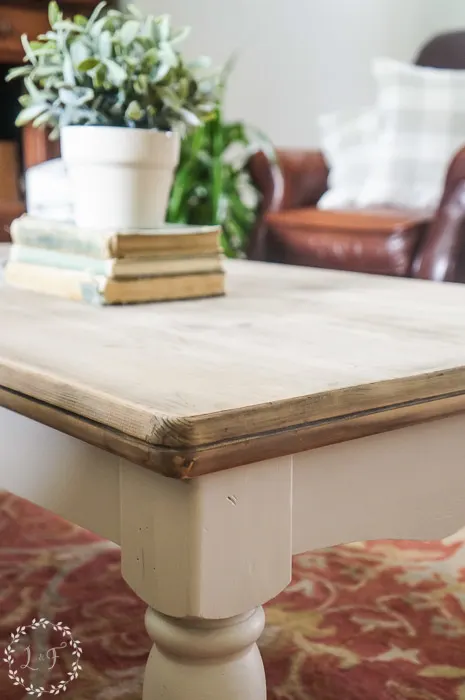
Can you believe that is the same, orange-pine wood??


The new design of the table must have been a home run because it sold in a day with multiple buyers interested, even before I could get it into my booth space! Isn’t it nice when that happens?
If you try out either the color Putty of the oxidizing solution, I would love to hear what you think. Put a pic of your new creation in the comments!
Thanks for coming along with me for this makeover!


Home Imagined Link Party #31 - The Antiqued Journey
Tuesday 14th of November 2023
[…] Pine Coffee Table Makeover French Provincial […]
Kelly
Sunday 18th of December 2016
Your makeovers are gorgeous! Where do you sell? I paint furniture as well but am having trouble selling.
Melanie
Wednesday 25th of January 2017
Thank you Kelly! I sell my pieces mainly out of my antique mall booth, but occasionally on Facebook. I wrote a post about where to sell your pieces, looking at the different options available. That may be a helpful read for you :) https://www.lostandfounddecor.com/where-to-sell-your-flipped-furniture-makeovers/
Kimberle McElwain-lovitt
Sunday 18th of December 2016
Love this look! Cannot wait to try.
Kimberle McElwain-lovitt
Sunday 18th of December 2016
Love this look! Cannot wait to try.