Remember this giant furniture haul I found on Craigslist back in March?

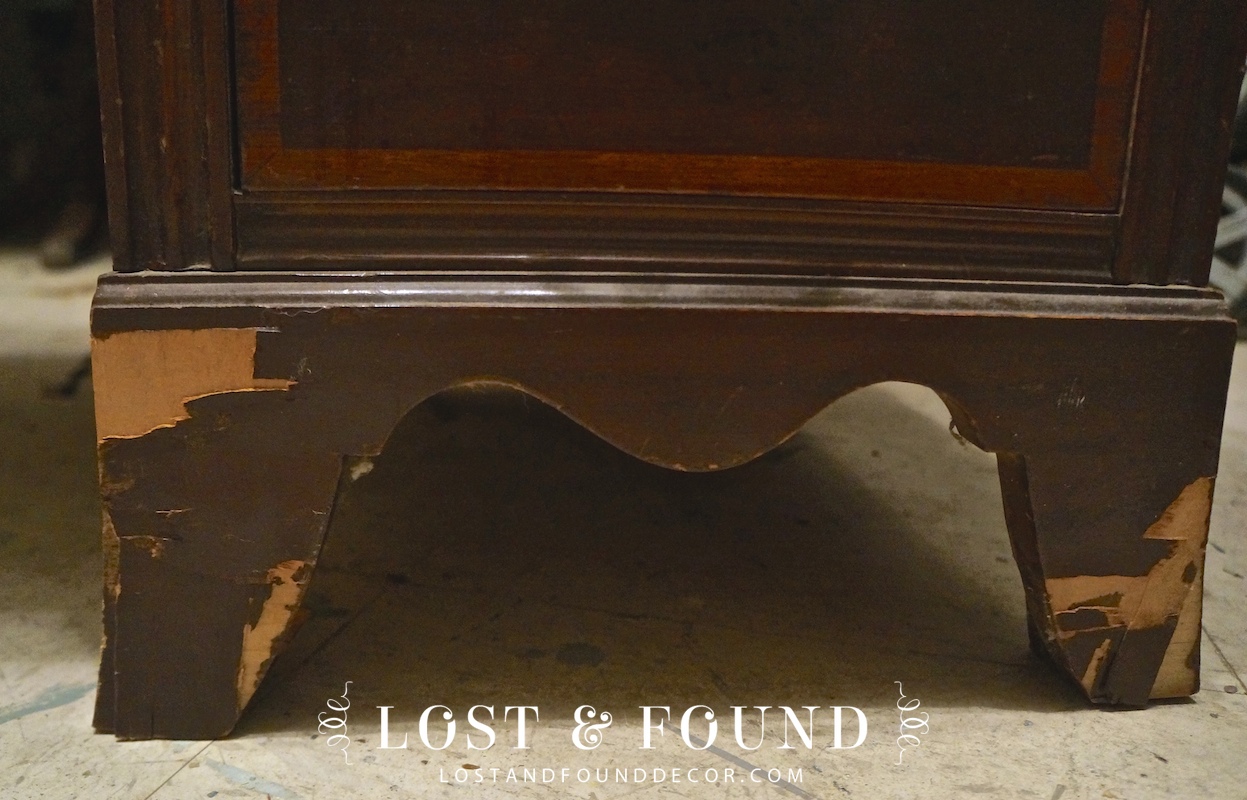
Well, this great Duncan Phyfe style vanity was one of the pieces I purchased. It was in pretty bad shape, lots of chipping and missed veneer and a really roughed up top. But, I love that style and knew with a little TLC it could be beautiful again.

The front legs were in particularly bad shape, so I started with removing the remaining veneer on those spots.
Most of it popped off easily, and a little sanding with the orbital took care of the few wood shards that were still glued down.
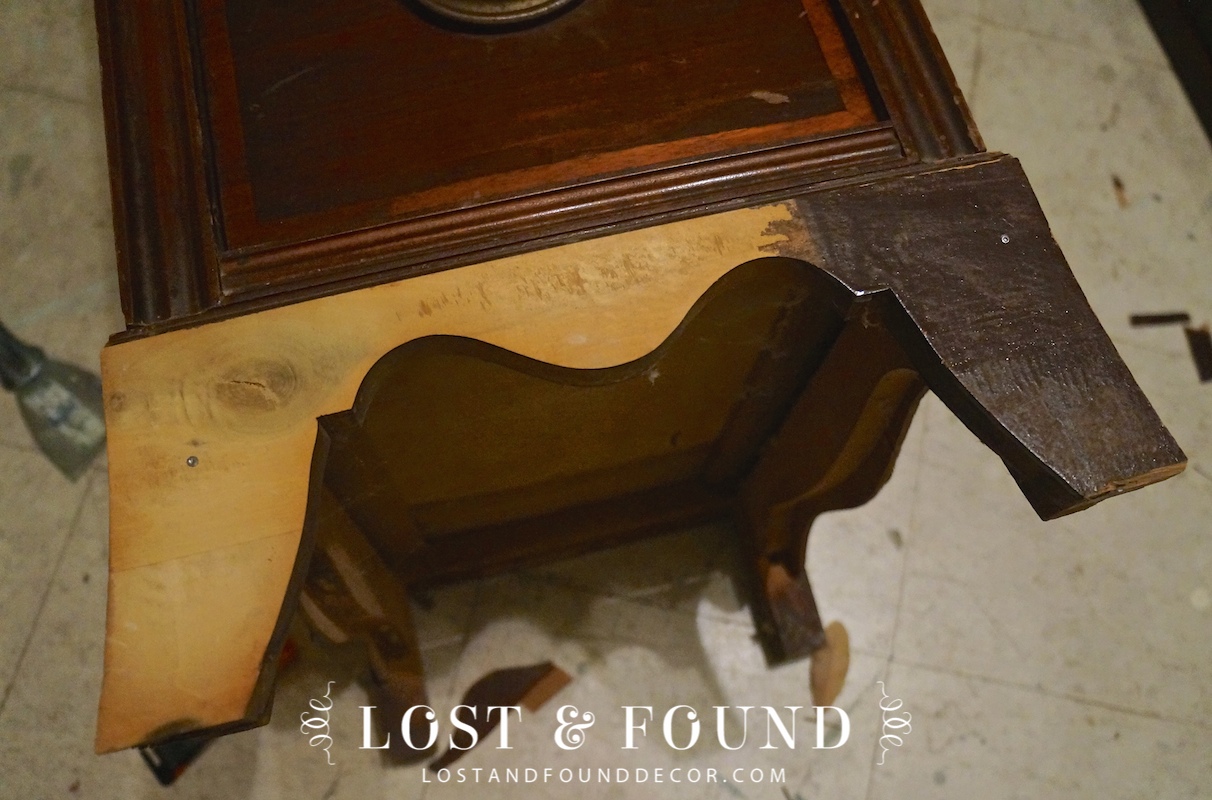
This is one of the front legs with all the veneer removed, and you can see that someone before me had taken off some of it already and just painted the wood underneath brown to match the veneer stain. Kind of a crummy fix if you ask me.
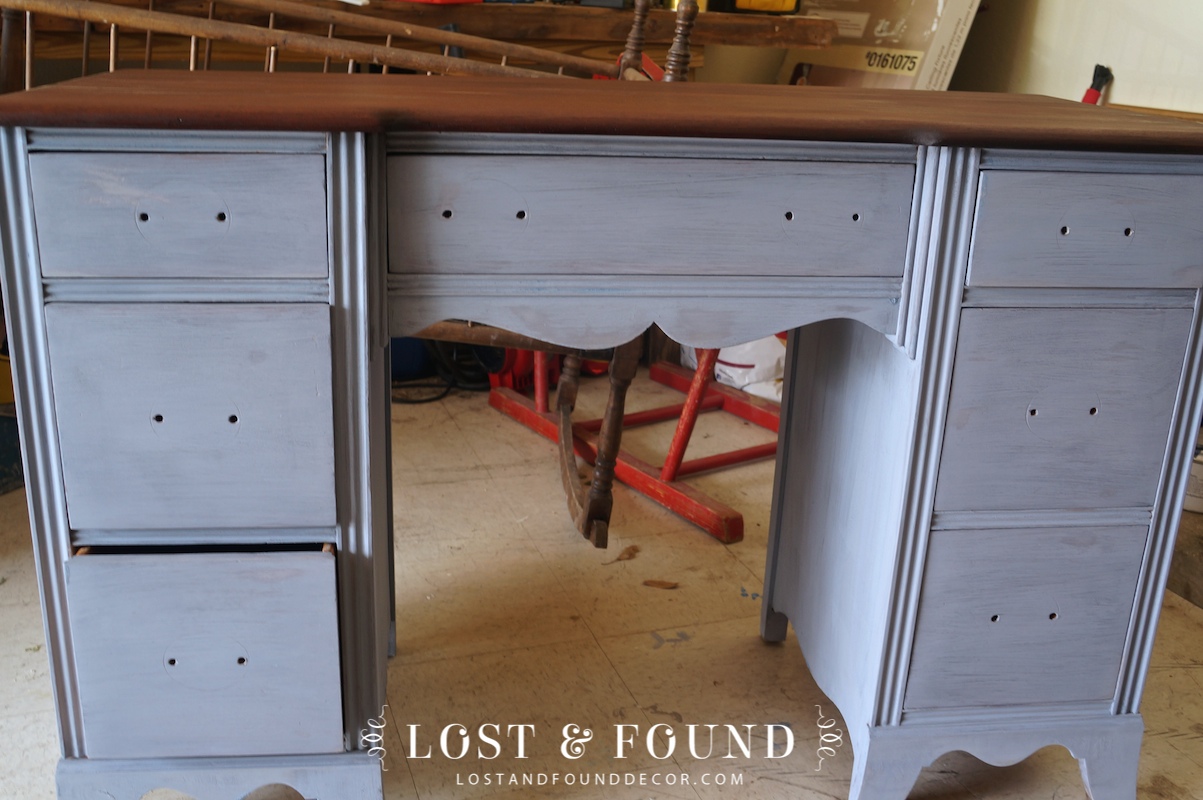
The piece also came with an attached mirror, and my first plan was to paint the whole thing in MMS Milk Paint Dried Lavender. The more I thought about it though, the more I thought all that purple might be a little too much.
Also, when I started looking at the top more closely I saw it was one beautiful, solid piece of wood–it needed to be given another chance! So I decided to get rid of the mirror and sand down the top to be re-stained; the base I would paint with the Dried Lavender.
I didn’t want the milk paint to chip much, so I gave the whole piece a quick sanding with the orbital sander (I’m too cheap to buy the bonding agent, I find a quick sanding works just as well).
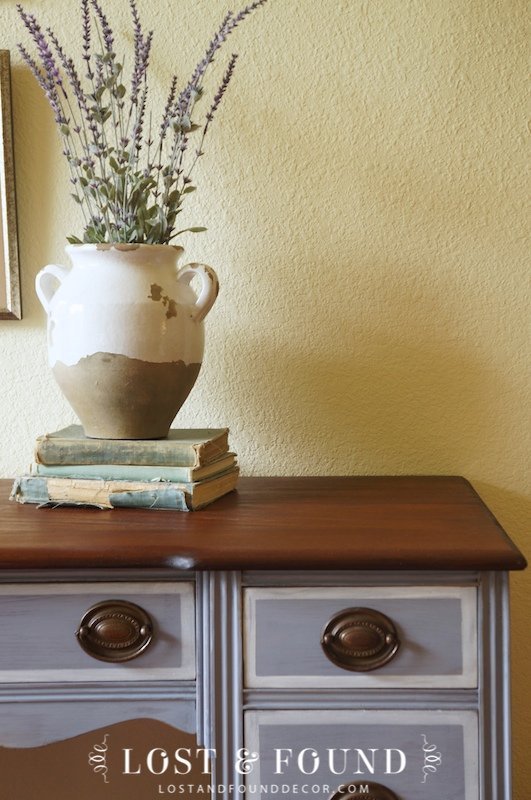
The top ended up sanding down so quickly and was smooth as silk. It refinished beautifully with two coats of Minwax Classic American. There were a few spots of bleed through on the base, but they were so small that I chose to let them just add to the imperfection of the piece rather than try to fix them.
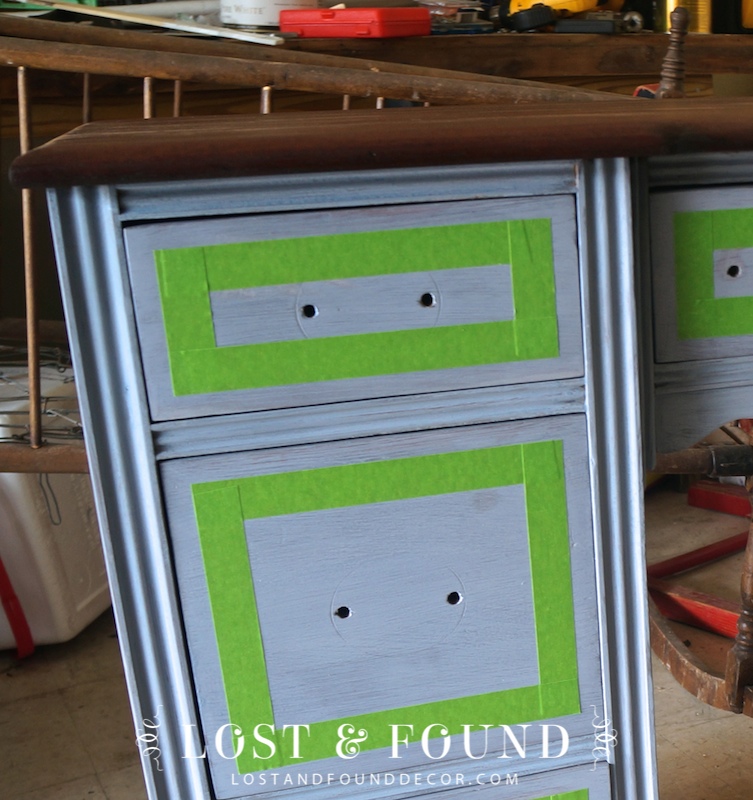
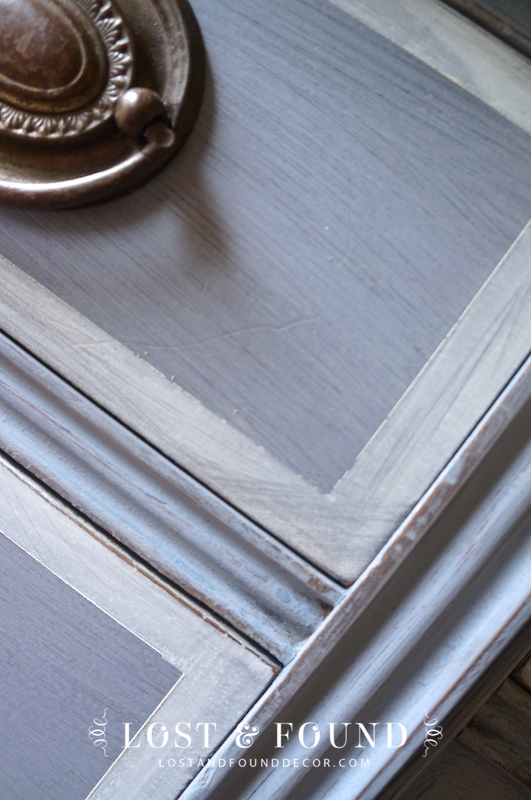
The original drawers fronts had a border of inlaid wood, so I decided to repeat that effect with a wash of chalk paint white. A frog tape border on the drawers did the trick. I went ahead and waxed the drawer fronts before putting on the frog tape so it wouldn’t pull off any of the milk paint.
Once the white was dry, the base got a very light sanding along the edges and a coat of wax. I also wiped two coats of an oil based poly onto the stained top to provide a durable, sealed surface.
Here is the final product.
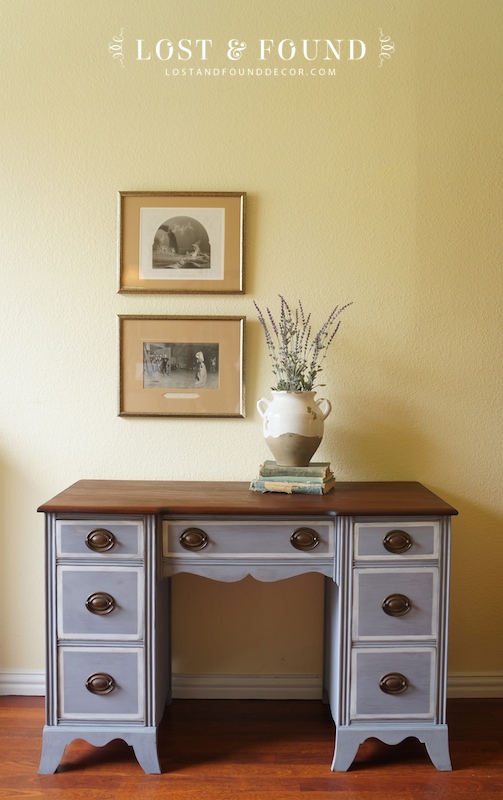

The milk paint did not chip at all, which I was happy with. The streaky, inconsistent finish of the paint though provides a ton of depth and character on it’s own.

The frog tape worked perfectly, making a crisp, clean border of washed white.
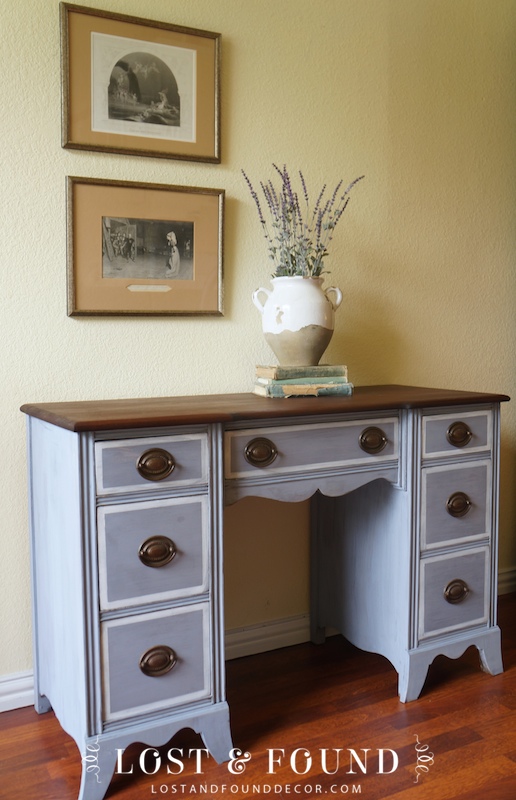
I’m so glad I decided to refinish the top. It is gorgeous now.


This piece will head up to my booth space sometime soon. I hope you like it! **update 5-18, the vanity sold after 2 days in my space to a local friend who will use it in her daughter’s room. Time for another project!**

Danielle
Saturday 24th of May 2014
Fabulous! Love the white detail too! x
kat
Friday 23rd of May 2014
Beautiful desk, great job! I really like the final effect.
Robinq
Thursday 22nd of May 2014
Lovely transformation. I hope you don't mind that I pinned it for inspiration....Stopping by from Redoux Interiors! Robin
Melanie
Thursday 22nd of May 2014
Hi Robin! I don't mind at all! Thank you for pinning, I'm so glad you like how it turned out. Thanks for stopping by :)
karen
Wednesday 21st of May 2014
This is so lovely. I love the details and how crisp it all looks. Thank you so much for sharing at Redouxinteriors!
Annie
Tuesday 20th of May 2014
lovely piece and wonderful transformation. I have one question: did you apply only one coat of the lavender in order to achieve the streaky look or did you create it with sanding?
Melanie
Tuesday 20th of May 2014
Thanks Annie! And in answer to your question, I painted on 2 coats of the Dried Lavender. The milk paint has that streaky effect on its own. It comes powdered and you mix it with water, so the pigments separate a little at times to make the color a little uneven. That's why you have to keep mixing and mixing and mixing your milk paint as you go, or else you will end up with a different color by the end of your paint job (speaking from experience)!