

A friend of mine had this little antique dresser passed down to her recently.

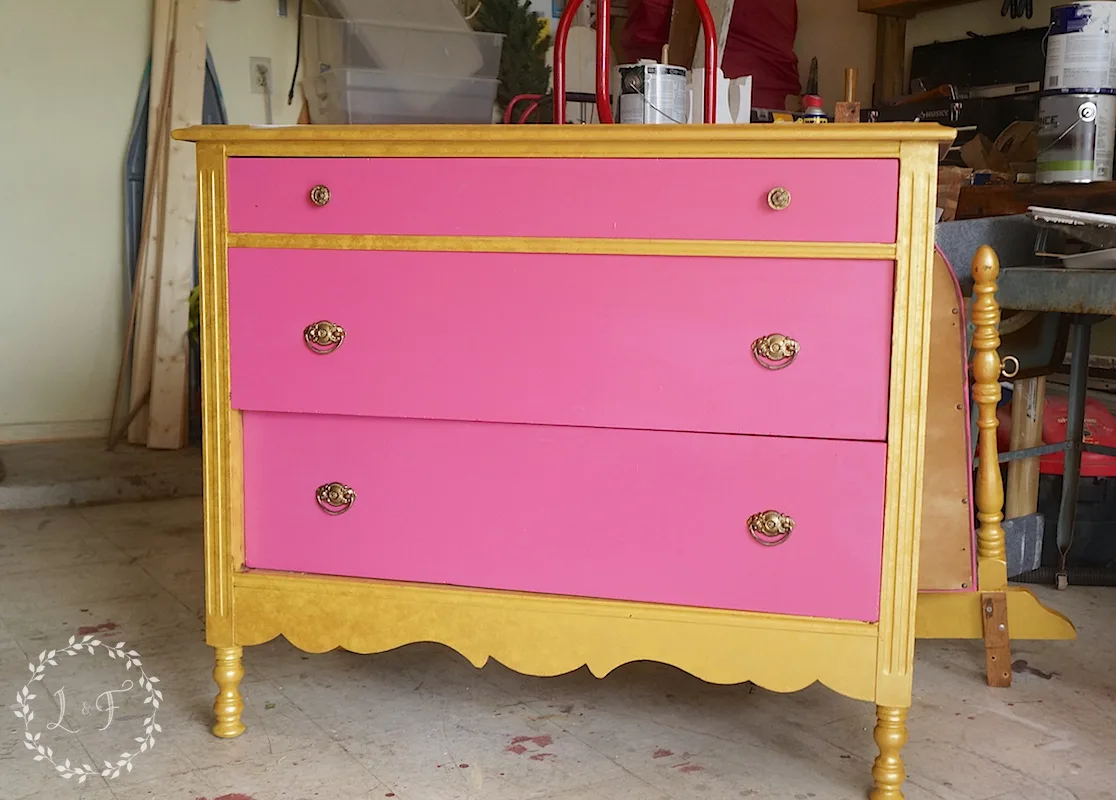
And you may not be able to really tell from the photo, but that’s not light maple wood–it’s sponge-painted gold. Yikes . . . Just not the best color combo.
Despite it’s Pepto-bismol color scheme, my friend was able to see the potential in this little piece. It was structurally sound, complete with matching mirror, and the perfect size for her youngest daughter’s big-girl room.
It just needed to not be pink and gold anymore.
She envisioned a farmhouse style distressed white, which I agreed would be lovely.
Here was the problem though–I could easily paint this piece white, but distressing it would be tricky. If I sanded down the white to distress some spots, it wouldn’t be a nice, stained wood-tone showing through, but rather that gold or pink.
We both agreed that wasn’t the look she was going for.
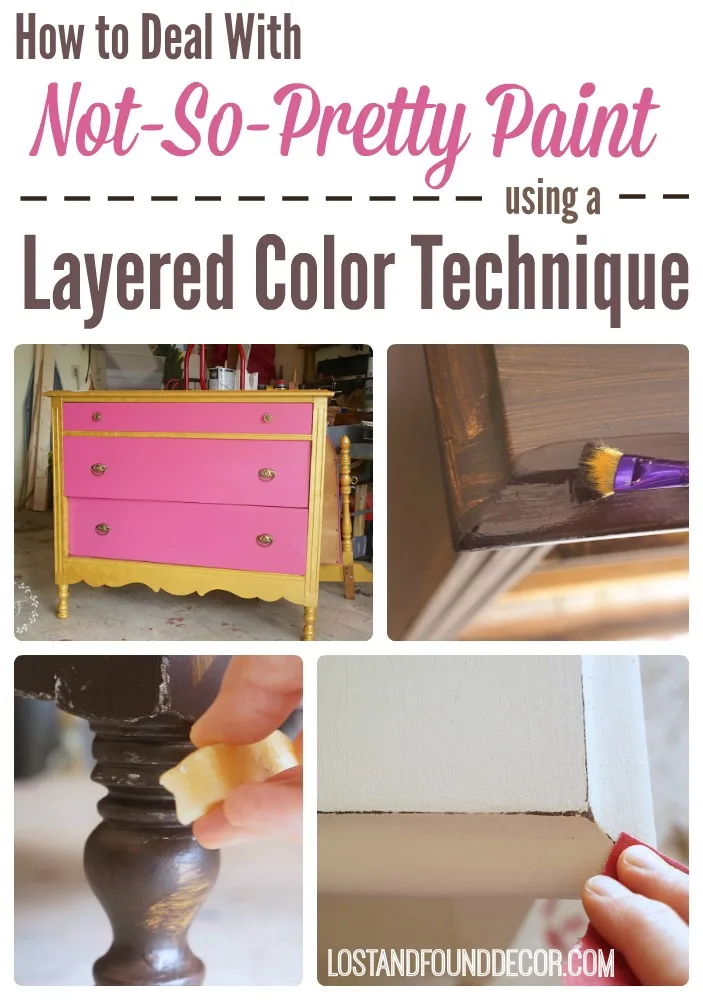
So that left me with 2 options for creating the distressed, farmhouse white look: Using a chemical stripper to take off all of that pink and gold paint, or using a layered color technique.
I really don’t like stripping paint, for a multitude of reasons, but mainly because I am lazy. Not only is stripping paint off a piece of furniture a labor intensive process, it’s also very messy and requires special cleaning up. Unless I have no other option, I’m gonna avoid stripping paint.
In my brain, option 2–the layered color technique–is much less work and my go-to trick for covering up paint I don’t want to see anymore.
So how does the layered color technique work?
To start, you need to decide what color you want to have as your base color. This is the color that will show up as your distress your top color.
I wanted the dresser to end up looking like a dark-stained wood that was then painted white, so for the base color, I chose Chocolate, the dark brown from the Fusion Mineral Paint line.
I cleaned and lightly sanded the whole piece like I usually do, then painted on a base coat of Chocolate.

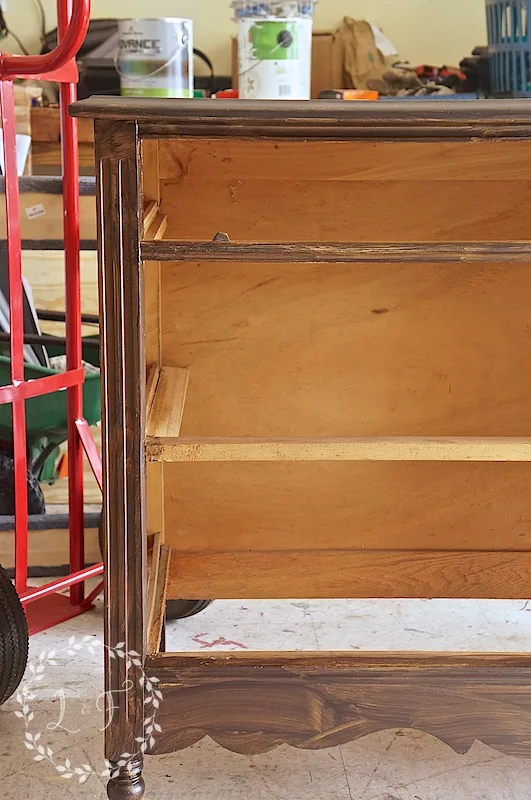
After the first coat dried, I went back with a small artist’s brush and painted a second coat of Chocolate just along the edges of the piece.

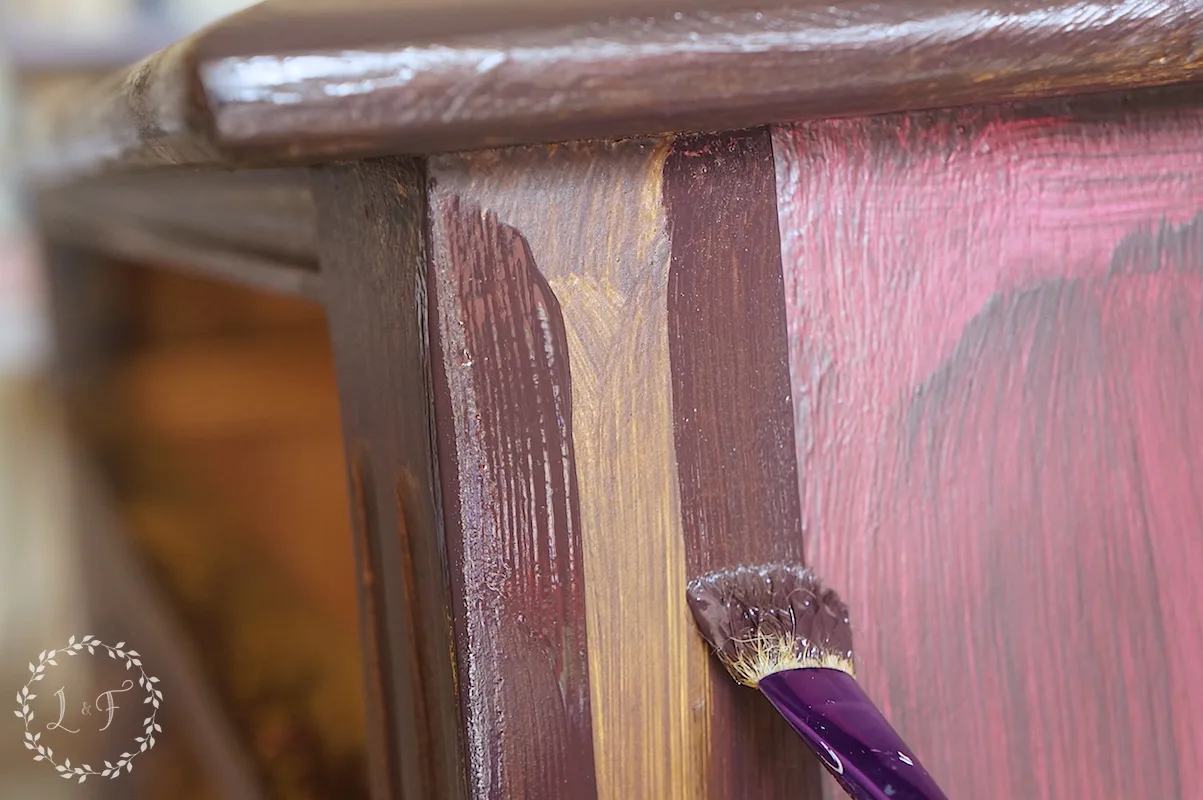
Why this one-and-a-half coats? Well, I wanted the brown to be over the entire piece, in case at any future point the white topcoat scratched–that way brown would show through.
I painted the second coat of brown along the edges though because those are the places on the dresser I knew I was going to distress, and I wanted to make sure no pink or gold would be able to peek through.
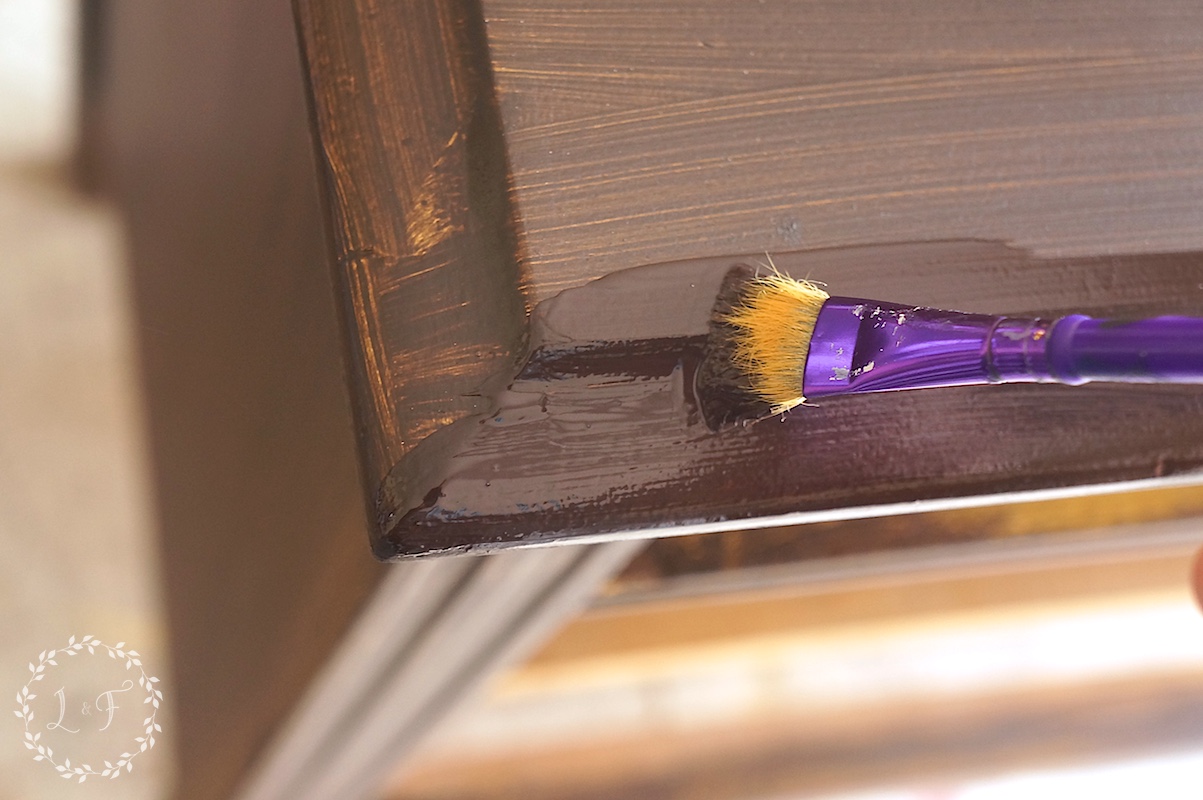
Now here comes the “magic” step of this process:
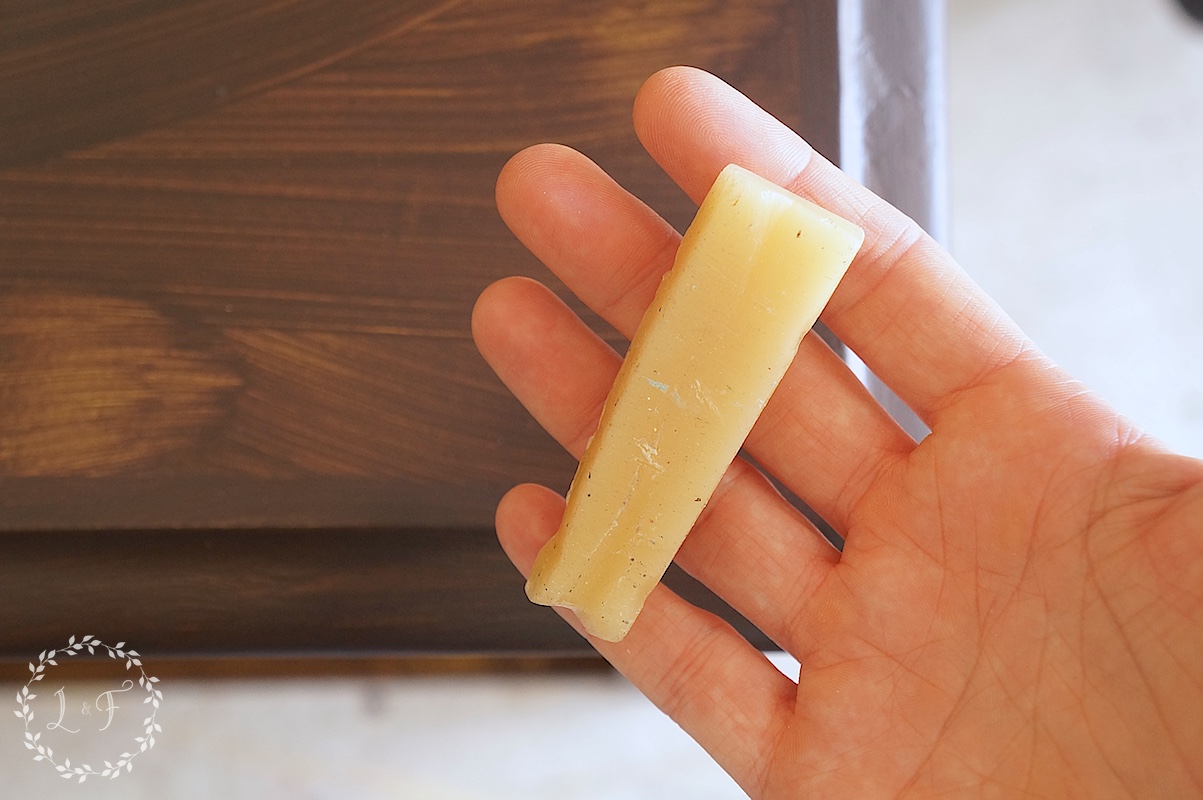

This is my Fusion Wax block, and it is what makes this technique successful. It’s nothing fancy–just pure beeswax, but it does work a little “magic.”
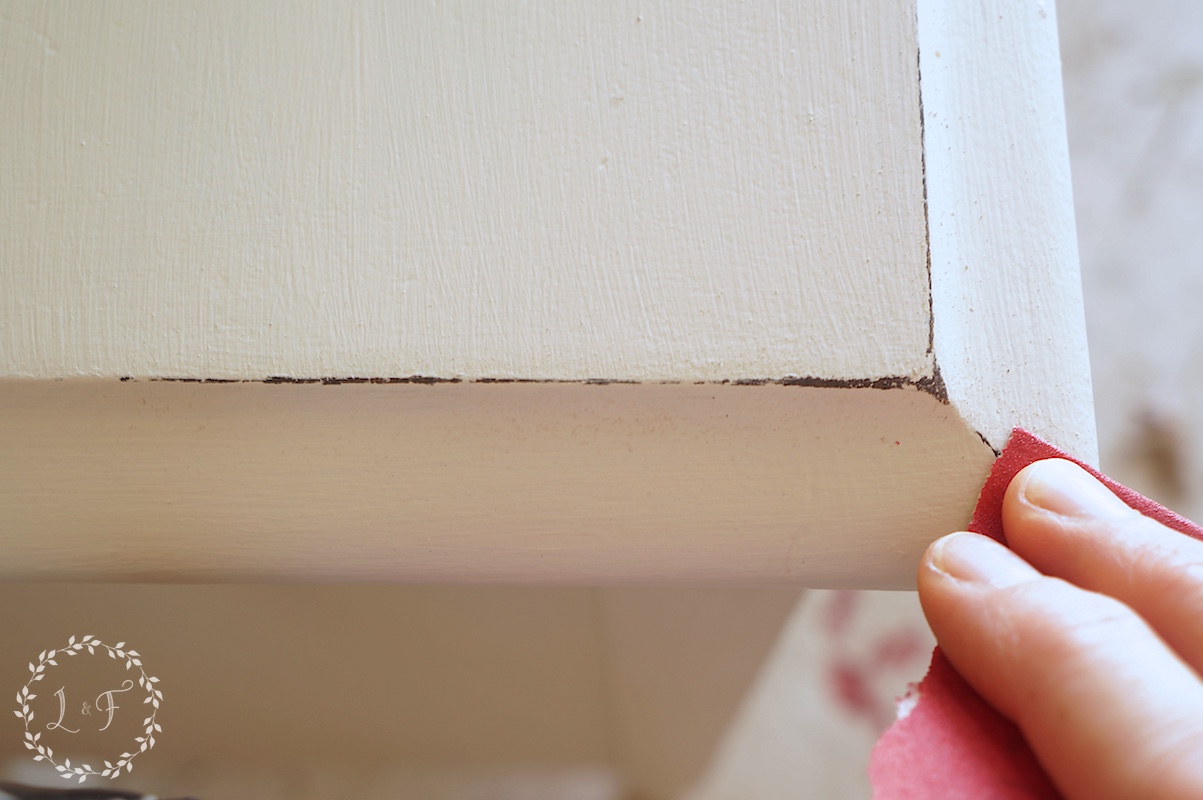
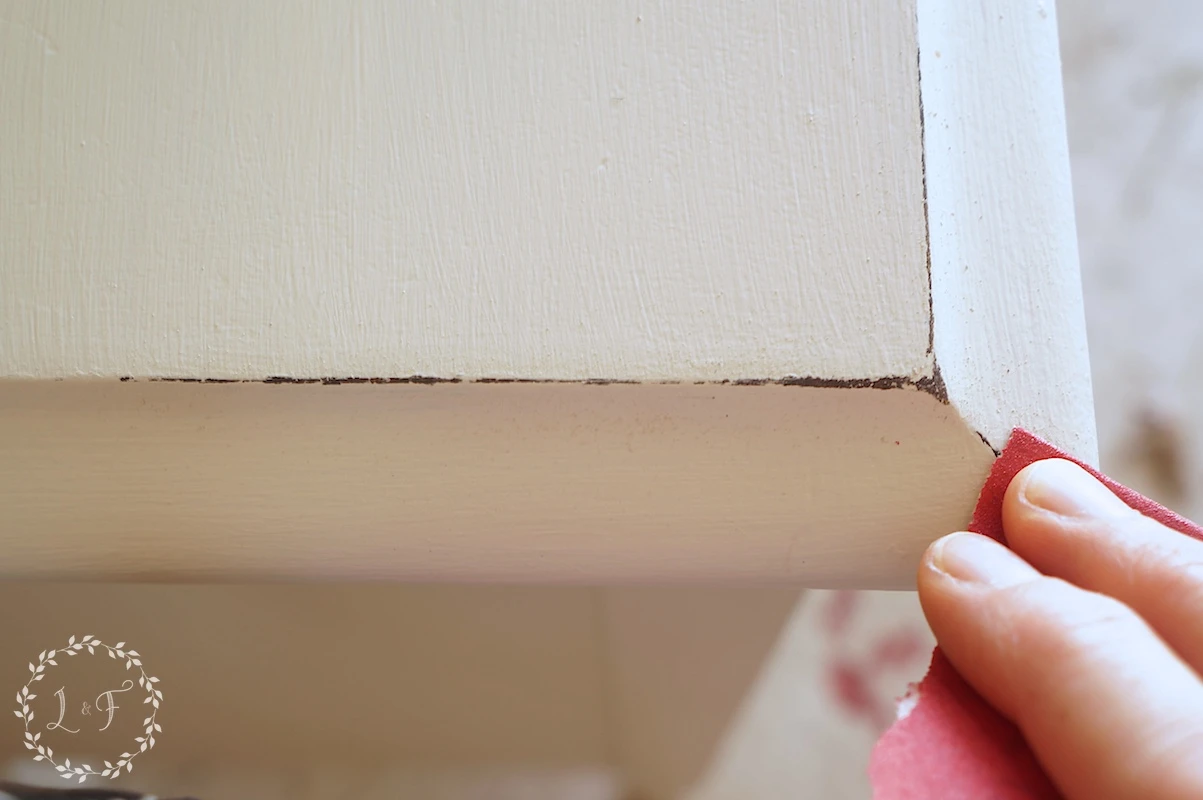
It’s the wax that will allow me to sand through my white paint and not the brown as well–that way it’s the pretty brown that shows up in my distressed spots and not the gold or pink.
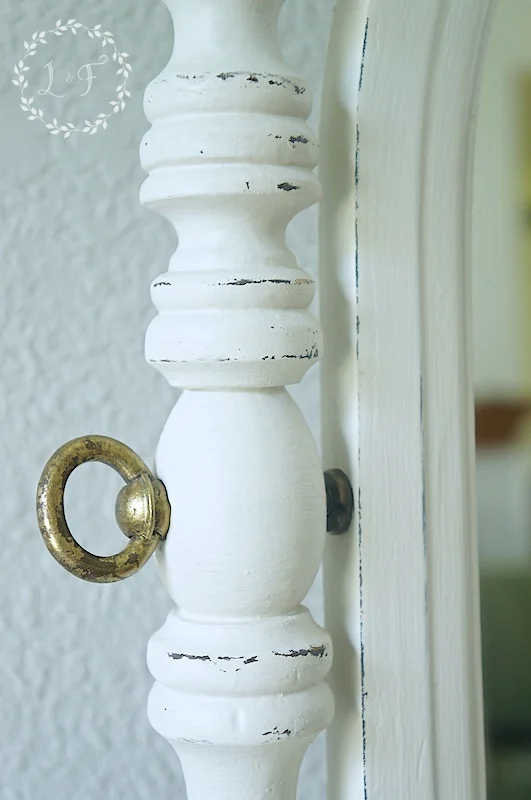
To get the layered color look, after the brown paint was dry I rubbed my wax block all along the edges of the dresser–just on the areas I knew I would later want to distress.
I like to focus my distressing on the edges and raised areas of my pieces because those are the places where paint would wear off naturally over time. So all the corners, edges, and raised spots on the legs and mirror stand got a good rub of wax.


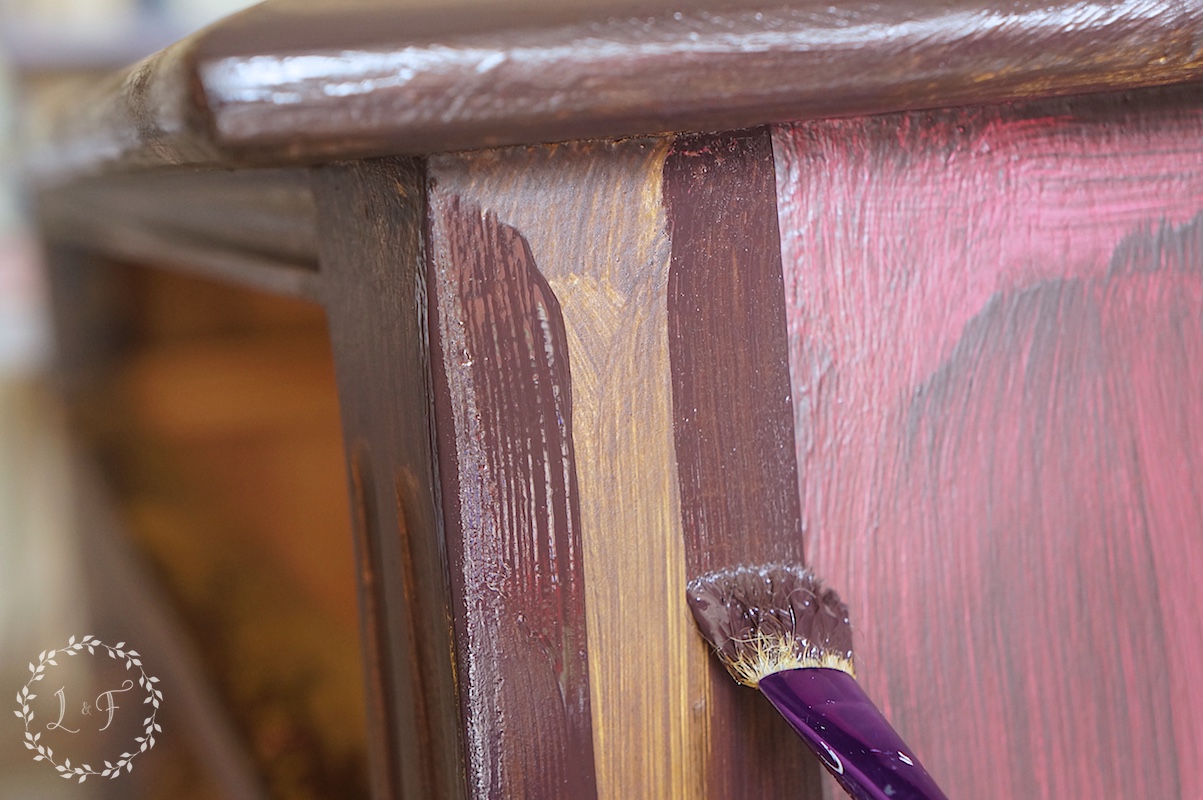
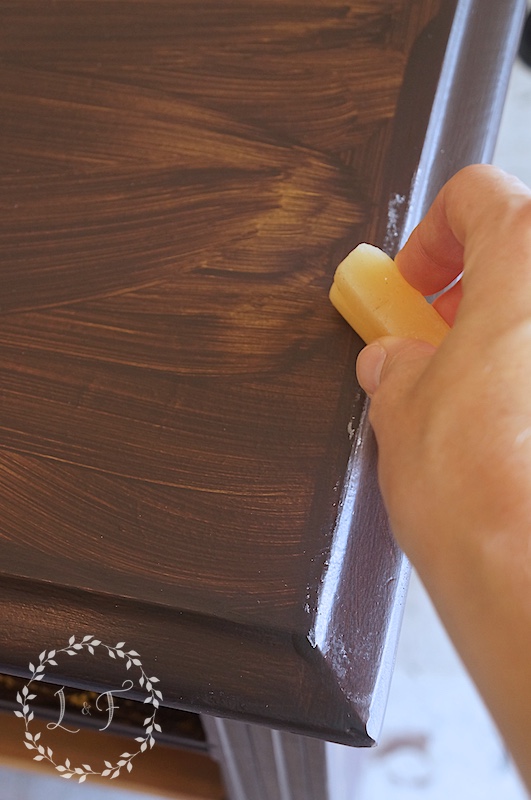
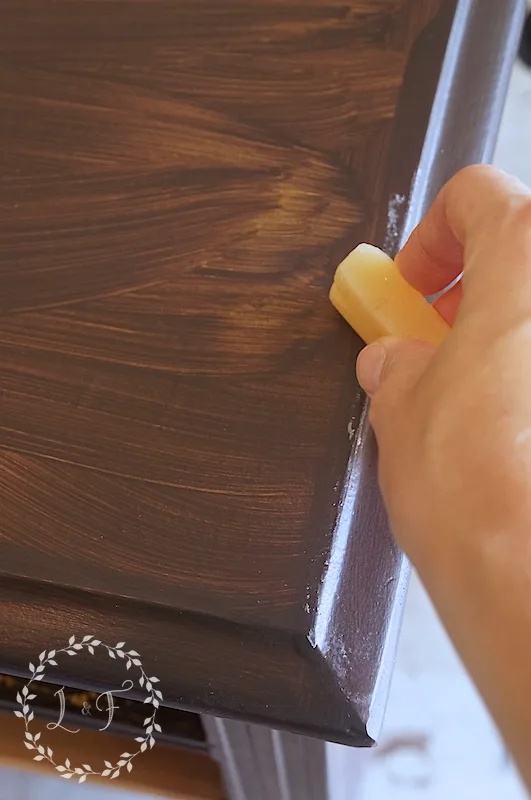
Once the wax was on all of the spots I planned to distress, I painted on my white paint (this time using Fusion Champlain) as I normally would.
Painting over the wax will leave your finish a little messy in spots, but don’t worry! All of those gummy, messy spots will come off when you sand them to distress.
I typically rub on the wax block every other coat I paint. This dresser needed 3 coats of Champlain to get full coverage, so I waxed the edges 2 times: once on top of the brown base color, and once on the 2nd coat of Champlain.
Basically the wax acts a resist for whatever paint goes on top of it–meaning the paint that is laid down on top of the wax will not adhere. When it’s time to come back and distress, all you have to do is barely touch it with some sandpaper and it comes right off.
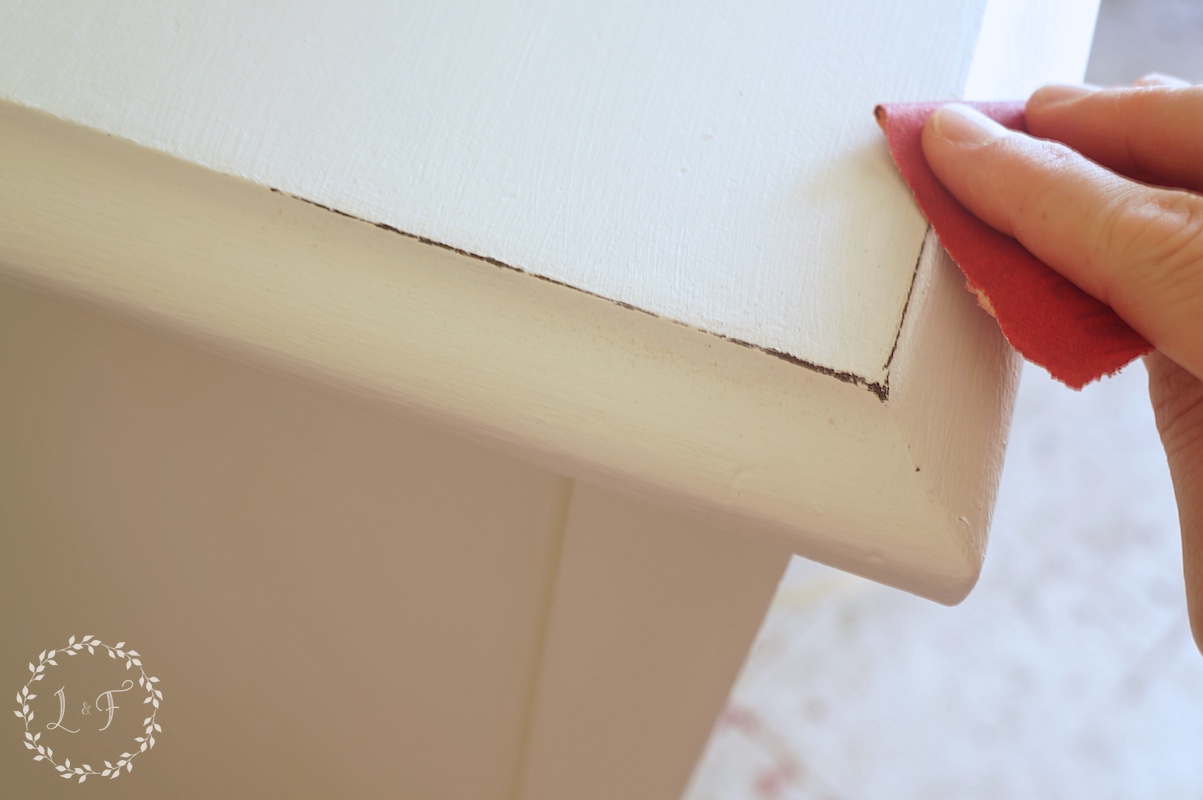

Since you don’t have to use much pressure at all on the sandpaper to rub off your top color, the sandpaper doesn’t get the chance to rub off the bottom color as well.
Try sanding through just one color without a wax resist and it may work about half of the time . . . The other half of the time you will wind up sanding through both colors.
This is the same trick I used when I painted my kitchen island. The base color of my cabinets is a light, honey-oak. I knew I wanted to create a distressed finish, but I didn’t want that honey-oak color being what came through.

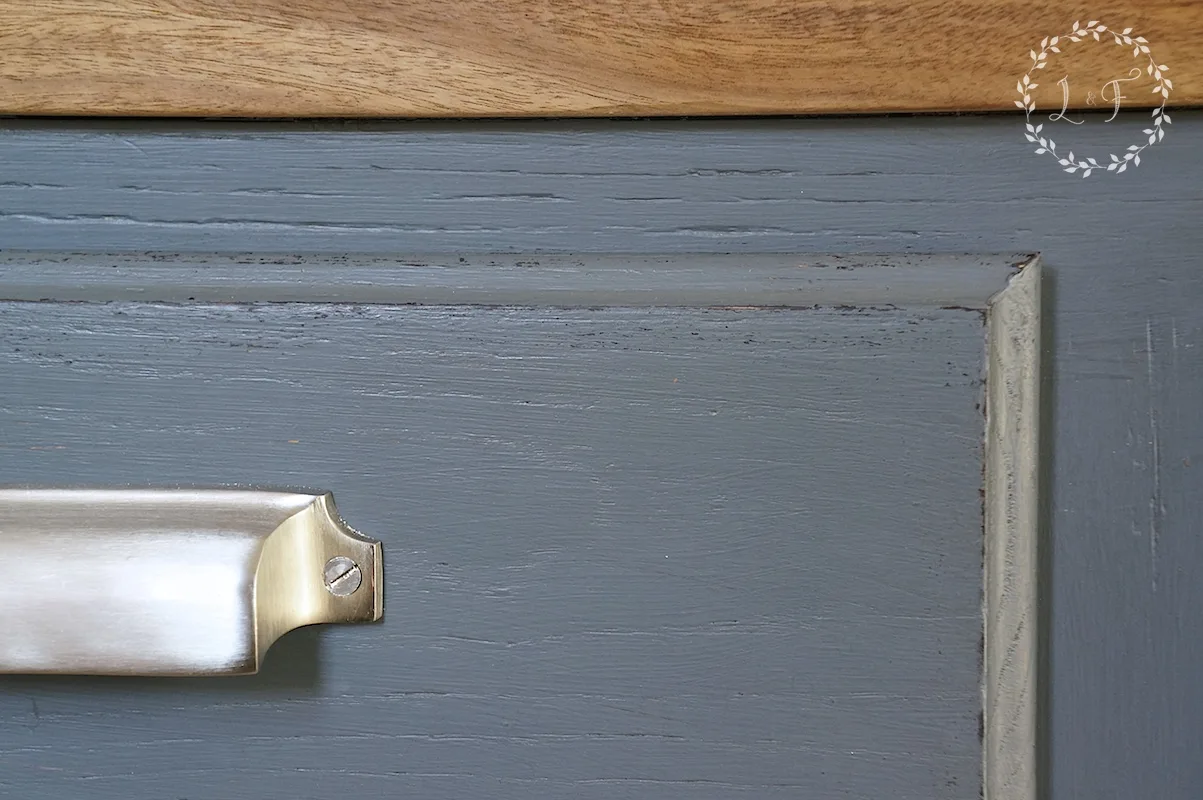
So I used Chocolate as the base color here too, then Soapstone on the top. That nice, warm brown you see peeking through the gray isn’t my stained island cabinet, it’s the Chocolate paint!
This trick works well for not only covering up paint colors you don’t want to see, but also for protecting a base wood finish that you have painted over.
Sometimes when I distress a piece, I wind up sanding through the stain on the wood underneath as well (especially on older pieces where the stain is really aged), and then the raw wood is what shows up–again, not the look I’m going for!
You could use the wax block trick to create layers of whatever colors you like . . . I could have done a base of gray on this piece with the white on top, or a base of blue, etc.
And you can rub the wax onto as much or as little of the piece as you like, depending on the look you want to create. It really is a great trick!
So how did this dresser turn out? Here’s a peek:

You’ll have to check back in a few days to see the full piece
(post now live, click here to see the full reveal)!


Sharry
Monday 29th of August 2016
This is THE best description and set of instructions for layering and distressing I've seen anywhere. I've been flipping furniture for about two years now and have experienced exactly what your instructions will help me avoid in the future! I find it quite frustrating when I see posts or blogs on Pinterest that don't give detailed instructions. Thanks so much for doing that here.
Melanie
Tuesday 30th of August 2016
Thank you so much Sharry! I am O glad you found it helpful. Happy Painting!
Farmhouse Antique Dresser Makeover Using Layered Paint Technique
Tuesday 14th of June 2016
[…] you missed that step-by-step post, you can read it here–it’s got some great tips in […]
Farmhouse Antique Dresser Makeover Using Layered Paint Technique
Tuesday 14th of June 2016
[…] you missed that step-by-step post, you can read it here–it’s got some great tips in […]
Ivory
Monday 13th of June 2016
Wow, what a beautiful job. I love it!
Melanie
Tuesday 14th of June 2016
Thank you so much!