Ready for a good old-fashioned furniture makeover today?
Follow along, and I can show you how to paint your own old furniture!
I have a bunch more painted furniture pieces on deck to share with you, but today let’s start with this lovely antique desk.

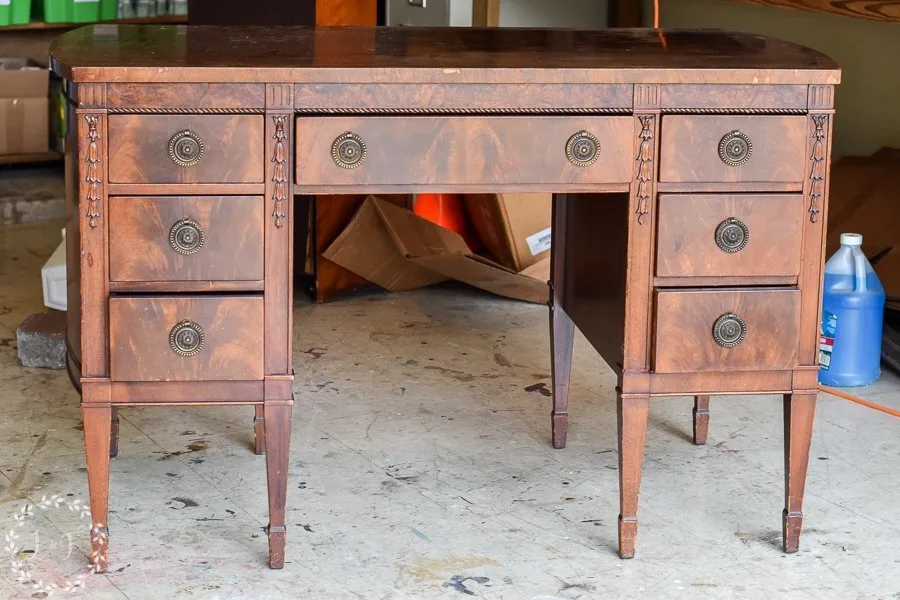
Beautiful antique desk but needs some TLC!
DIY Painted Desk
This old desk was a Facebook find.
I was in love from the moment I saw its tiny little picture on my phone!
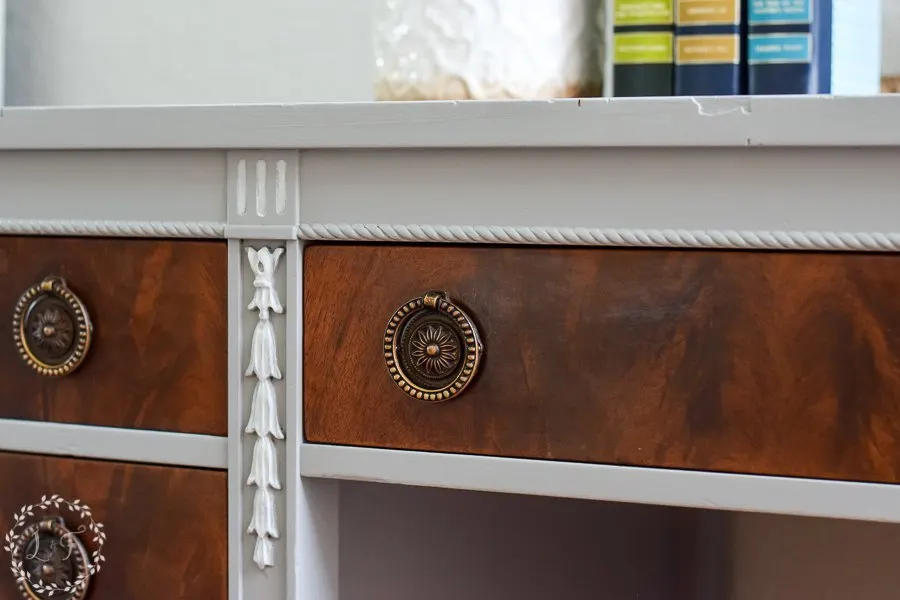
It had all its original hardware (score!) and this beautiful burled wood veneer on parts.
It was solid and sturdy but had a few places of chipping veneer and missing trim.
All of this made it the perfect candidate for a DIY paint job.
I knew paint would be able to cover up those little faults and make this desk shine again!
How to Prep Old Furniture for Paint
Prepping a great, old wood piece like this is easy!
1) Quickly Clean It: The first step was to give it a cleaning with Fusion’s TSP.
TSP removes any buildup of grease and grime (why is this important? See why here).
2) Lightly Sand It: After it dried, I lightly scuffed it with 180 grit sandpaper.
BUT NOT the drawer fronts.
Why not sand the drawer fronts?
Well, I decided to keep those unpainted to highlight that beautiful burled wood veneer.
It was still in great condition.
DIY Furniture Painting Steps
My favorite paint to use for this kind of quick “cover up” job is Fusion Mineral Paint.
Fusion is not a chalk paint, but it works like one. It’s super easy to use and has minimal prep!
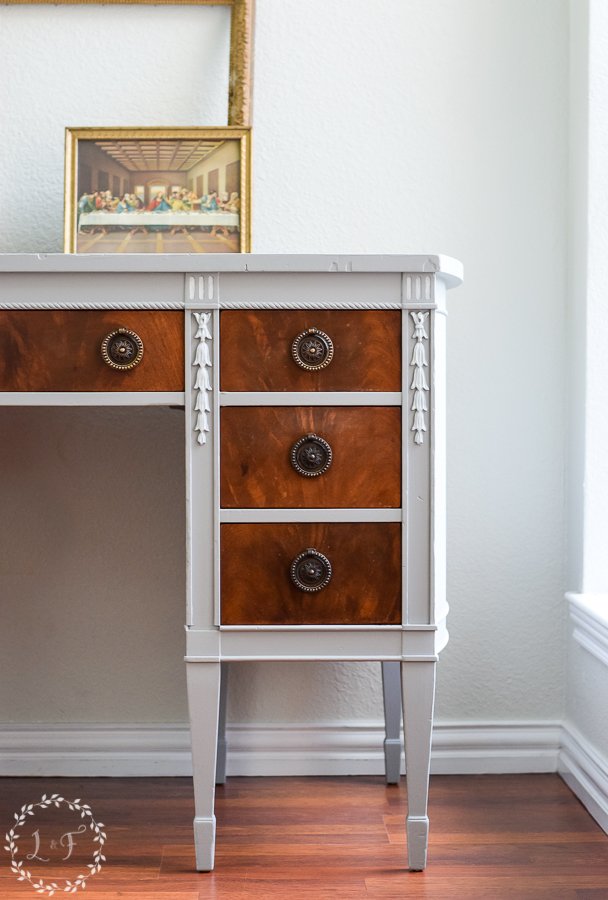
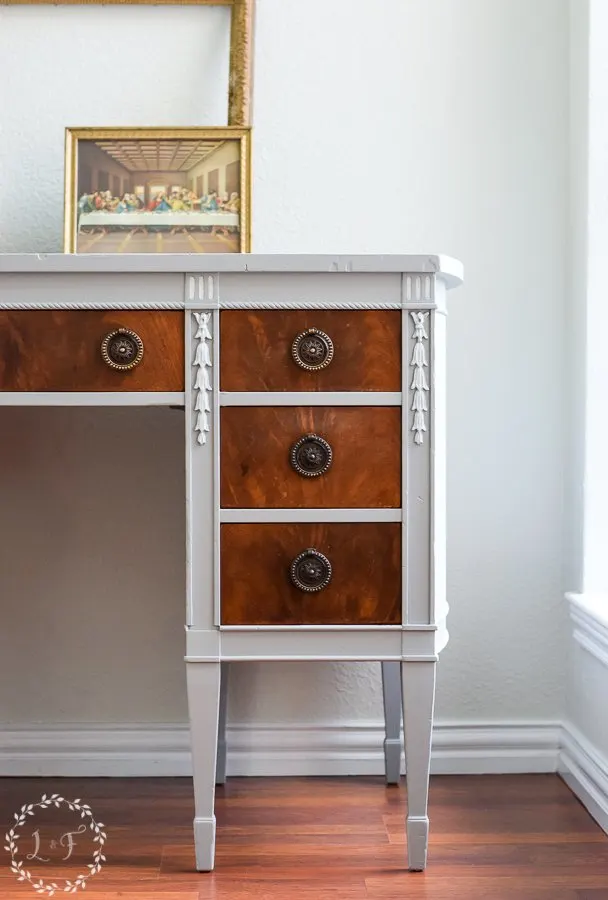
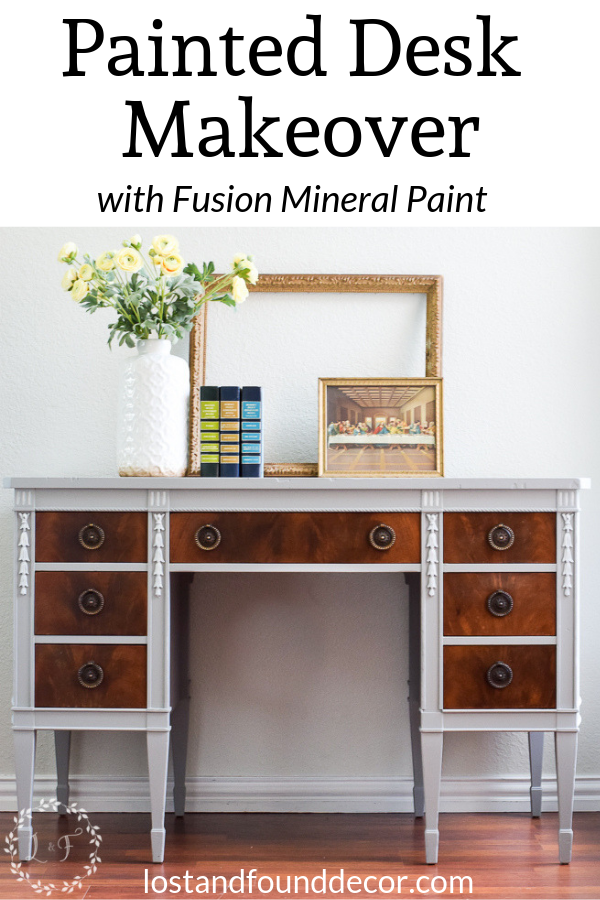
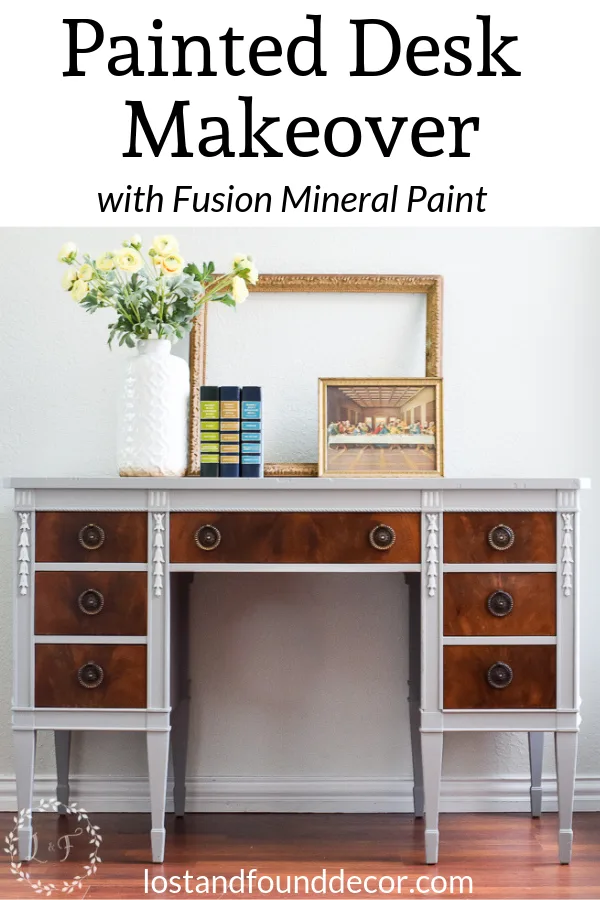
I chose the soft gray Little Lamb and gave the whole body of the desk 2 coats of that color.
I wanted to highlight the pretty applique accents a bit more.
So I dry brushed on some of the Fusion white color Raw Silk, just on those spots.
If you want to see more about dry-brushing, you can see that here!
After Photos
Ready for a new look on this DIY painted desk?

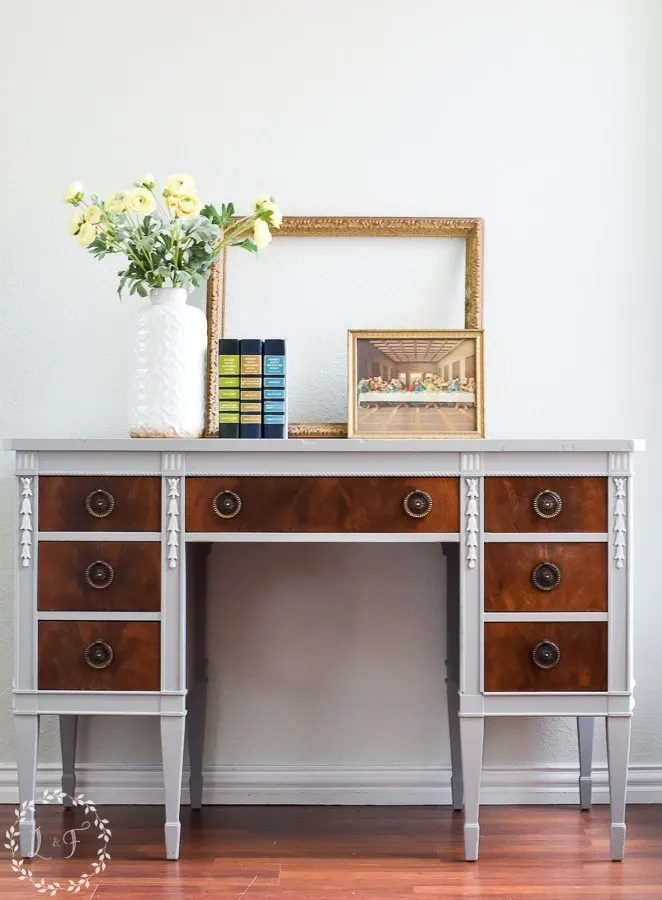
The soft, elegant gray color is the perfect contrast to the beautiful, warm wood of the drawer fronts!
And it also covers up all the dings and imperfections this desk had from being loved for so many years.
Now it’s fresh and clean again and ready for many more years of use!
You don’t always have to paint an entire piece of furniture to give it a new look.
I love leaving some of the original wood finish when I can–and who could resist it when it was so pretty!

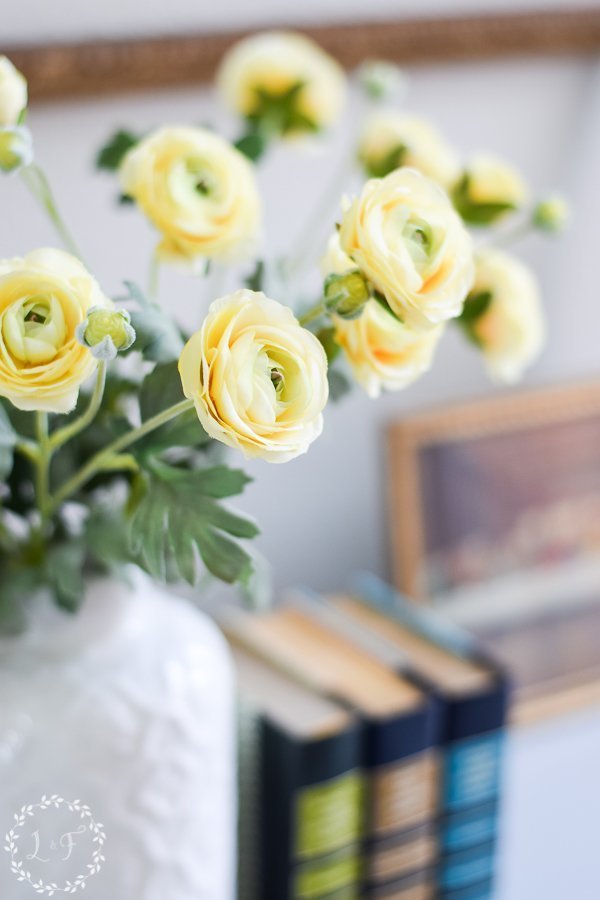
I staged it with some of my favorite yellow flowers for a fresh and bright feel.

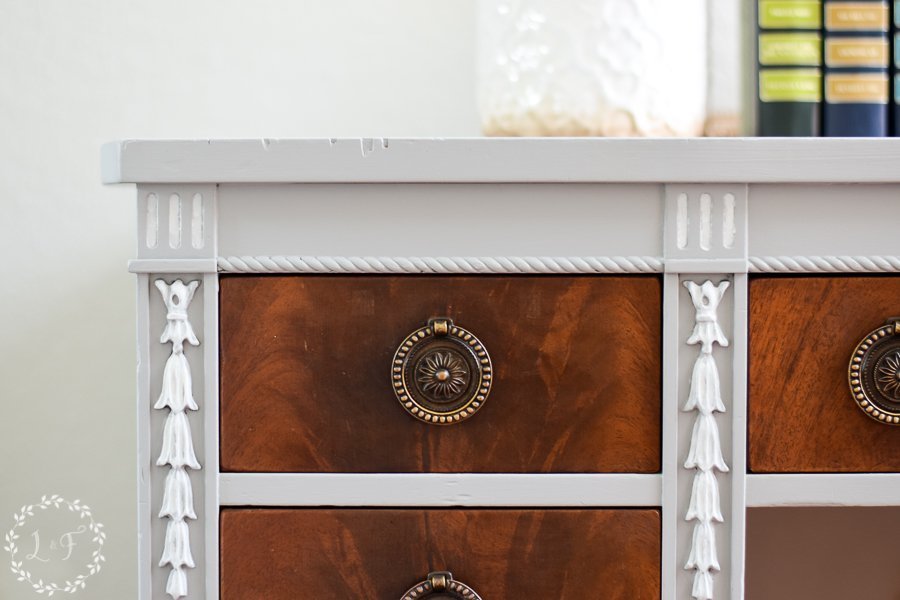

And do you see how dry-brushing on a bit of the white paint helps those pretty carvings stand out more?


Do you have an old desk you can see giving a makeover?
With a little TLC, those old, wood pieces can look like new again!
All of the paint and products I used for this DIY painted desk project can be found at both of my local Dallas area retail locations, as well as in my online shop.


Thank you for letting me share with you today!


Vickie Delvac
Tuesday 22nd of January 2019
Melanie, That came out beautiful! It's the best of both worlds. I love painted furniture but I also really love beautiful wood grain.
Melanie
Friday 1st of March 2019
Thank you Vickie! I was really happy with how it turned out.
Vickie Delvac
Tuesday 22nd of January 2019
Melanie, That came out beautiful! It's the best of both worlds. I love painted furniture but I also really love beautiful wood grain.
Melanie
Friday 1st of March 2019
Thank you Vickie! I was really happy with how it turned out.
Carol Perez
Monday 21st of January 2019
well done
Carol Perez
Monday 21st of January 2019
well done
cchemid
Saturday 19th of January 2019
Just beautiful, Melanie!