Well, summer is here! It’s the season of backyard barbecues, days at the lake, and lazy days on the back porch spent with friends and family.
In that summer spirit, I’m sharing today a quick and easy craft project you can use to welcome guests to your home or decorate your outdoor space.
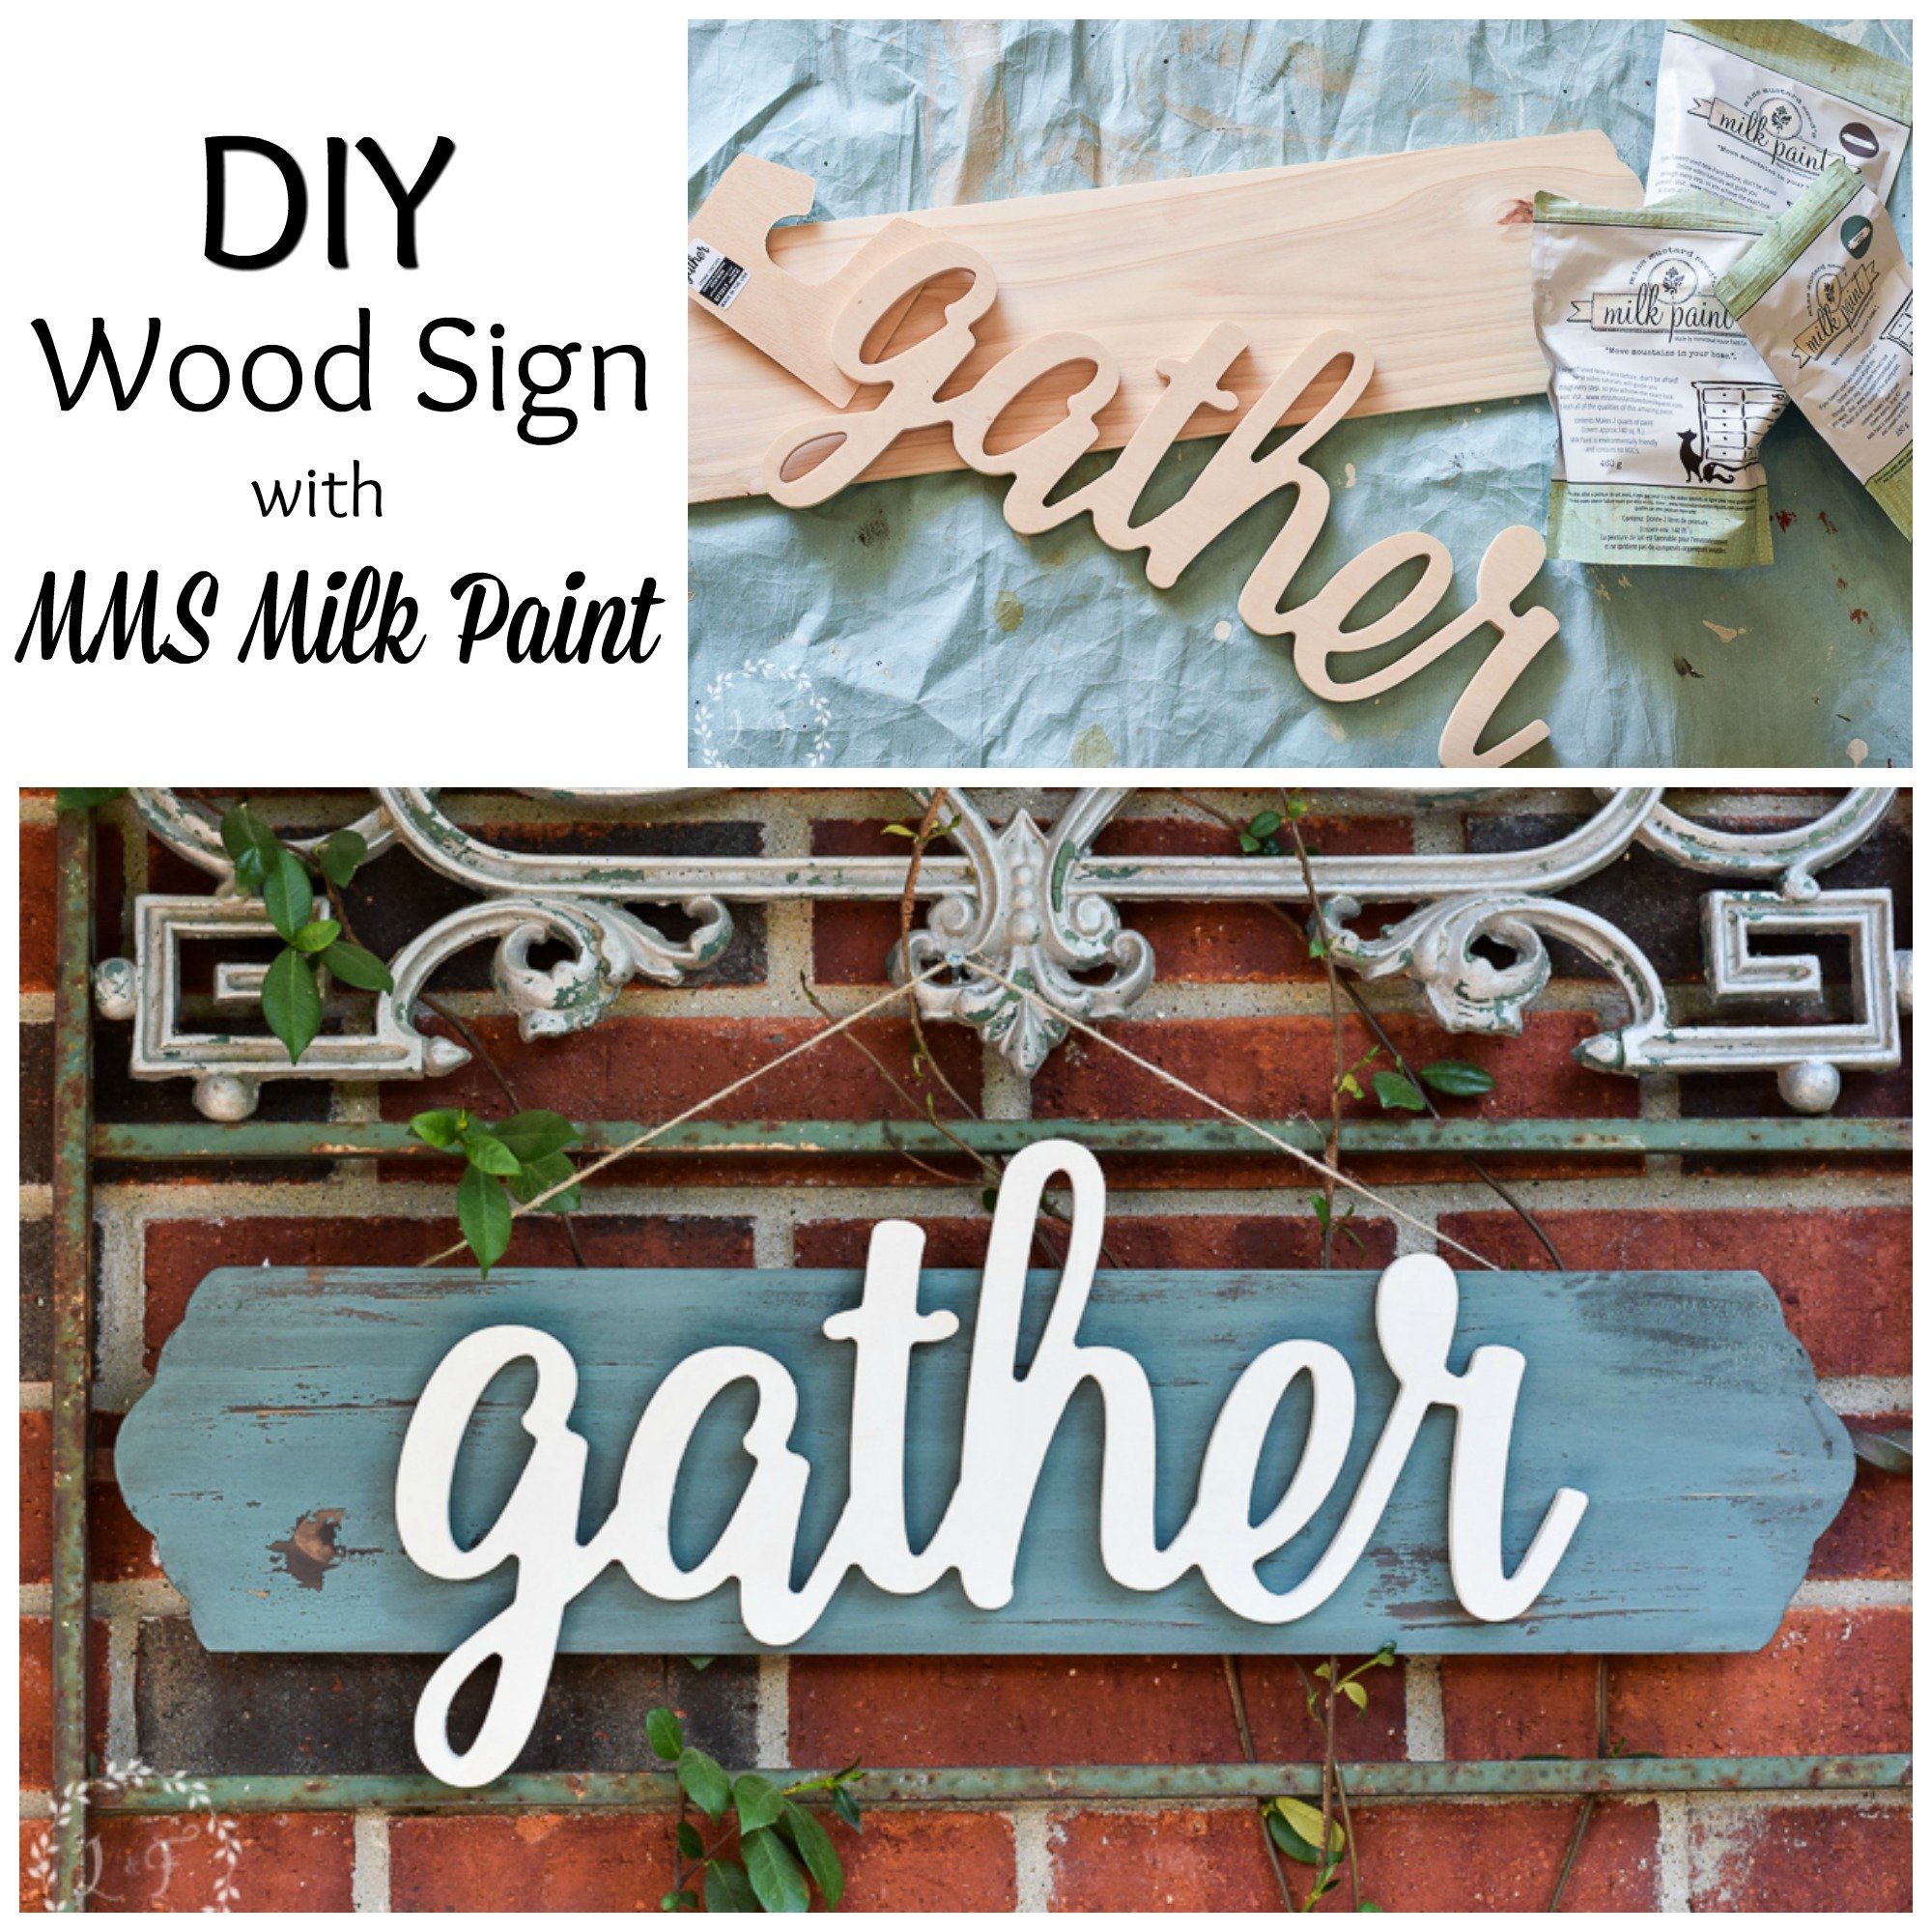

I love all the cute, painted script signs that are around these days, but let’s face it—I’m not so great at drawing or painting pretty, script words. I was never that girl who was able to doodle her name 15 different cute ways on the back of her notebook!
So when I found these great raw wood materials at my local Hobby Lobby, I knew this was the perfect option for making my own wooden sign with no word art skill required!
I decided to use Miss Mustard Seed’s Milk Paint for this project. Milk Paint works really well on raw wood—it soaks down into the wood and is very durable as a result. And I just happen to have a stash of milk paint in my garage from leftover furniture projects!
I would love to share with you today the steps for making this sign so you can make one using your own favorite colors combos!
Materials Needed
1. Unfinished Wood Sign (I got mine at Hobby Lobby)
2. Unfinished Wooden Word (also from Hobby Lobby)
3. Miss Mustard Seed’s Milk Paint Sample Size in 3 colors (I used Curio, Kitchen Scale and Farmhouse White
4. Miss Mustard Seed’s Milk Paint Beeswax
5. Miss Mustard Seed’s Milk Paint Antiquing Wax
6. Paint Brush
Steps:
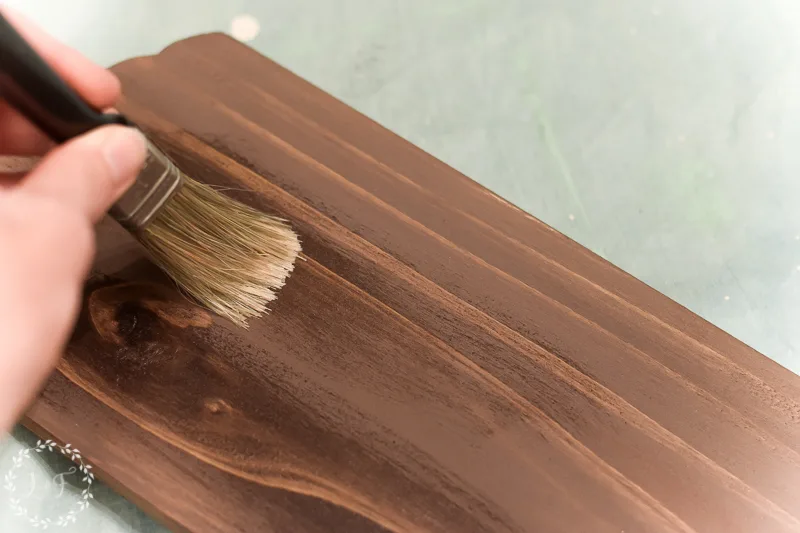
1. Stain the board with Curio and allow to dry
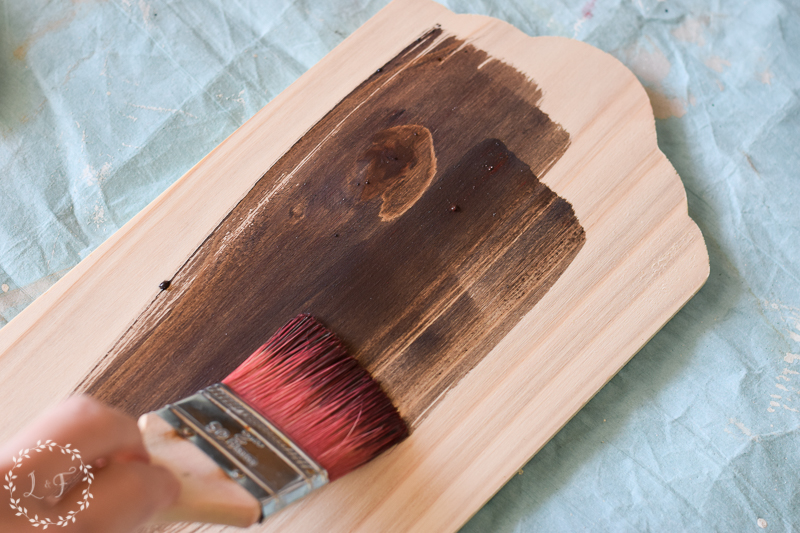

Did you know you can use milk paint as a stain on raw wood? Instead of mixing it as you normally do (1 part paint powder to 1 part water), you make a thinner mixture by adding more water. The more water you add, the lighter color stain you can make.
For this project, I mixed 2 parts water with 1 part Curio milk paint, which is the dark brown color in the line.
I painted it onto the board then wiped back the excess—easy peasy! Now the base of my sign wouldn’t be that yellow, raw wood, but a nice, dark wood base that would contrast well with any other colors I painted on top.
2. Brush MMS Beeswax all over your Curio-stained board

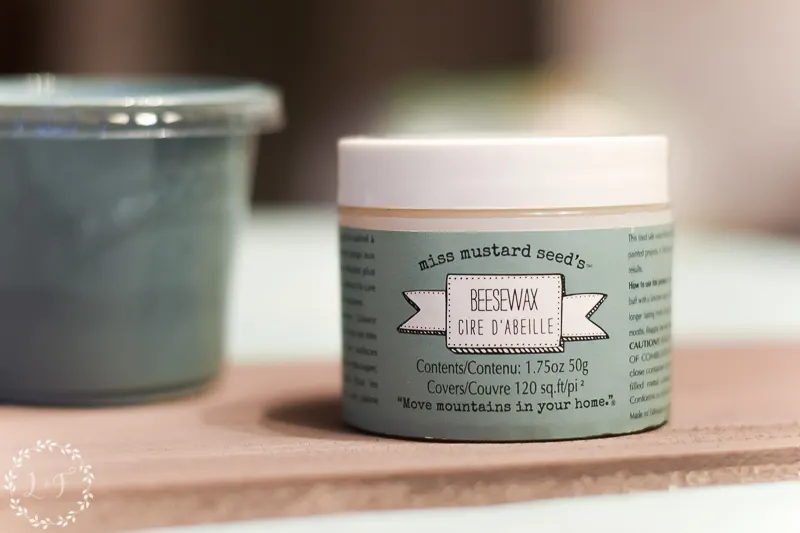
With this being a raw wood piece, my top color of milk paint was unlikely to chip at all (remember, milk paint soaks into raw wood!) So to help encourage some chipping and to create the layered color look, I used the MMS Beeswax to create a resist between the 2 colors of paint.
This Beeswax is a natural, food-safe product that can seal milk paint or be used to polish wood surfaces. Or you can use it like I did–to help create texture and layered colors.
I brushed it onto my board in various areas—not covering the entire board, but in different spots. I was hoping to create a natural, distressed look, where the paint is distressed unevenly across the board rather than in one, uniform way.
3. Paint on top color and allow to dry
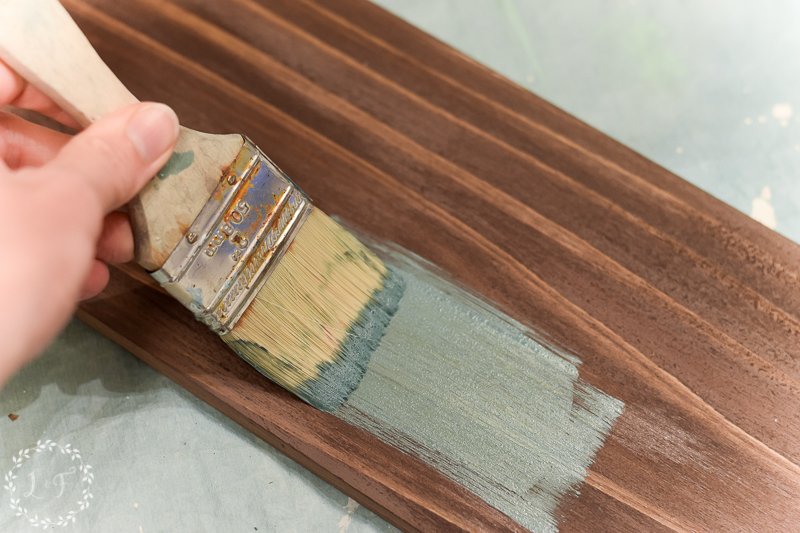

Quickly after brushing on the beeswax, I painted on my top color of Kitchen Scale. You don’t want to give the beeswax a lot of time to start soaking into the milk paint, so it’s helpful to have your top color mixed and ready to go.
Kitchen Scale has great coverage and because it’s a darker color, it only took 1 coat. If you’re painting on a lighter color, you may need 2 coats of paint, and in that case, I would repeat step #2 in between each coat.
4. Distress your board with sandpaper
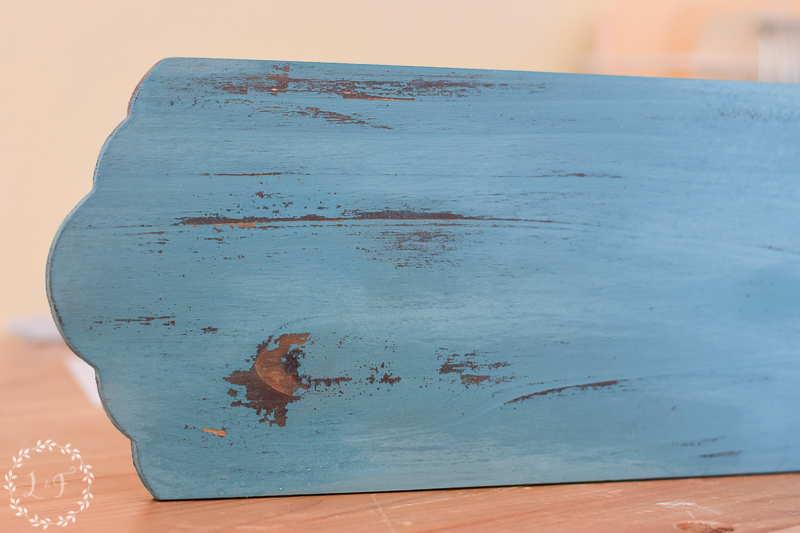

Using some 220 grit sandpaper, I sanded back the Kitchen Scale using very light pressure. The spots where I had brushed on the Beeswax sanded off very easily, and I even got a bit of chipping around some of the knots in the wood.
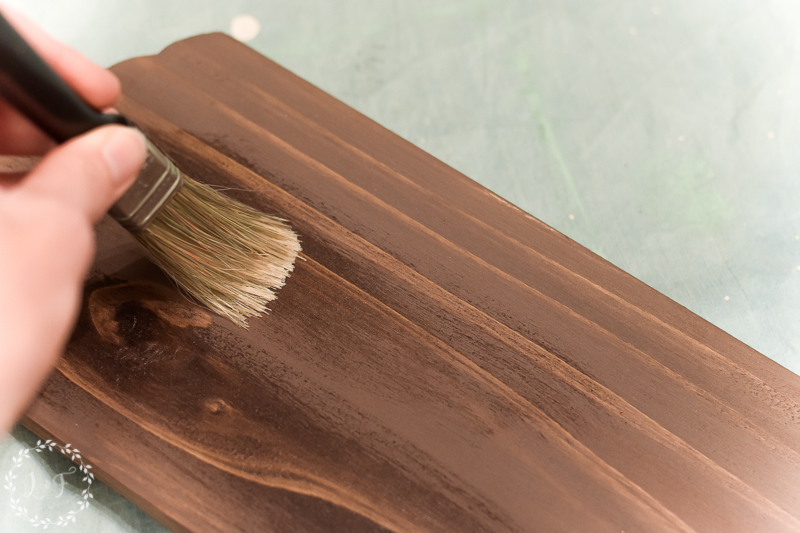
5. Finish your board with Antiquing Wax
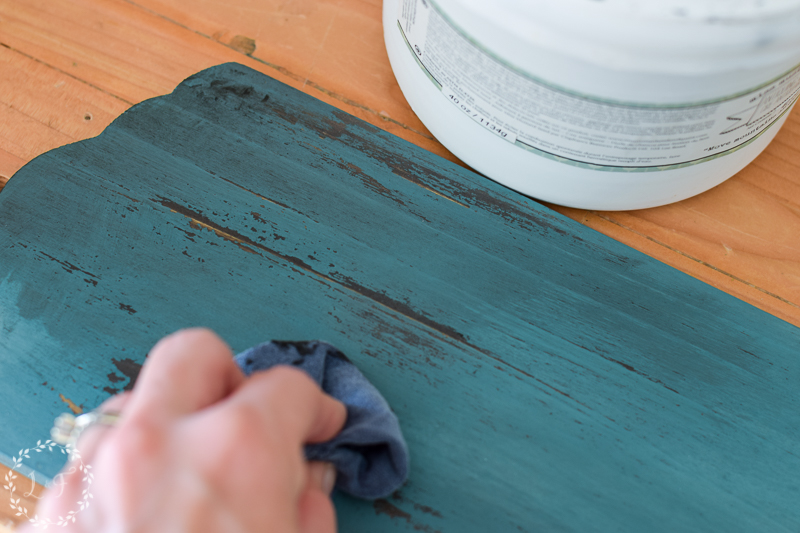

Using the Antiquing Wax over a distressed finish will help highlight the cracks and texture in the milk paint. It also seals your paint, so it’s a win-win!
Using a rag, I rubbed on the wax and then buffed off any excess.
Milk Paint dries very quickly, so I think this whole process took maybe an hour from start to finish!
6. Paint your wooden word and allow to dry
Using a small artist’s brush, I painted 2 coats of Farmhouse White on my word. I didn’t seal the finish with anything because I know the paint won’t come off and I’m not very concerned about any water, dirt, or other grime getting into the finish since this is just a decorative piece. But if you are concerned about that, you can use furniture wax or hemp oil to seal the paint quickly.
7. Attach the word to your painted board
I centered the word on my sign, gently flipped it over, and screwed 2 small wood screws through the back of the sign into the word to attach it to the board. I was concerned that might not be enough to hold it (maybe I would need some wood glue or hot glue too?), but those 2 screws did the trick!
8. Tie some string or jute to the hangers on the board and enjoy your sign!

With all the gorgeous colors in the MMS Milk Paint line, there are a million ways you can customize your sign to fit your own color scheme and tastes.
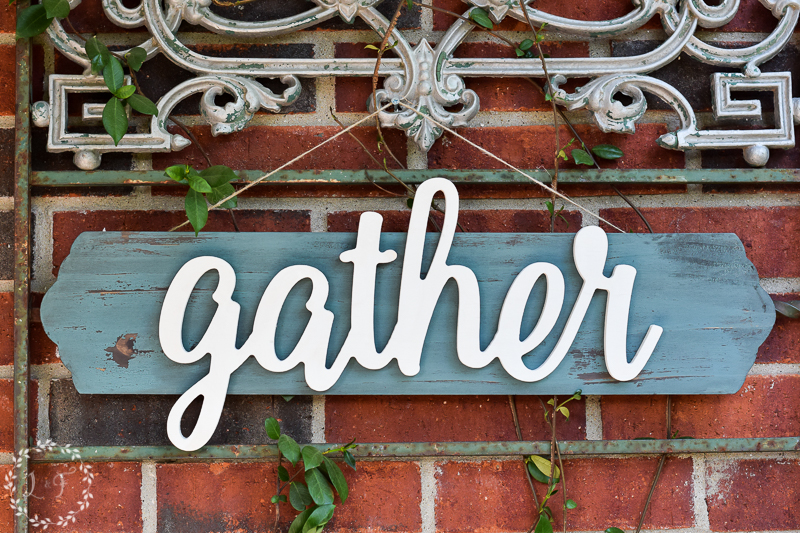
I have my sign currently hanging on my back patio. I love the pretty blue-green color of the Kitchen Scale and how it adds a fun pop of color against the brick wall.
So next time you’re at your local Hobby Lobby, grab your materials, take a look through the MMS colors in my local or online shop, and have fun creating your own Wooden Script Word Sign (no cute doodling required!)
Thanks for joining me today!


9doxies
Thursday 5th of July 2018
This turned out so nice as always I learn some new tip or trick from your projects! Thank you :)