Happy Friday everyone!
Today I am so excited to be the featured shop owner at Coastal Charm’s weekly feature “Shop Talk”.
When Linda asked me to be the guest for the week, I was honored and thrilled to share a little more about Lost & Found on her great blog.
Please stop by her site today and show a little love!
Now, onto my most recent chest makeover painting with chalk paint.
This great little French Provincial Dixie Chest-On-Chest was next on my list of pieces to finish up and get out of my garage.
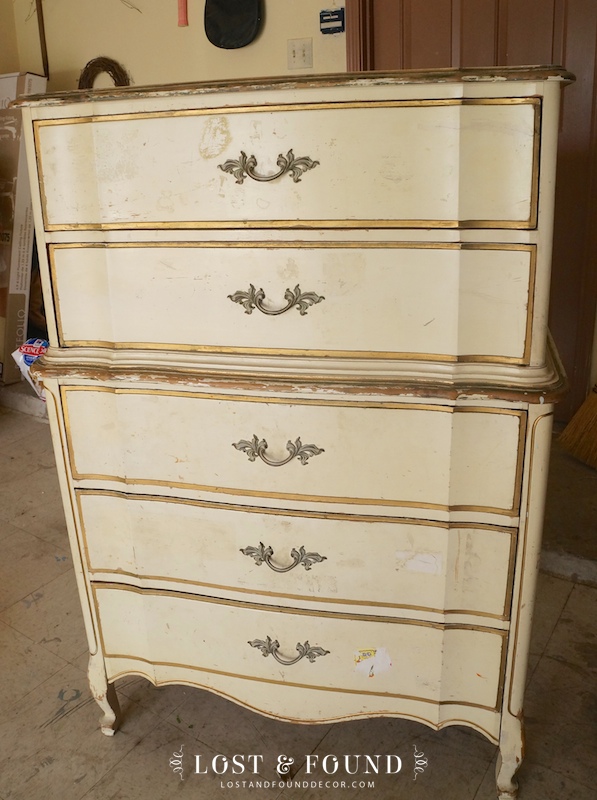
I bought it a few months ago as part of a bigger Craigslist purchase from some folks I found in my neighborhood.
It’s a sturdy piece with those classic french provincial lines and drawer hardware, but it’s former owner must have been a fan of stickers–they were stuck all over it!
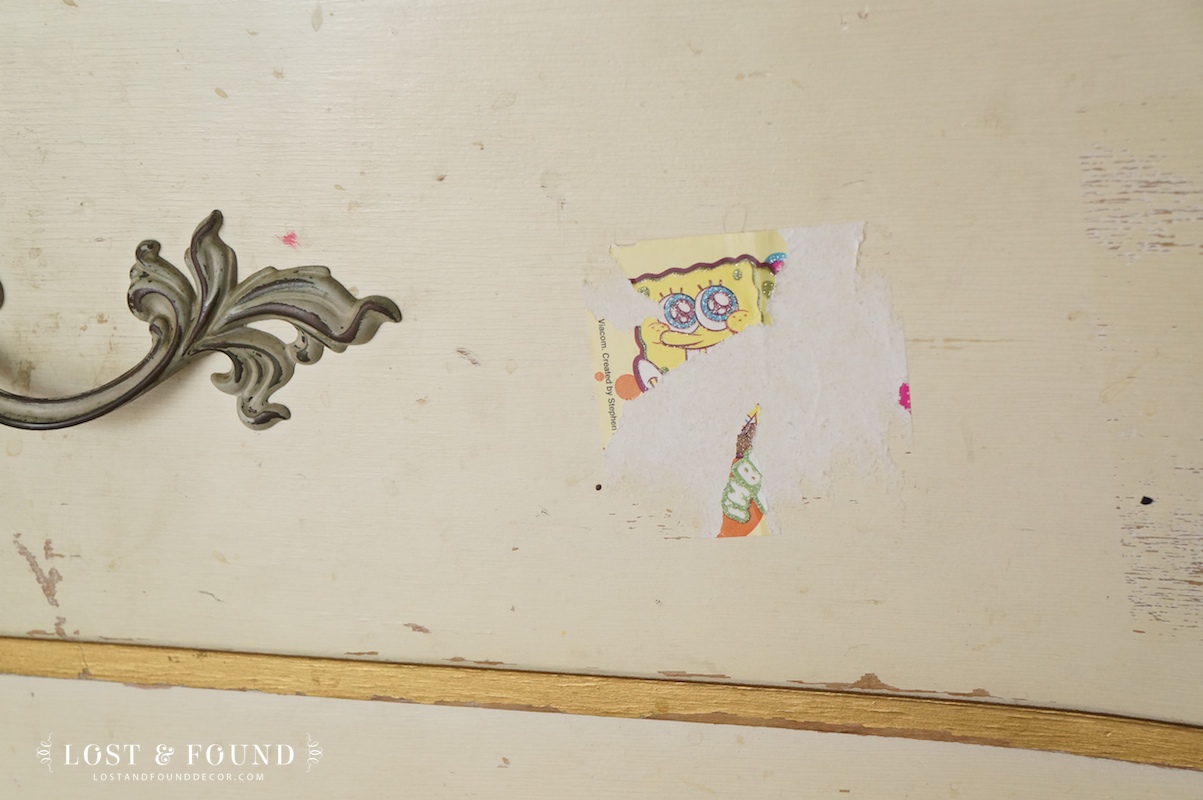
I had to do a little work to get Sponge Bob and his friends off of the drawer fronts. I usually use Goo Gone for sticker removal, but I was out.
So, I tried using a 1:1 vinegar and water mixture.
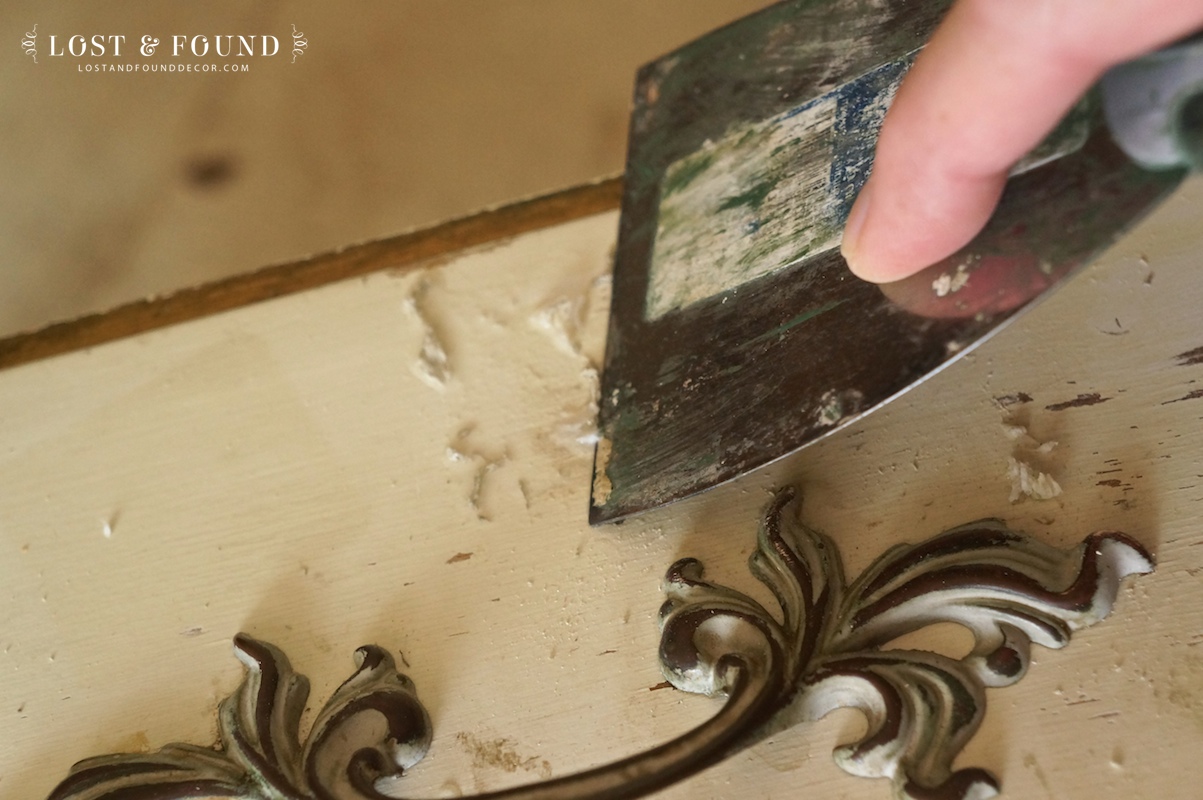
I just sprayed it on, let it sit for 3-4 minutes, then scraped the sticker residue right off. Worked like a charm!
Since this chest has that classic elegant style, I didn’t want to do anything too crazy with it. All it really needed was a good clean-up and update.
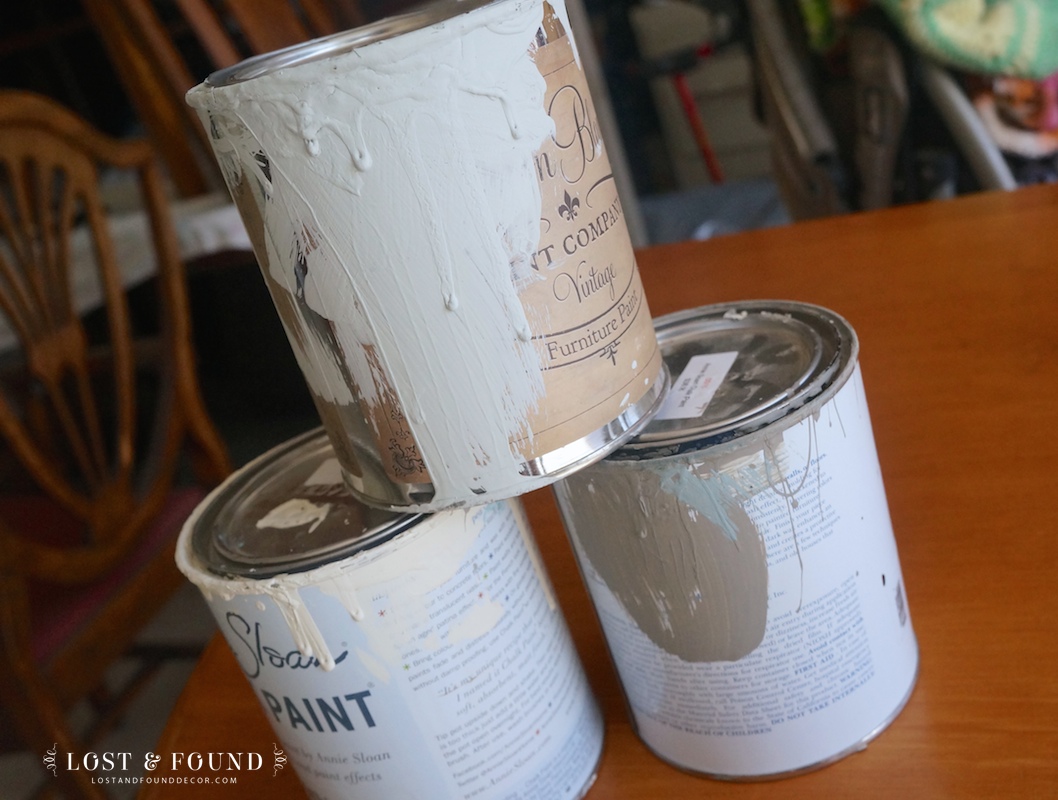
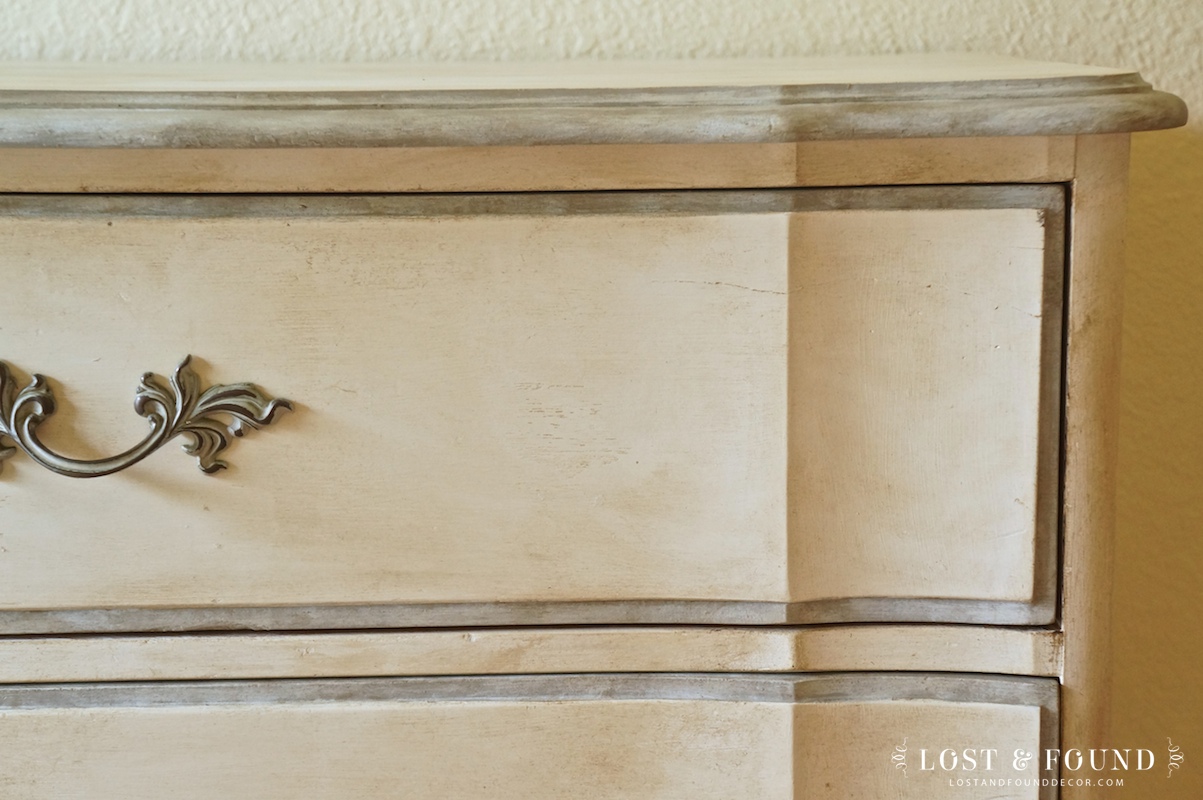
I decided to cover the dirty off-white finish with a clean coat of Annie Sloan Chalk Paint Old White, and add some details to the drawers and trim with a little gray and blue.
Here is it in process, with two coats Old White and two coats French Linen on the trim.
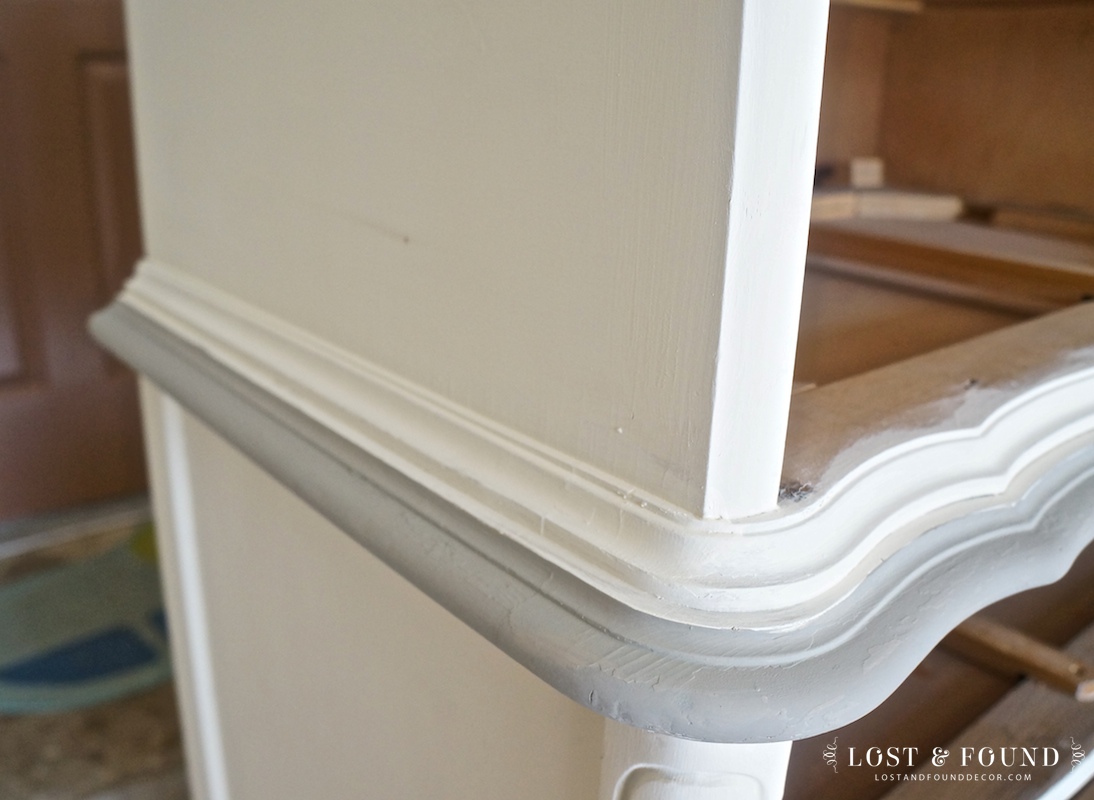
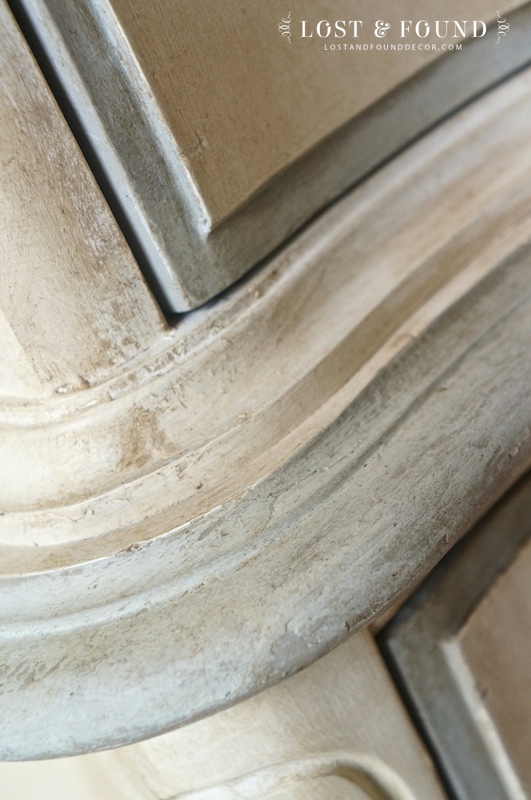
I wanted to add a little more depth to the trim, so I dry brushed on some very light blue (the color was Sugar Cane, by Maison Blanche).

Once the painting was done, I realized it needed a little something more.
The last time I used dark wax, I told myself I would never do it again! Well, never say never, right?
Dark wax was just what this chest needed to make the creamy white and dry-brushed trim come together.
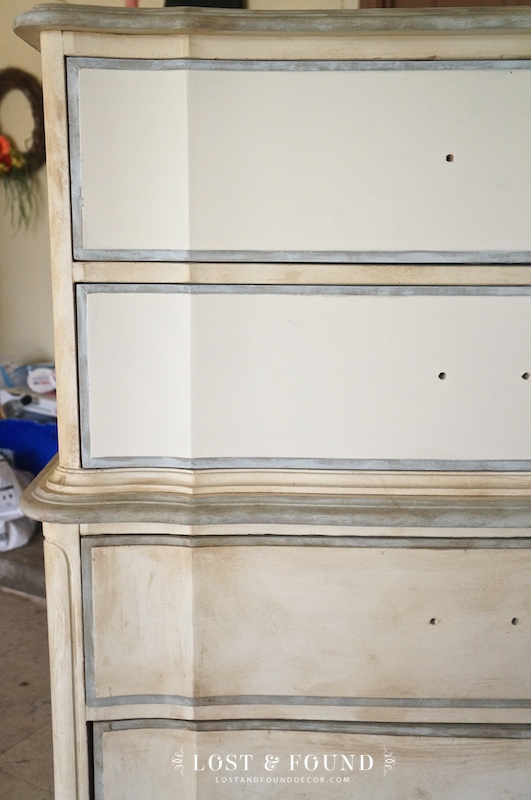
I’m still trying to figure out how to do the dark wax well.
I have a hard time with its streakiness on the larger areas of pieces.
But you can see from the picture above that I think it was worth the additional effort.
It really finishes off the chest and adds back some of its vintage elegance.
Here it is with the hardware back on, drawers wiped out, and hauled inside for a photo:
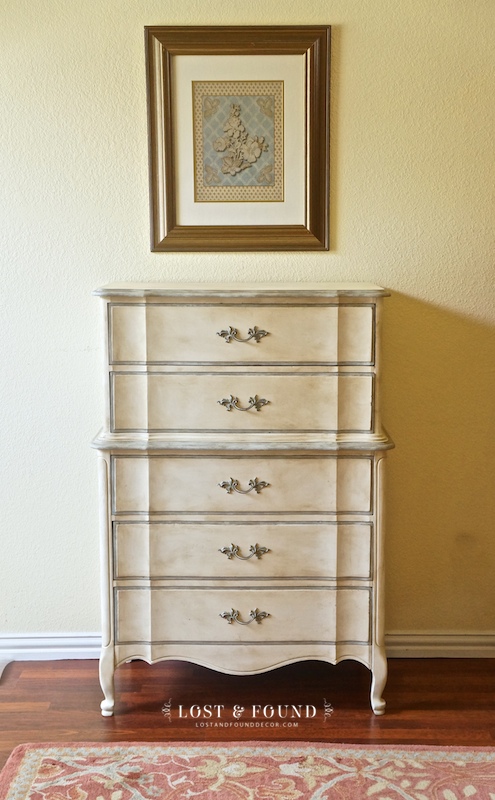
The yucky yellow of my walls doesn’t do a lot for showing off the finish of the chest, but you can get the picture!
I am very happy with how it turned out.
No more beat-up, sticker-laden creamy finish, but instead it now has an updated color palette with its elegance highlighted.
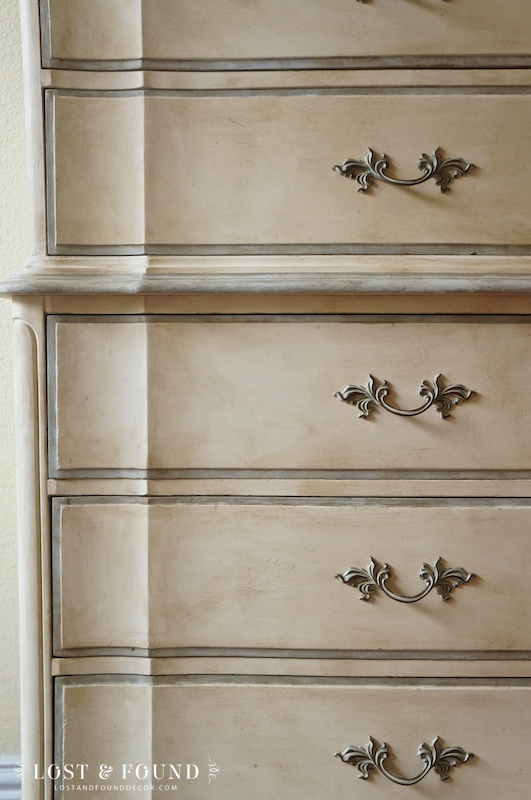
I love how the dark wax settles down into the cracks and adds depth.
It also highlights that great vertical line that runs down the drawer fronts.
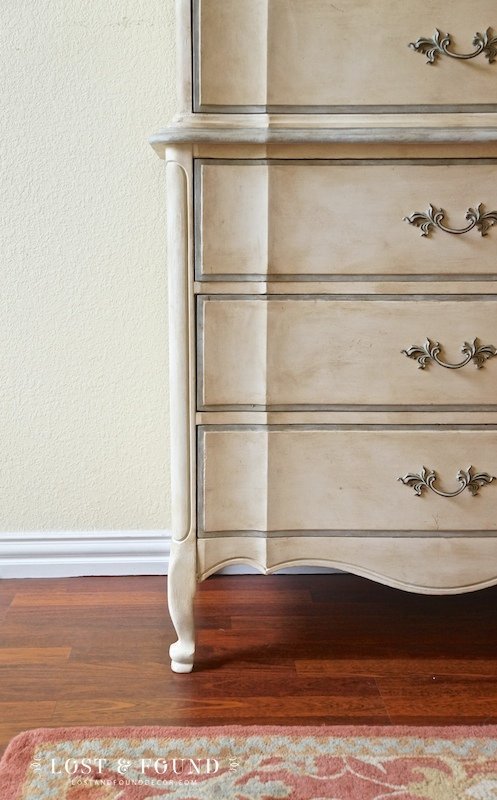
It looks nice with my rug 🙂
Not so great with my yellow walls (which I’m dying to paint, by the way).
French provincial pieces are so easy to make pretty, especially painting with chalk paint.
Just a little TLC makes all the difference.
Yay! One more piece out of my garage 🙂
Have a fantastic weekend, and don’t forget to visit me at Shop Talk!

Dawn @ We Call It Junkin.com
Monday 7th of July 2014
I love the effect the dark wax had on it. Looks great! Thank you for sharing this at the History & Home link party. Take care, Dawn @ We Call It Junkin.com
Kathryn Griffin @TheDedicatedHouse
Sunday 6th of July 2014
It's gorgeous! Thank you for sharing. You are one of the fan favorites at the Sunday Showcase from the Make it Pretty Monday party at The Dedicated House. Here is the link so you can check out your feature. http://www.thededicatedhouse.com/2014/07/sunday-showcase-from-make-it-pretty.html Hope to see your prettiness again tomorrow at the bash! Toodles, Kathryn @TheDedicatedHouse
Diane
Friday 4th of July 2014
Have you tried cutting the dark wax with mineral spirits? It becomes more of a glaze and therefore easier to work with!
Diane | An Extraordinary Day
Wednesday 2nd of July 2014
Beautiful! What a dramatic improvement. I bet it will fly out of your shop, Melanie. ;) Thanks so much for linking up your project at Project Inspire{d}!
When I tested Plaid's FolkArt Chalk and Wax I was very pleased with the outcome of their dark wax. I first applied the clear wax and let it dry according to directions and then applied the dark with a paintbrush in workable sections. The directions said that you could apply the clear wax to thin it...so after I applied the dark I immediately brushed on the clear and then brushed them together and rubbed it down with a soft washcloth. I'm not sure it this makes sense or not. I think I might have explained it better on the post I wrote about the Antique Washstand Makeover: http://bit.ly/1gTsWpg. I had used ASCP dark wax and put it away for good. This was a breeze for me and I really liked working with it....aside from the sore wrists. ;) Let me know if the same technique would work the ASCP wax.
Diana Petrillo
Tuesday 1st of July 2014
Just wonderful, Melanie, as always. It's a special gift to know what colors and waxes and such to use--you've got it girl!