It’s time for a good, old-fashioned furniture makeover today!
It’s been awhile since I had one to post, and now I have 3 or 4 to share! But today you’re getting just one 🙂
Awhile back my friend messaged me, asking if I wanted this old armoire she had (please excuse the blurry cell phone picture!)
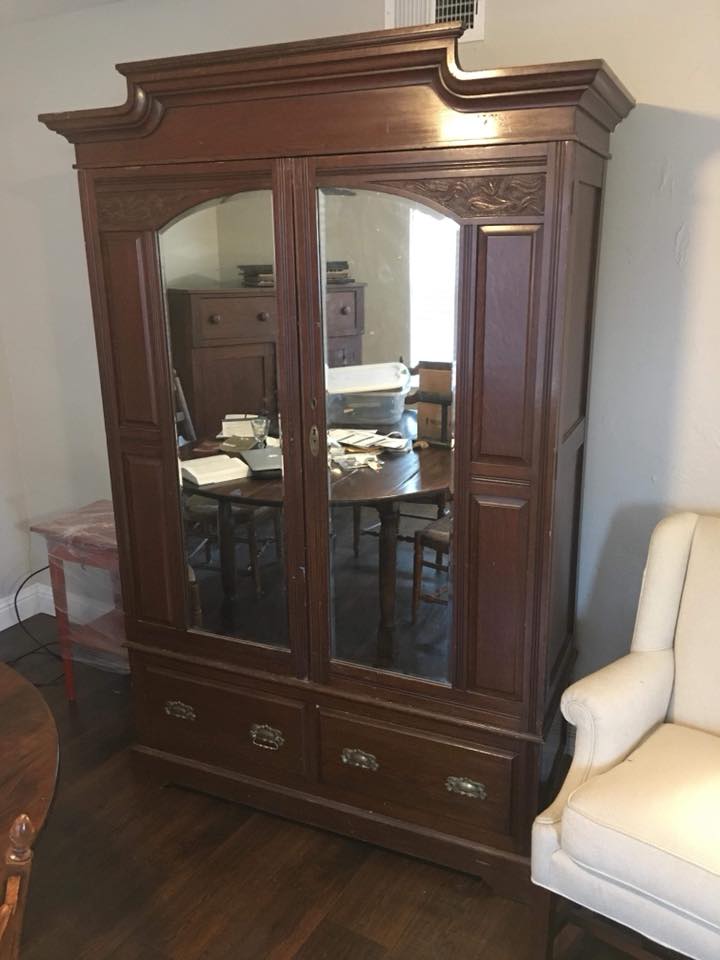

Well, of course, I wanted it! It’s pretty amazing, right?
She wasn’t sure of its age, and I couldn’t find any sort of definitive markings on it either. But it does have some age to it, and the finish was definitely showing some wear.
It actually came apart into 4 different pieces, so moving it wasn’t too terrible.
But man, even when separated into 4 different pieces this thing was still a beast!

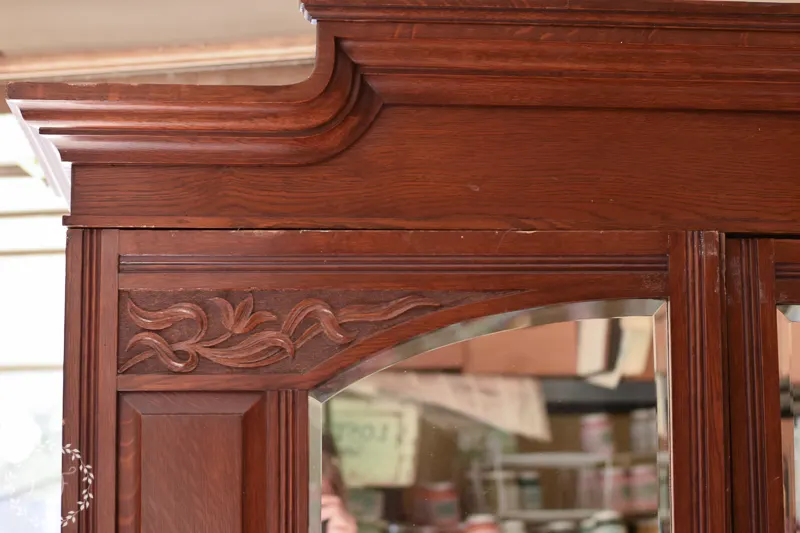
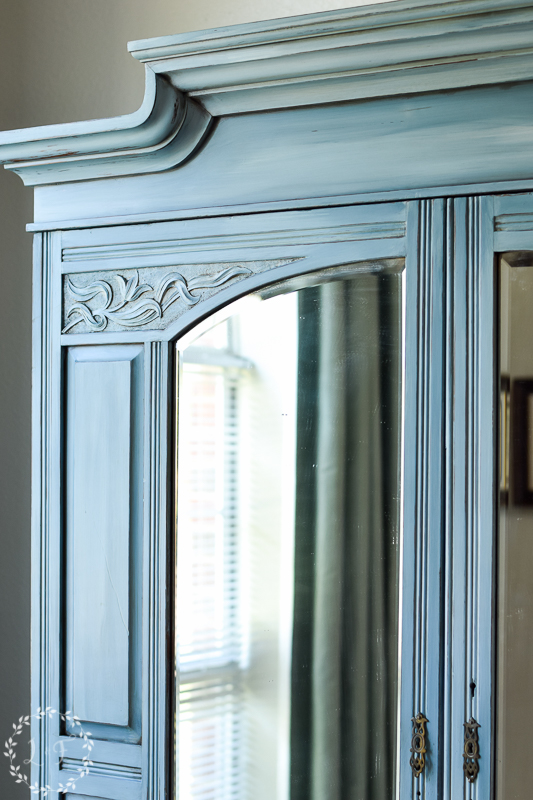
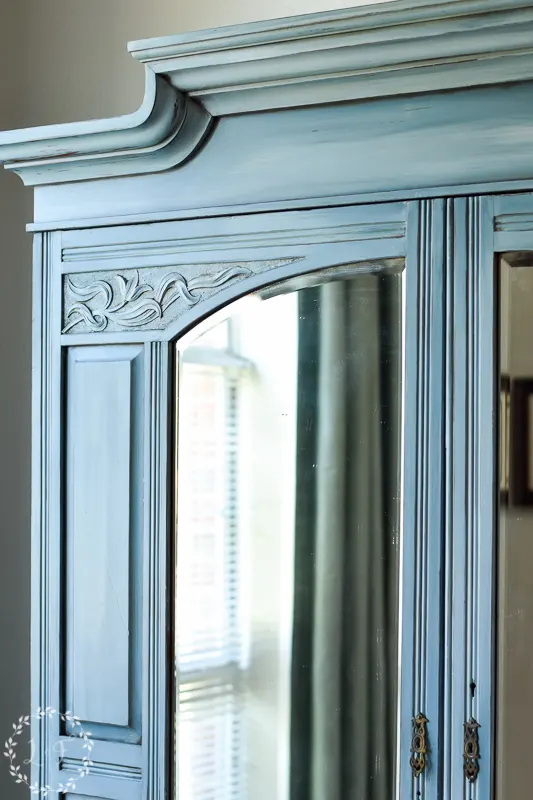
I knew that the beautiful carved details and wood inset panels would be highlighted so well with paint.
Sometimes, great details like this get lost when the piece is stained.
I know there are bound to be some people out there who look at this piece and are not happy with me for painting it . . . which is ok! I can understand.
But let me say though that this piece needed some major love–the inside was covered in musty, dusty fabric, there were dings and dents all over it, and the wood finish had grown dull and lifeless.
Also, this was not a treasured hand-me-down, but honestly just a piece my friend had been given for free and wanted off of her hands.
So since painting is what I do, I thought the best way for me to revive this piece and give it a new life with a new owner was to paint it.
I had been wanting to try out a new technique called color blending, where you take multiple shades of the same color (or totally different colors if you’re riskier) and blend them together by thinning out the paint with water.
Some color blended pieces are a little too out there for my taste, but some of them look amazing.
I especially like the pieces where the colors are various shades of the same tone and can be blended to create depth and shadow.
That’s what I decided to try and do with this piece–using 3 shades of blue, I wanted to create an antiqued, shadowed finish.
My Materials
- Degreasing cleaner (I like to use Simple Green)
- 220 grit sandpaper
- Spray bottle with water
- Paint Brush
- 3 colors Fusion Mineral Paint–Seaside, Heirloom, and Little Whale
- Fusion’s Antiquing Glaze
- t-shirt rag
Like with all of my pieces I started out giving it a good cleaning with Simple Green. Then I gave the whole piece a light sanding with the 220 grit sandpaper, just to open up the pores of the finish.
Step 1
Working on one panel at a time, I started by painting on the darkest blue, Seaside.
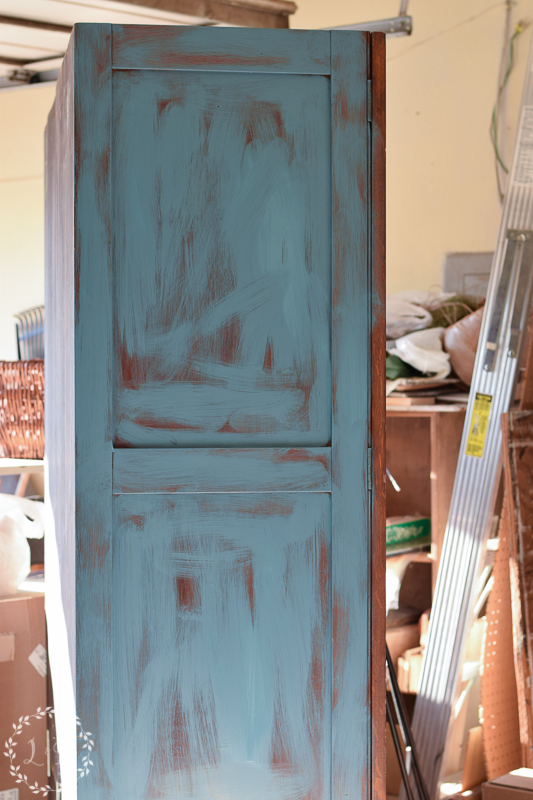
You can tell I painted it on pretty messy! That’s ok for this technique.
Step 2
After letting the Seaside dry for a few minutes, using the same brush, I painted on the middle color blue, Heirloom. Still using a kinda sloppy technique.

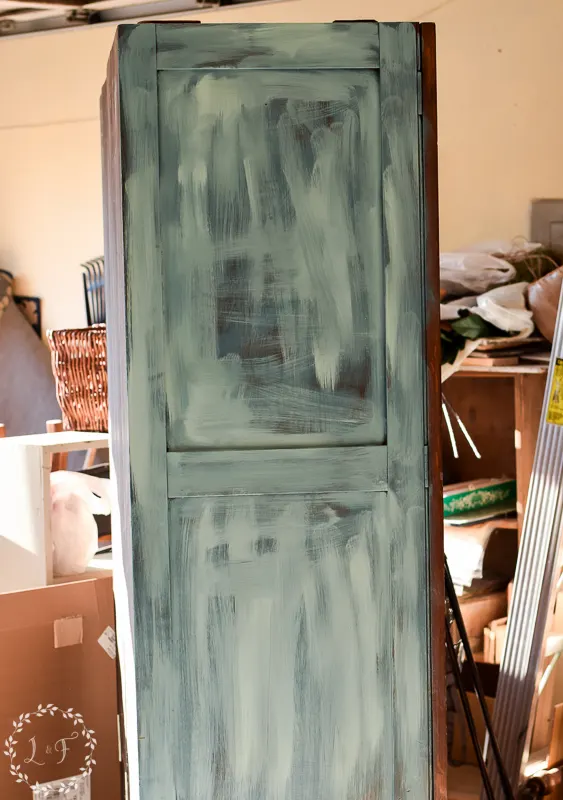
I realize that looks pretty terrible! Bear with me though!
At this point, it’s good to spray the paint with a little bit of water from a spray bottle, then you can use your brush to start blending the colors together.
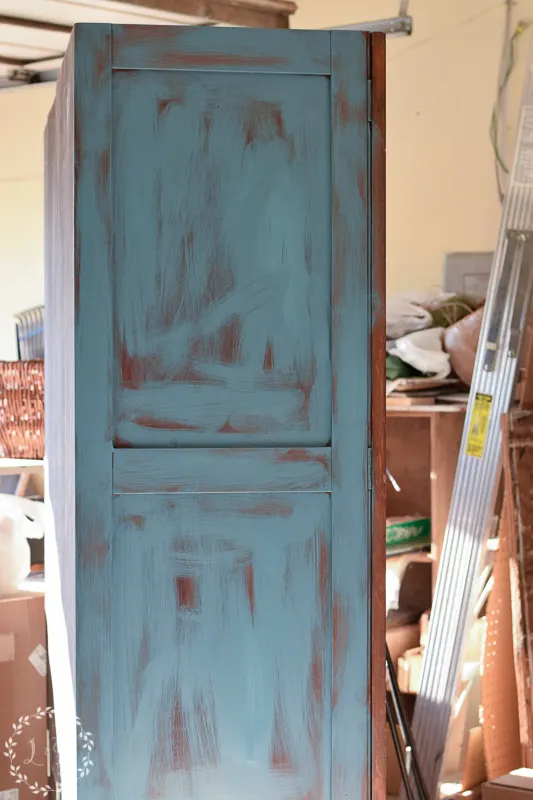
Step 3
Again using the same brush, I painted on the Little Whale, the lightest of the 3 blues. Then sprayed down the finish and used my brush to blend more.
To help mimic the look of shadow, I tried to keep the darker Seaside showing more in the corners and along the edges of each panel, then have the finish get lighter as you move more towards the center.
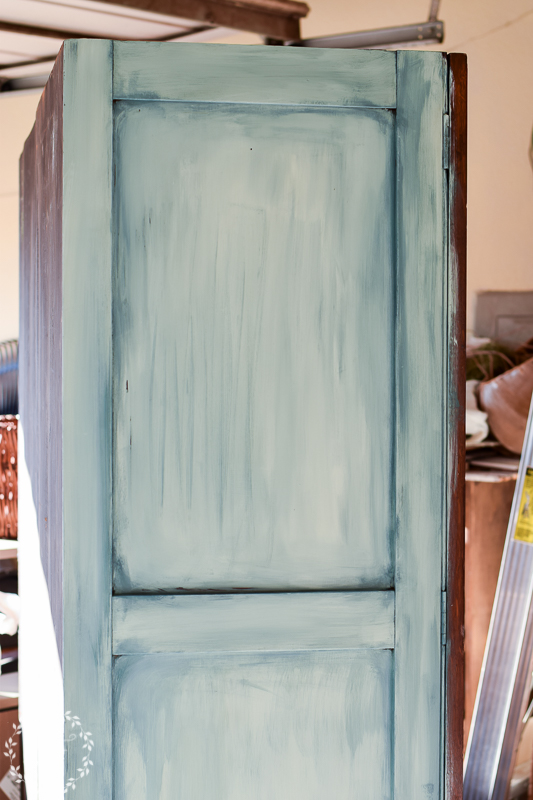

So it’s not perfect, but starting to look a lot better!
Step 4
I kept spraying down the finish, adding a bit more paint, and blending with my brush until I got the look I was going for. Really, this was an experimental process! I just kept messing with it until I was happy with what I saw.
Step 5
Using a bit of Fusion’s Chocolate and a small artist brush, I dry-brushed on a bit of dark brown paint into the corners of each panel, to help create even more shadow.
Step 6
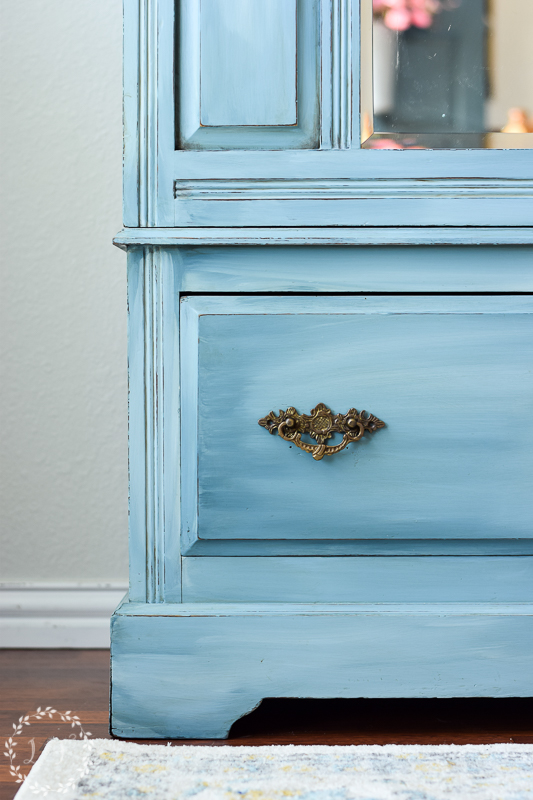
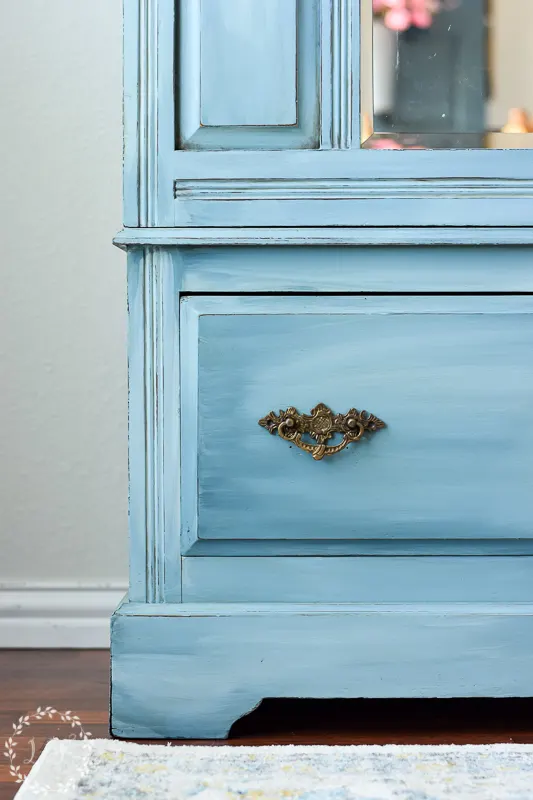
After giving the whole piece a light distressing–focusing mainly on edges and details–I used the Antiquing Glaze to warm up the finish and made sure to let it settle into the corners and recesses of the details.
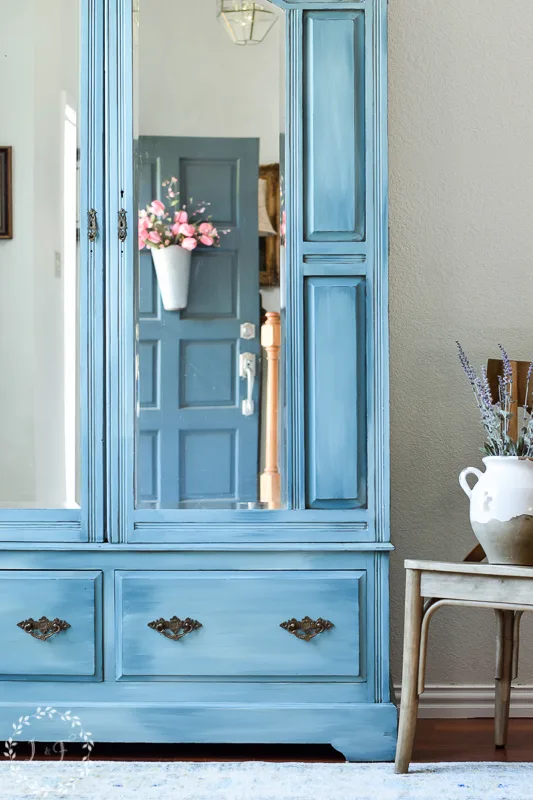
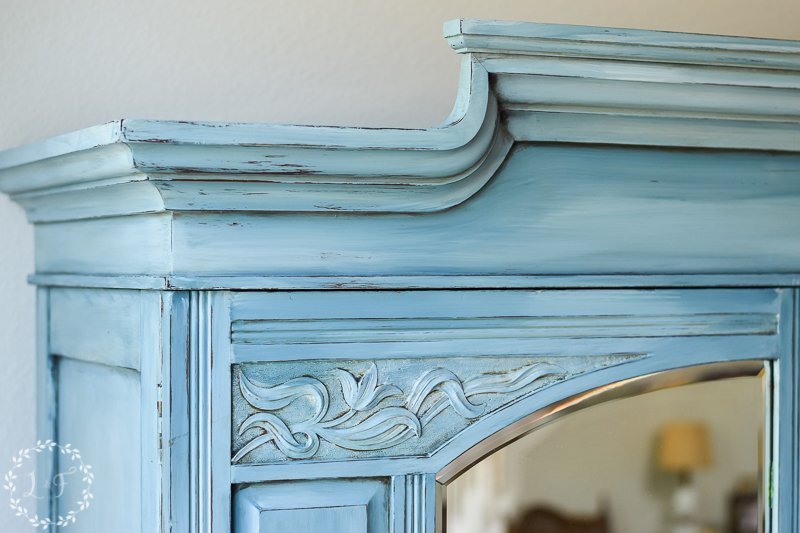
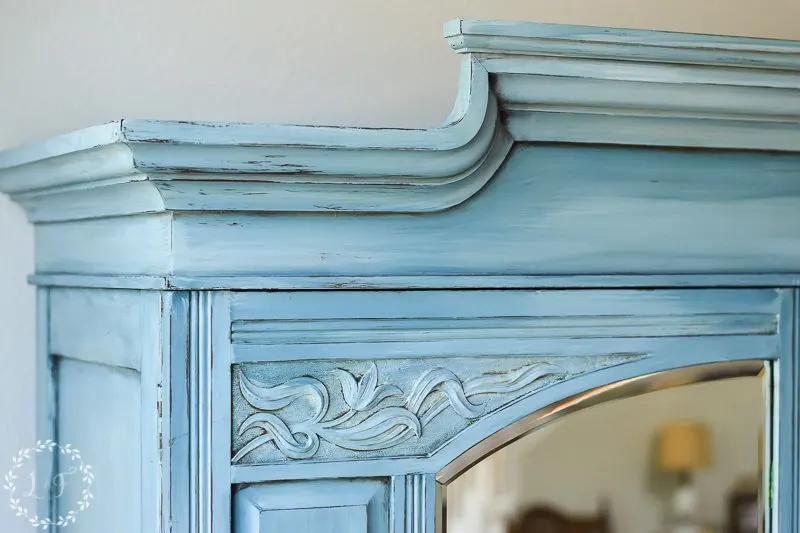
So here’s the final result!
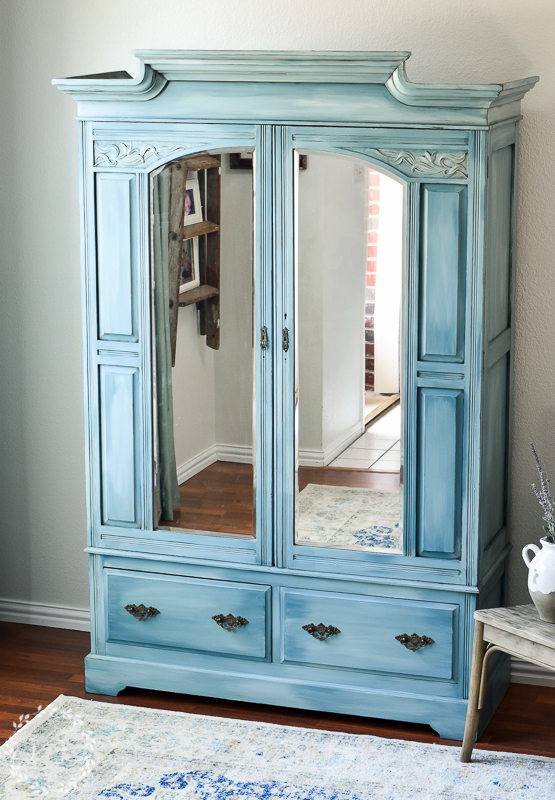

What do you think??
Overall, I am happy with how it turned out. The blue ended up being a bit brighter than I wanted, but still, I think it looks pretty good.
Color blending though is not for the faint of heart!
It definitely takes a bit of work and I think I will need to practice the technique a bit more before I feel like I’ve perfected it.

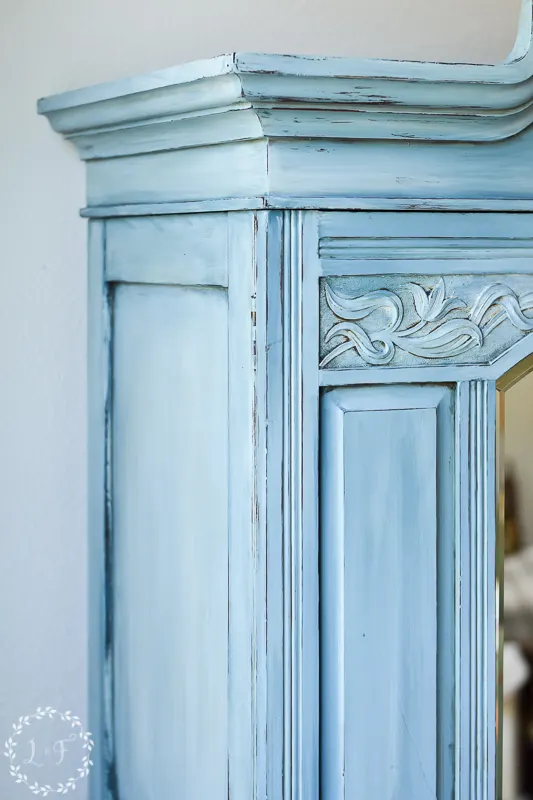
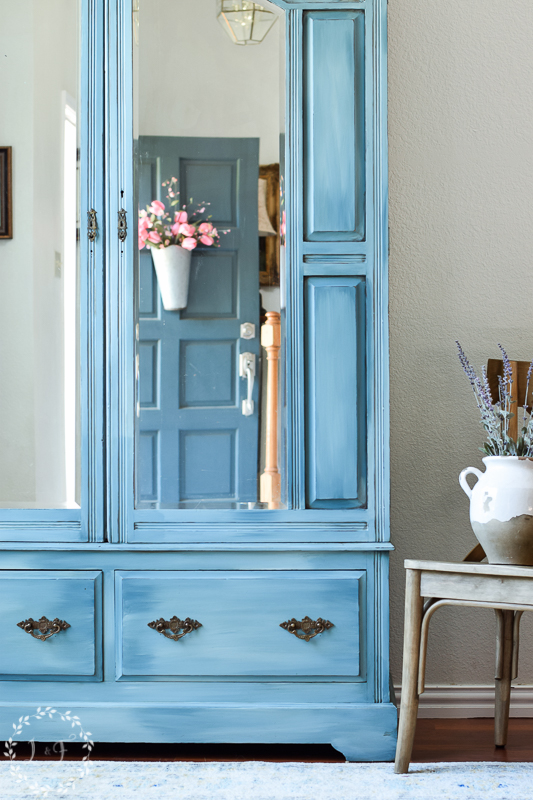
I do like the way the paint highlights the details on the doors.
And the beveled mirror inserts are really pretty stunning too!
Photographing this baby was a bit challenging . . . At one point I was hiding behind my staircase so I wouldn’t be in the shot!
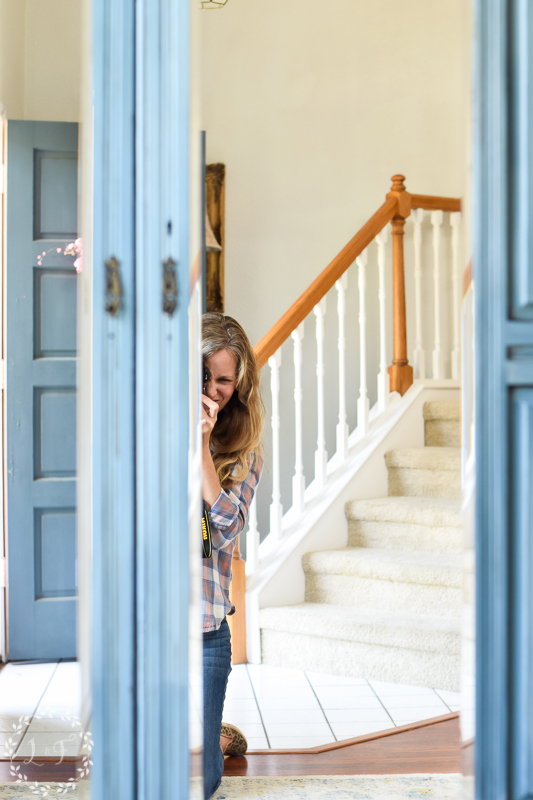
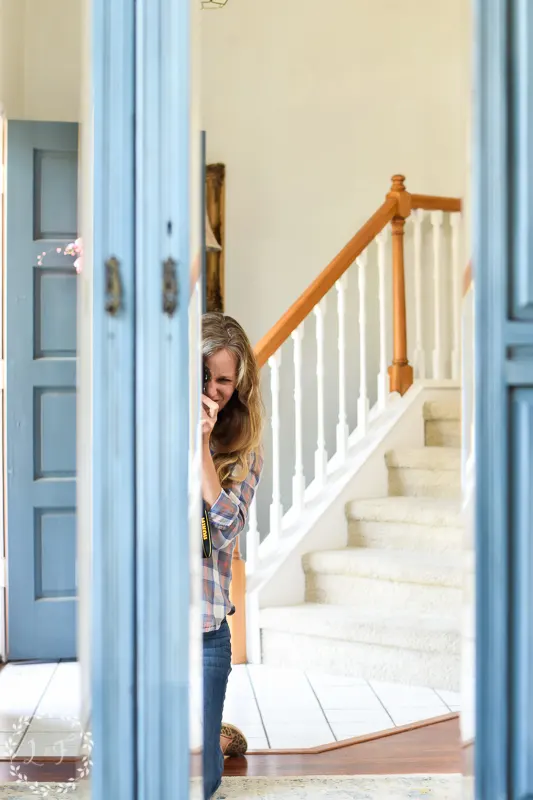
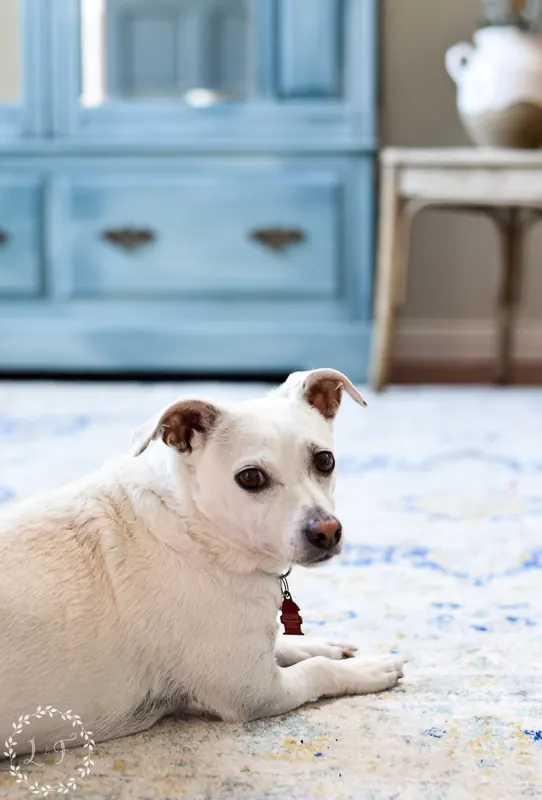
And the animals kept wandering in and out of the photos too . . .

I had fun working on this piece but I’m not gonna lie . . . I was excited the day it finally left my house and made it’s way up to my Antique Company Mall Booth space. It took up a ton of room and was soooo heavy to move!
This post contains links to websites outside of LostandFoundDecor.com. Links are provided for your convenience and comply with all affiliate program standards. You don’t pay any more for a product by shopping through this link, but it does help support this blog. Thanks for the love 🙂
I hope you enjoyed this makeover!
Have you tried color blending? If not, do you think you will try it sometime? I would love to hear!
And for your convenience, here are the links for the materials I used in case you want to replicate this look yourself 🙂
- Simple Green Degreasing Cleaner
- Fusion Mineral Paint Seaside, Heirloom, Little Whale, and Chocolate
- Fusion Antiquing Glaze
- Staalmeester Paint Brush
- NuLoom Traditional Persian Vintage Rug in Dark Blue
Thank you so much for joining me today!


Kristin Paddack
Monday 14th of April 2025
I love it! It’s so pretty! It looks like ocean water. I am going to try this tomorrow with a piece of trash i just got. I found a place not far that sells fusion paint, so I’ll give this a whirl and post my attempt!
Margaret
Sunday 16th of February 2025
Blending is tedious and I love it! I have done a couple of pieces and kept them all!
Georgia
Thursday 4th of April 2024
I really like this technique. I would like to try it someday. I learned from The Turquiose Iris a similar technique with painting on, spritzing with water and using a paint scraper to scrape off. You layer on the paints with this technique and it is really beautiful.
Lesley
Wednesday 31st of January 2024
Absolutely beautiful!
Faye
Saturday 12th of May 2018
It is the perfect shade of blue!! I'm going to try color blending on my next piece, I hope it turns out half as beautiful as this did.