Well, it’s finally finished!
Actually, it’s about 95% finished, but I’m ready to go ahead and call it “done” so I can share some pictures with yall!
If you’re wondering, I’m talking about my kitchen. Yes, it’s been 3 years in the works. I tell you, I am just a slow DIY’er!
I used to feel kind of bad about it—maybe I am lazy or don’t have much endurance? But honestly I think that’s just how I work. I get excited and work on something for a bit, then get bored, and switch to another project, and so on and so on . . . It drives my husband a little crazy and it’s really not the most efficient way to do a project. But it’s the best I’ve got at the moment.
I wish I could say I that I powered through this whole transformation in a month, working every weekend and late during the weeknights—I feel like that would be a more impressive makeover to share. But that’s just not the truth. LIFE continues to happen in the midst of DIY, and other things come up that need attention.
So roughly 3 years after I started painting the first set of cabinets, we are at the finish line.
Unfortunately, I don’t have a fantastic “before” photo to show you of the kitchen. But I think I can paint a picture for you through these other photos . . .
I’ve told you before about the terrible yellow walls and ceilings in my house, right?
When we moved in a little over 7 years ago the whole house was painted this dingy yellow color (popcorn ceilings were yellow also), and that included the kitchen.
Before we even moved in my fantastic husband and father-in-law painted the walls in the kitchen a shade of pale blue and installed beadboard wainscoting around the whole space, which we painted white. We also took out the shallow aluminum sink and installed a deeper, white porcelain sink along with a new satin nickel faucet. Those changes alone were huge improvements and so we left it like that for another 4-ish years.
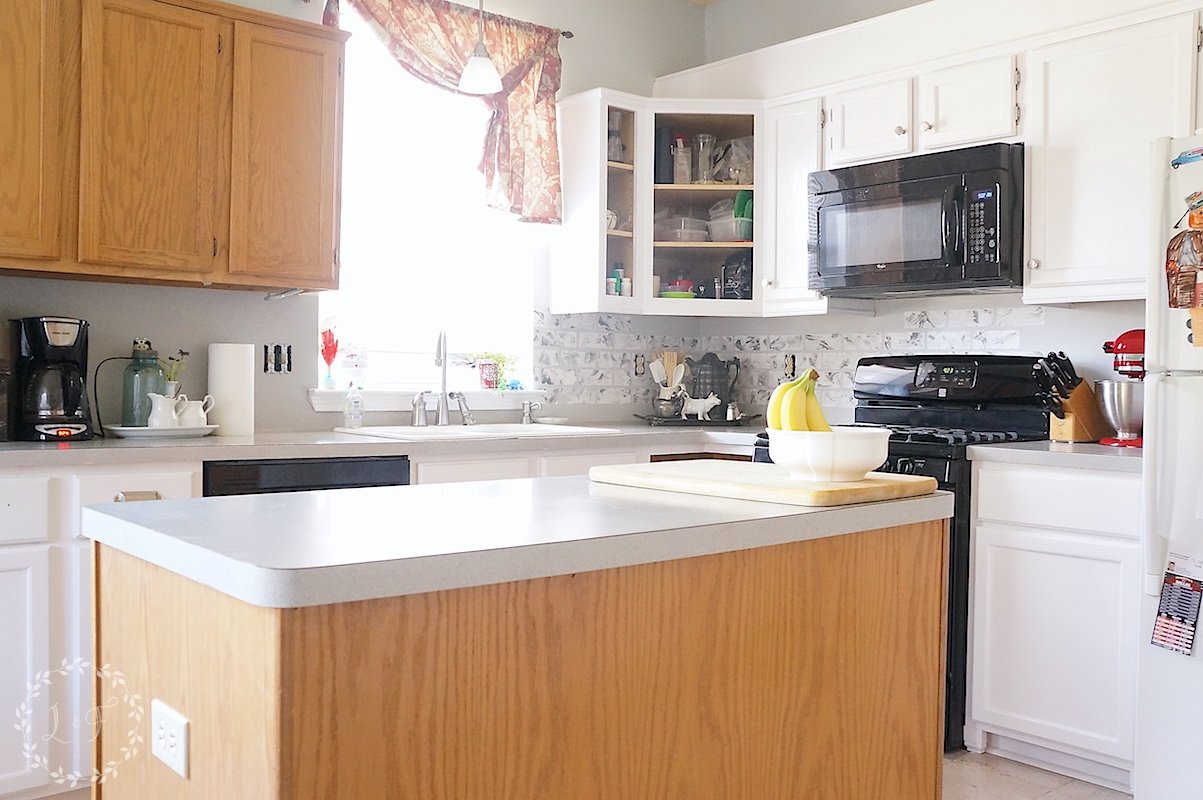
The next step was to spruce up and paint our cabinets. They were the basic builder grade, light honey oak, paired with a light blue laminate countertop. We didn’t have the money to replace the countertop, so my plan was to paint the cabinets white and work with the countertop we had.
The Cabinets
This is an in-progress photo of the cabinet makeover process . . .
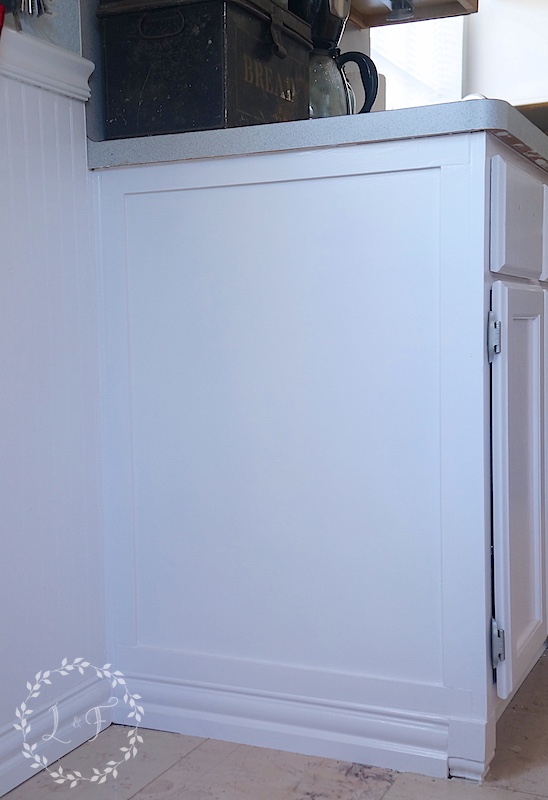
I added some trim to the bottom cabinets and to the base of the top cabinets, and gave them all a coat of nice, clean white. None of the cabinets had hardware, so I also installed some satin nickel bin pulls on the drawers and knobs for the doors. If you want to know more about what paint I used and my process for painting my white cabinets, I talk about that in this post here.
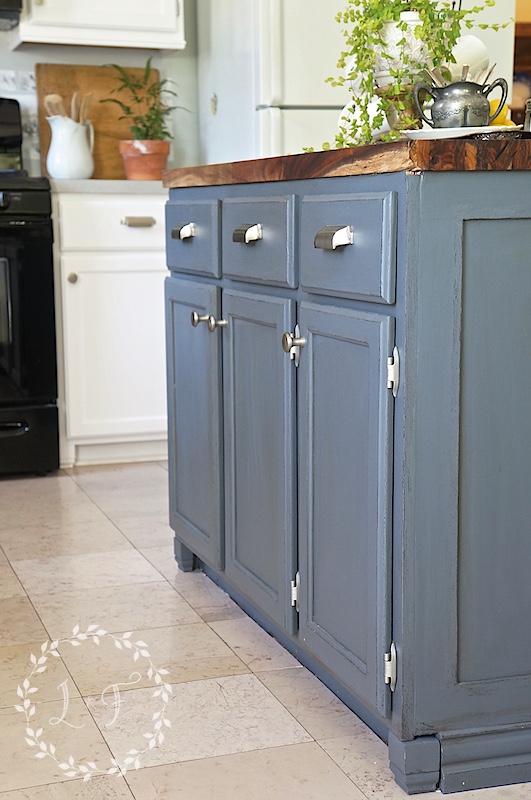
The Island
Then came the island makeover—you can read all about that here.
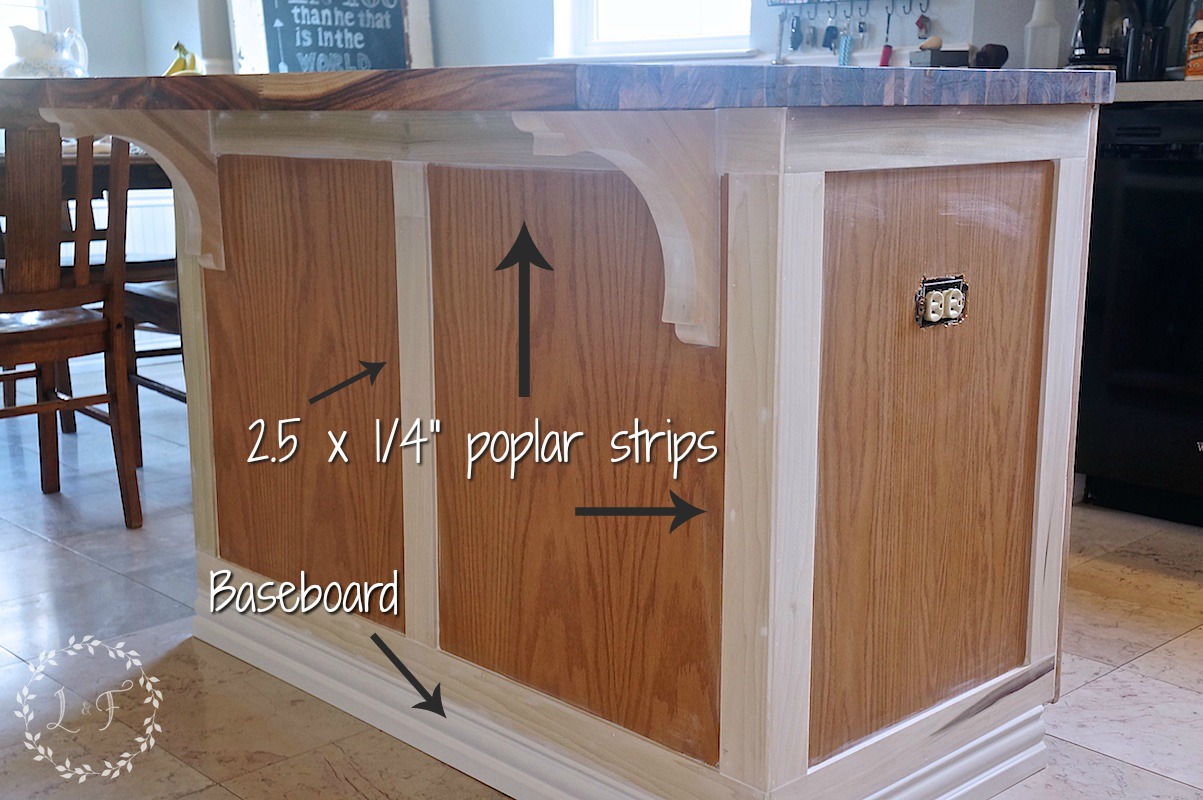
Using some Fusion Mineral Paint, I created a distressed, antiqued finish on the island and I love so much how it turned out! I detail that whole painting process in this post here.
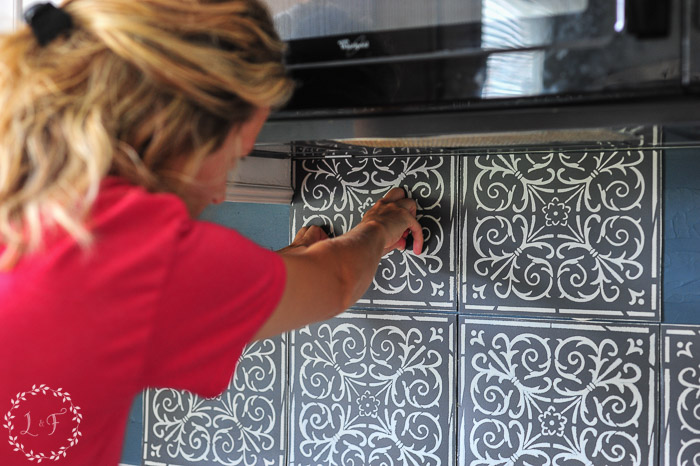
The Backsplash
With the cabinets and island finished, things were starting to come together! We still had to deal with that blue laminate countertop that ran all the way up the backsplash though, so after some trial and errors I came up with my faux patterned tile backsplash—which I am still loving to this day. That was another big project, and you can see the whole details about how I painted and stenciled these peel and stick floor tiles here.
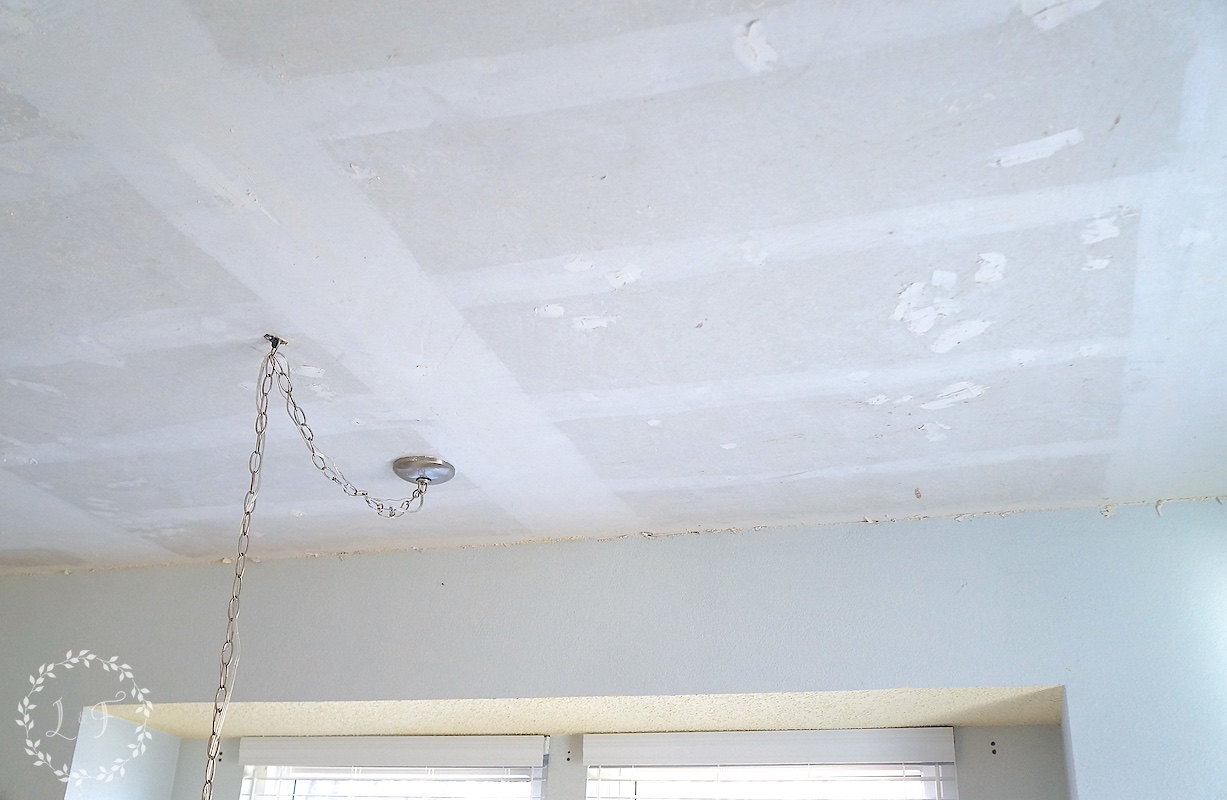
The Ceiling
When we put in the new backsplash the color on the walls needed a little update so we went for a more sophisticated shade of blue/gray, Sherwin Williams Silver Strand. I decided the still yellow-painted popcorn ceiling needed to go, so on a whim one day I started scraping it off.
NOTE—if you start scraping off a popcorn ceiling, you must finish the job. It’s not one of those things you can change your mind on!
NOTE #2—it is the dirtiest, most frustrating DIY job I have ever done and I will never do it again. 🙂
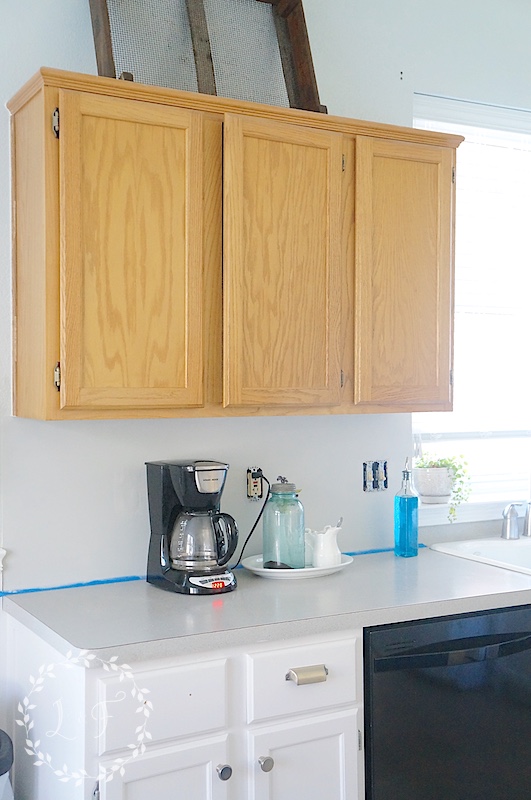
That gets us to our 2 most recently finished projects—1) exchanging one of our set of upper cabinets for open shelving and 2) trimming out our builder-grade windows.
These were 2 relatively inexpensive projects that made a HUGE impact on the look of our kitchen. They really helped give the space a custom look, and all without spending thousands and thousands of dollars on new cabinetry, appliances, or other more expensive updates.
I was going to go through both projects in this post, but it was getting super long! So today we will look at the open shelving and I’ll walk through the window trim in my next post, as well as the final kitchen reveal!
DIY Open Shelving
I wanted to take down the upper set of cabinets that were to the immediate left of my sink. I really thought it would lighten up the feel of the whole space, and it certainly did.
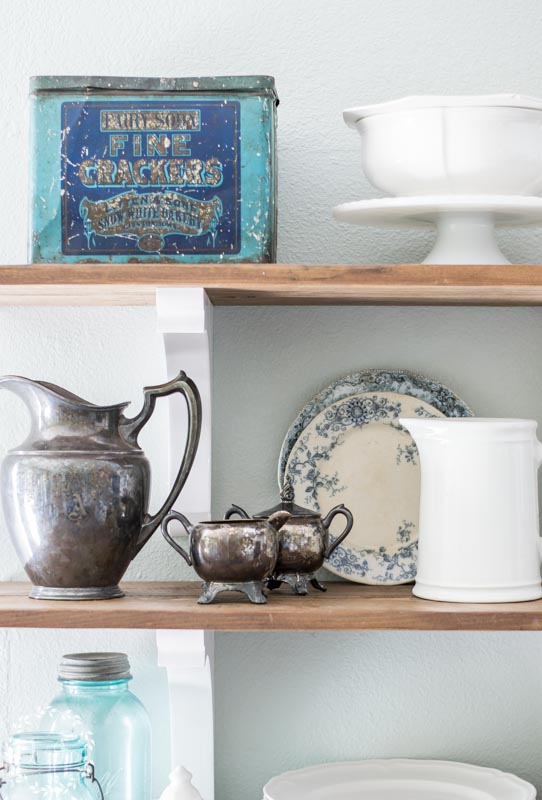
I worried a bit at first about being able to keep them looking “cute,” but all I really had in there were my dishes and glasses, which are all white and clear. All of my ugly stuff is hidden in my other cabinets! So it’s been easy keeping them clean looking and because it is a good distance away from the range, I haven’t had issues with grease or dirt settling on them. We use everything up there often enough that they really don’t have time to gather much dust either.
Materials Needed for this Project:
(This post contains affiliate links to sites outside of LostandFoundDecor.com. You won’t get charged any extra, but shopping through these links does help support this blog. Thanks for the love!)
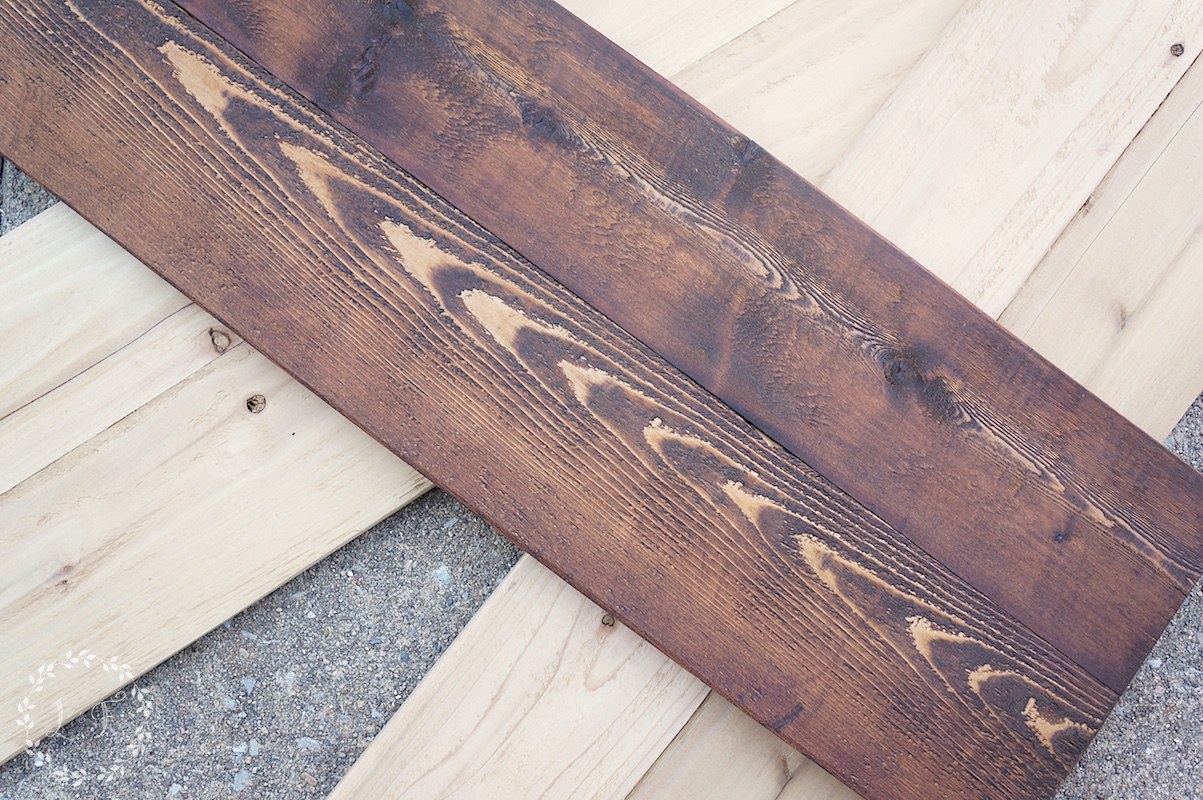
- 1 in. thick wood planks of your choice (I used leftover cedar fence pickets cut down to 4 feet).
- Wood shelf brackets, 3 for each shelf; I used these here. Also screws and drywall anchors.
- Stain and Sealer for your planks, I used Minwax Dark Walnut and Fusion’s Tough Coat.
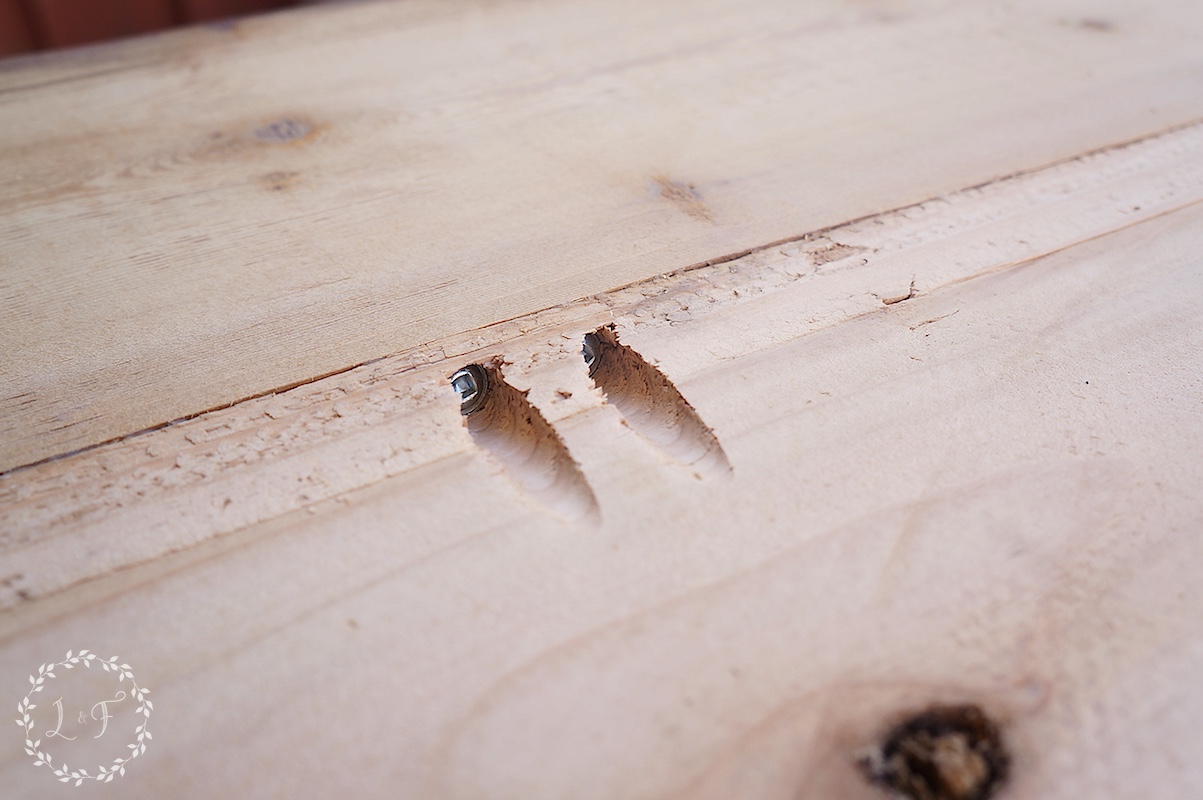
- Kreg Jig for connecting planks along with screws.
To make each shelf, we took two 1 x 6 cedar planks and connected them together using the Kreg Jig. I love using this jig!
It’s really simple and can be used for so many projects. Instead of using a more complicated method of joining the planks using wood biscuits, the Kreg jig allows you to screw the 2 boards together while hiding the screws.
And just a side note–these cedar planks are leftover from a giant fence rebuilding project we did a year or so ago. We have used them for a few other projects in our house, including making a vanity top out of them for our upstairs guest bath. I’m big on using materials you already have–we saved a good bit of money not going out and buying more wood!
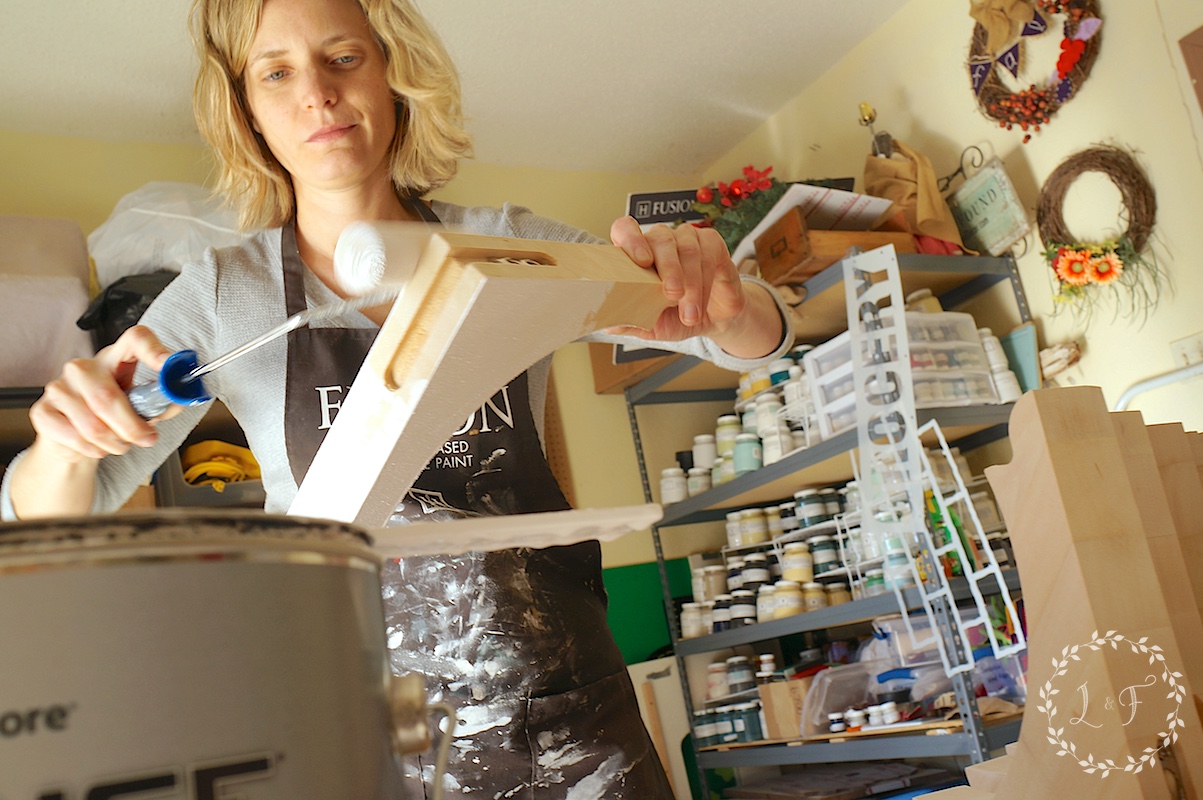
I painted the wood corbels with the same white paint I used for the cabinets (also leftover) and then the shelves were ready to install.
After we removed the wall cabinet, we had to do some touch up to the wall behind it–smoothing out some drywall damage and painting. To install the cabinets, we found the studs along the wall and mounted each corbel onto a stud–3 per shelf.
We allowed for 11.5 inches in between each shelf to make sure there was enough height for glasses and such, while also keeping the top shelf within reach. We didn’t attach the shelves to the corbels because the weight of the dishes holds them down just fine. It was a really simple process!
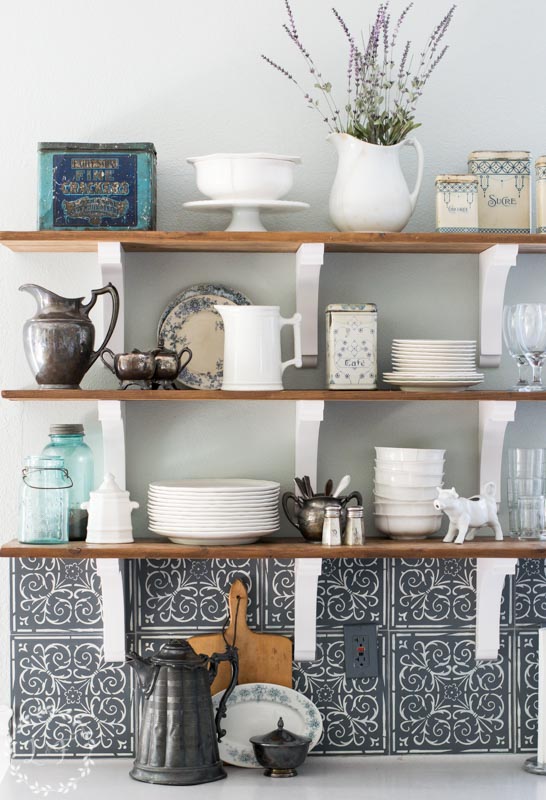
I love so much how they turned out!
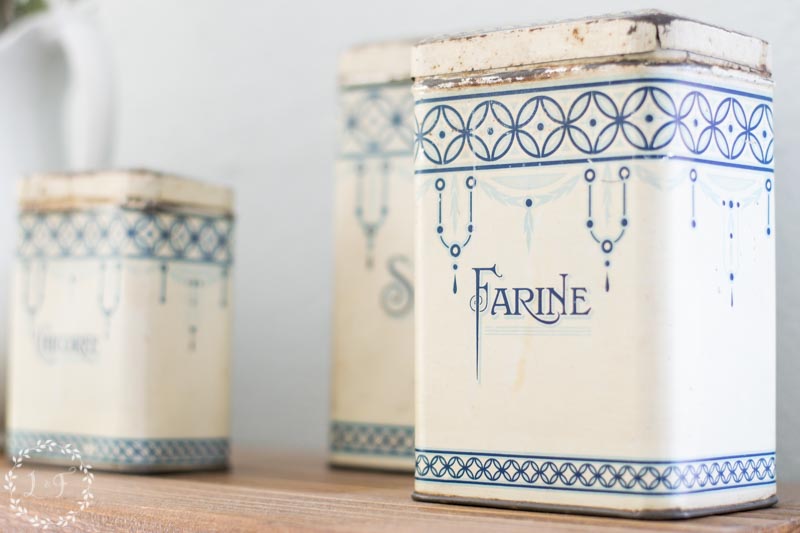
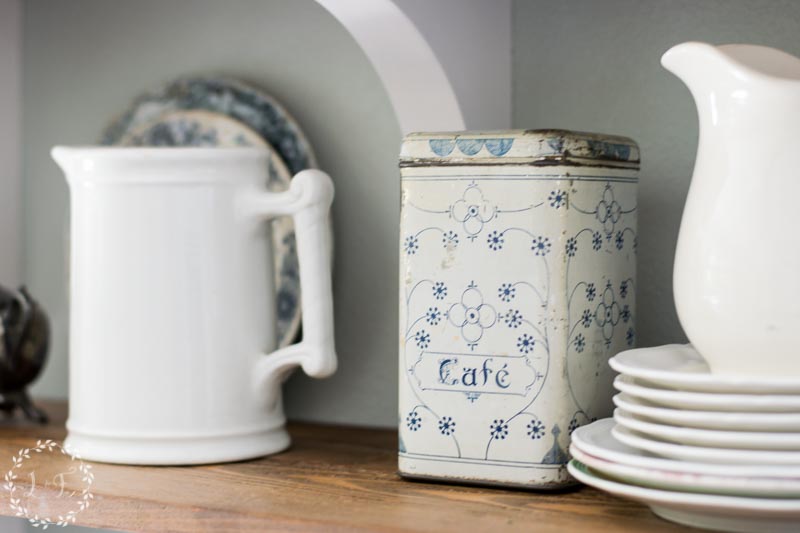
They really do add a lightness to the space and having the shelves open makes unloading the dishwasher super quick. Plus, it gave me a space to display some of my collected vintage tins, ironstone and other pieces, which adds some extra character to the space.

If you’ve read all the way to this point, congratulations! This was a long post!
Thanks so much for following along with me on this multi-year makeover. And stop back by in a few days to see our window trim project, along with more photos of our kitchen finally pulled all together!

blissranch
Monday 2nd of October 2017
I'm loving it all, no matter how long it took you.
blissranch
Monday 2nd of October 2017
I'm loving it all, no matter how long it took you.
Mary
Monday 2nd of October 2017
Thanks for sharing REAL life DIY. It is nice to know I am not alone "start..bored..start another" syndrome. I love how the simple changes have had a great impact on your kitchen. It looks great. Anxious to see the finished project. Hubby & I are in the throws of remodeling an 80 year old farmhouse. I thought we would be a year fixer-uppering and then living happily ever after. 1.75 years later we are nearly finished with the first 1/3... I have a stock of furniture pieces I am anxious to work on, and just received my first bottle of soapstone fusion paint, finished up 5 steps for beginners and am ready to take the first step of refinishing...but seems getting a house ready to live in, is my reality... SO thanks for the pep talk. This too shall pass... . Mary
Melanie
Monday 2nd of October 2017
Mary, I'm so glad you found my post relatable. And it does sound like you have a lot of work on your hands! What an amazing project though! Keep at it, so often it's a marathon and not a sprint :)
June
Thursday 28th of September 2017
Wow good job on your shelving and backsplash. I love it.
Melanie
Monday 2nd of October 2017
Thanks so much June!