My kids have been gone this week at “Grandma & Grandpa Camp,” which means I’ve had much more time than usual to work on projects. We’ve been rearranging bedrooms, packing up baby stuff we no longer need, installing kitchen lights, and painting the bathroom–just to name a few of the projects!
I also have been spending many long, hot hours in my garage working on some furniture makeover projects. I’ve had this Duncan Phyfe style dining set for about 3 months, and have honestly been dreading starting on it.
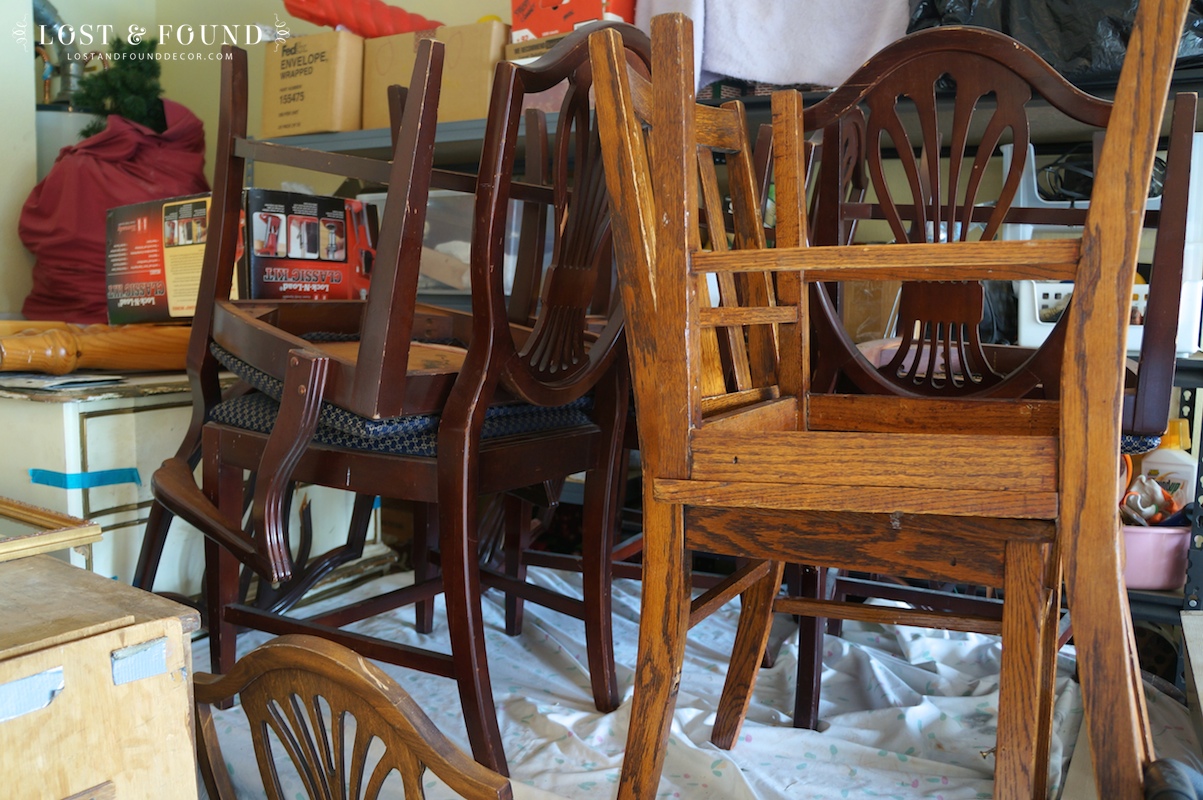
(It’s the darker chair set, the table is underneath all the chairs covered by the sheet!)
I found the table on Craigslist and it came with 6 chairs all with various levels of damage. Only one of the chairs was an armchair, and it was virtually unusable because the harp back was completely broken through.
Most of the other chairs had some sort of veneer damage also on their harp backs.
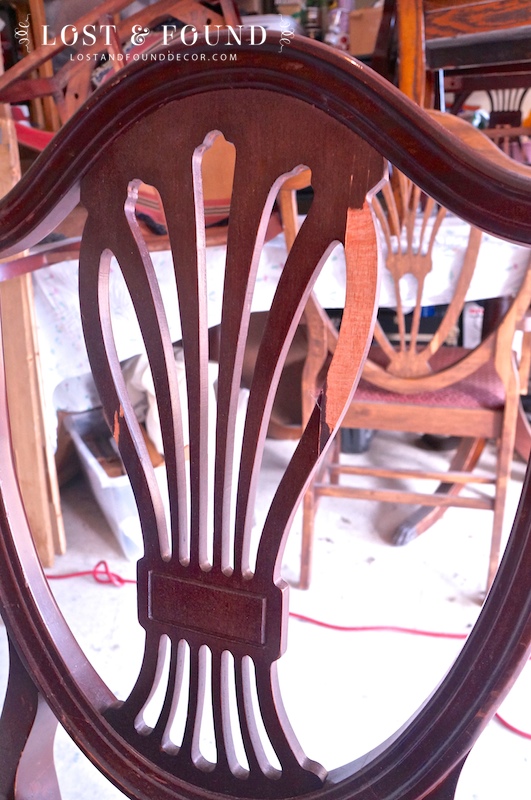
I knew this project was going to involve a lot of wood filling, wood glueing, and sanding to just get those chairs presentable.
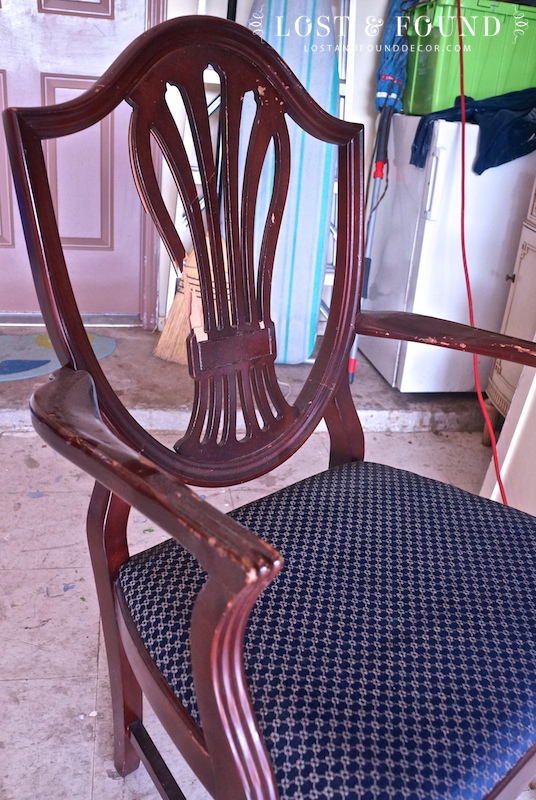
Not long after I bought the table, I saw another armchair that was about 95% identical to my chairs at a dealer’s booth just down from me in the mall. He was actually going out of business, and sold me the armchair (which was in good condition) for $12. So, now I had 7 chairs, but only 6 usable ones.
In a stroke of genius the other day I decided to try and make some use of the old broken armchair, by removing it’s arms and attaching them onto one of the other armless chairs.
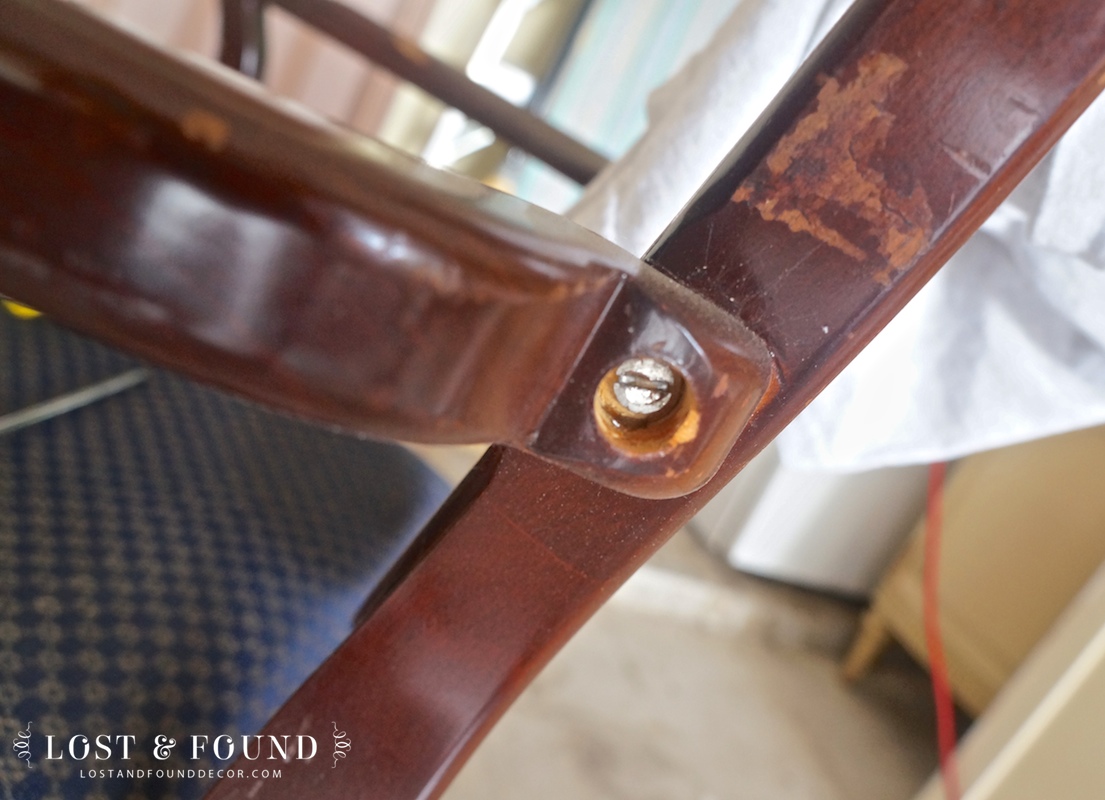
It turned out to be a simple process. Just unscrew the screw at the top of the arm,
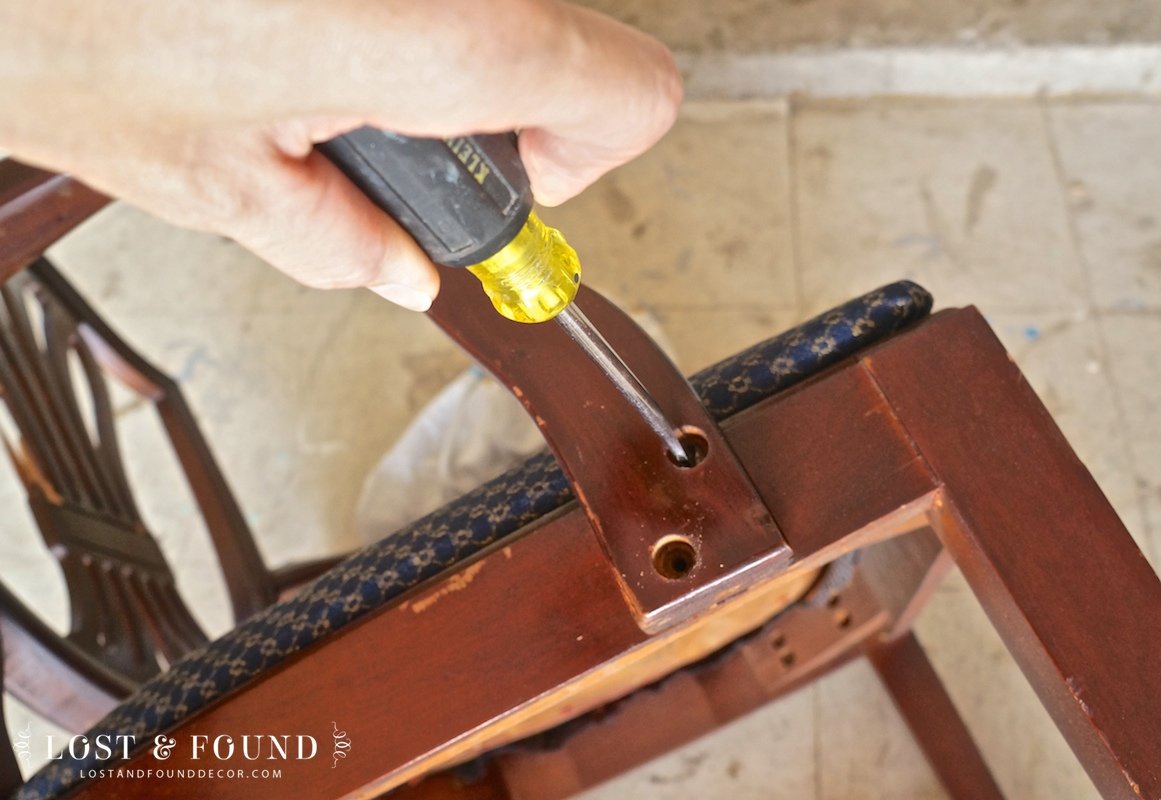
then the bottom two screws on the arm and it pops right off! I lined up the arm on the usable chair and screwed each of the 3 screws back in, while also using a little wood glue to firm up the joint. It worked perfectly! So after all of that, I now have a functional set of 6 chairs, including 2 armchairs (one that doesn’t exactly match but is close enough).
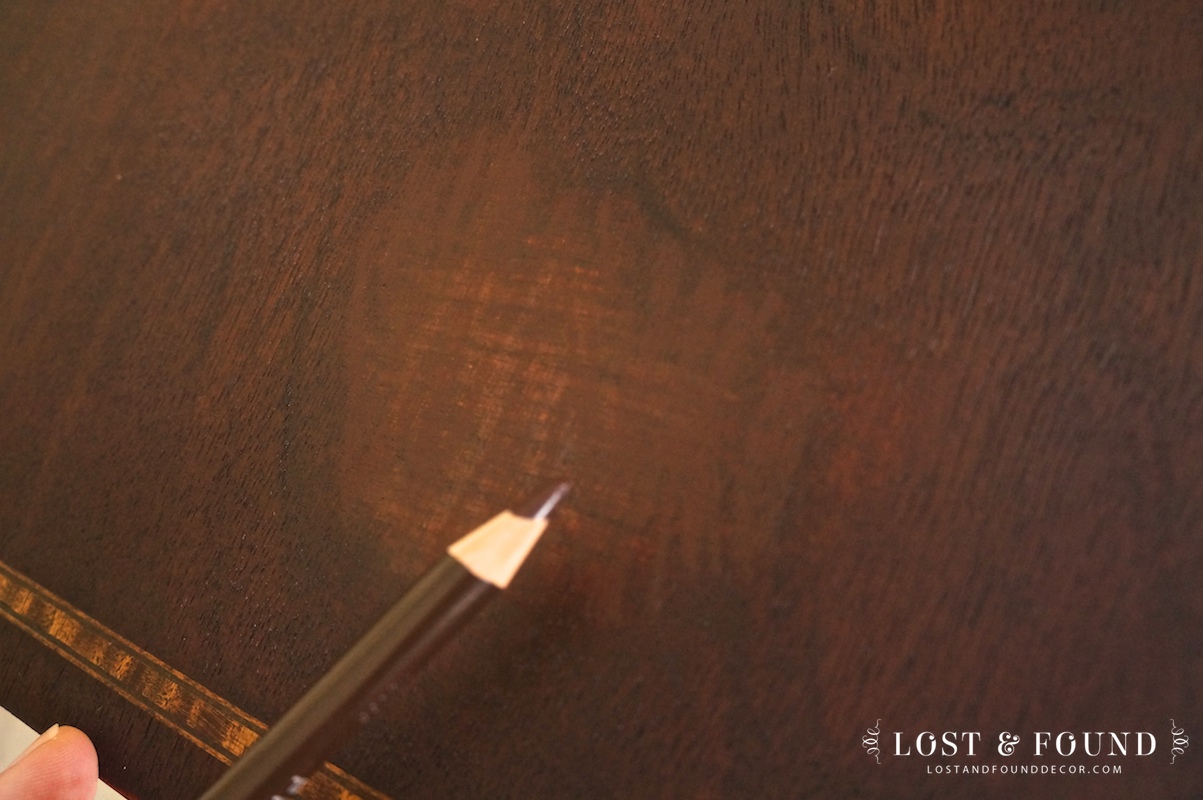
My Mom was actually in town for a bit during this process, so while I was working on the chairs I let her have a try at using my orbital sander to sand down the table top. The table had this amazing inlaid wood trim detail that I desperately didn’t want to paint over. Taking it down to the bare wood and re-staining it was the way go to.
Well, my Mom made an accidental little boo boo (I still love you Mom!). While sanding the top, she sanded through the veneer in 4 places. I wasn’t too concerned initially because I figured with stain it would all even out. But . . . it didn’t. This is what the table top looked like after applying new stain:

It was not a pretty sight! I spent the evening looking online to see how I could fix this, and basically found a bunch of people saying it was hopeless! That there was no fix for veneer that was sanded through. Then on a woodworking message board I found this one gentleman who walked through a process of using soft artist colored pencils to draw back in the wood grain and recolor the damaged area. I decided it was worth a try, so it was off to Hobby Lobby–note, take a close up photo of the damaged spots before you go!

Here’s what I came back with: Four shades of colored pencils that roughly corresponded to the different wood tones in my table top (I wound up only using 3), and spray-on clear acrylic (or shellac if you prefer). Let me preface by saying that I am no artist, but I am super happy with how I was able to camouflage the spots with this method.
I started with scribbling all over the spot with the lightest of the pencils, then sprayed acrylic on the spot.

After it dried (about 10 minutes), I moved on to the pencil that matched the lighter wood grain lines. I did my best to connect the grain lines across the damaged area (in this picture the lines are running vertically), then smudged the area lightly with my finger to make the lines not so obvious. Another layer of acrylic then went on to seal those marks.
Finally, I used the darkest pencil to draw on the darker grain lines. There’s a little glare on the picture because of the shellac, but if you look closely you can see how I tried to connect the lines over the area (horizontally in this picture). More smudging, more acrylic, and then done!
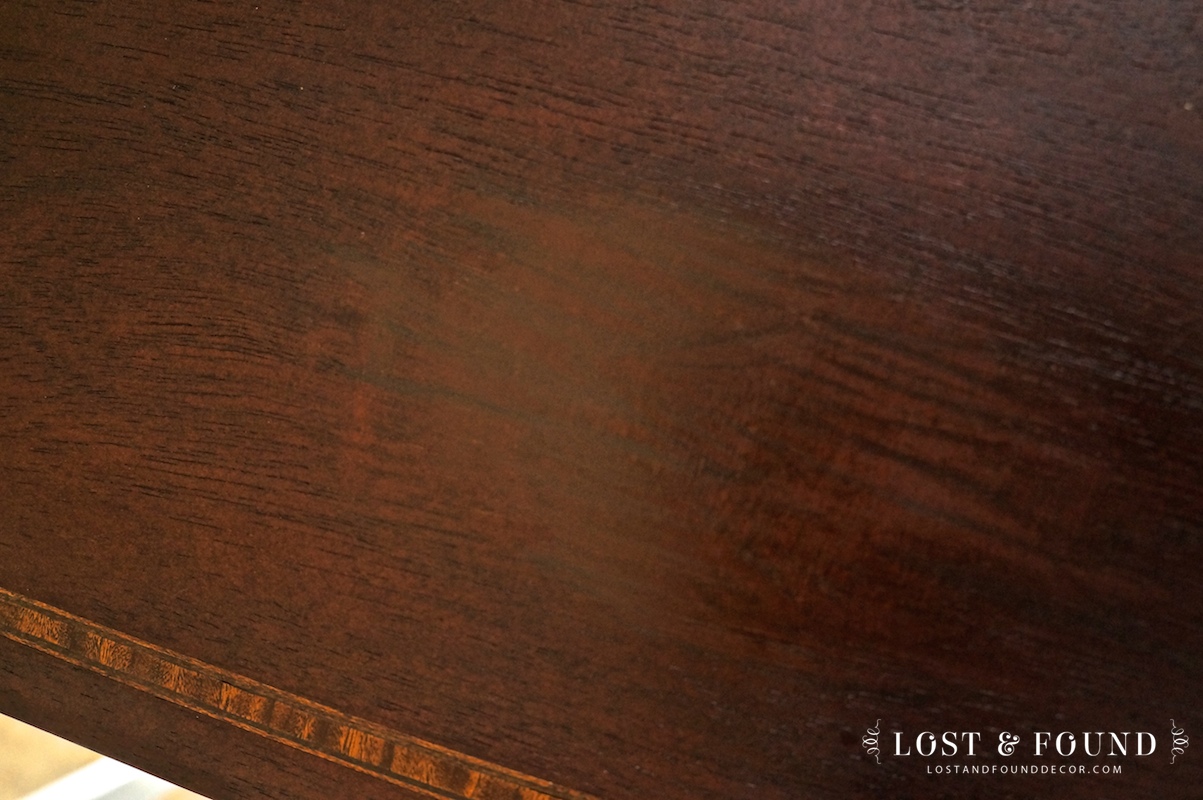
After sealing the whole table top with poly, the spots are hardly noticeable. It really is amazing, and I’m so glad I found that hopeful gentleman on the woodworking board so that I didn’t have to paint the top and cover up all that beautiful wood!
There was a ton of prep work in this massive dining set makeover. Once these little projects were all done, I also had to paint each chair as well as the table base, distress and seal them all with wax, and recover each chair. After many more hours of work, I’m thrilled to say it’s finished. Here is a little peek at how it turned out:
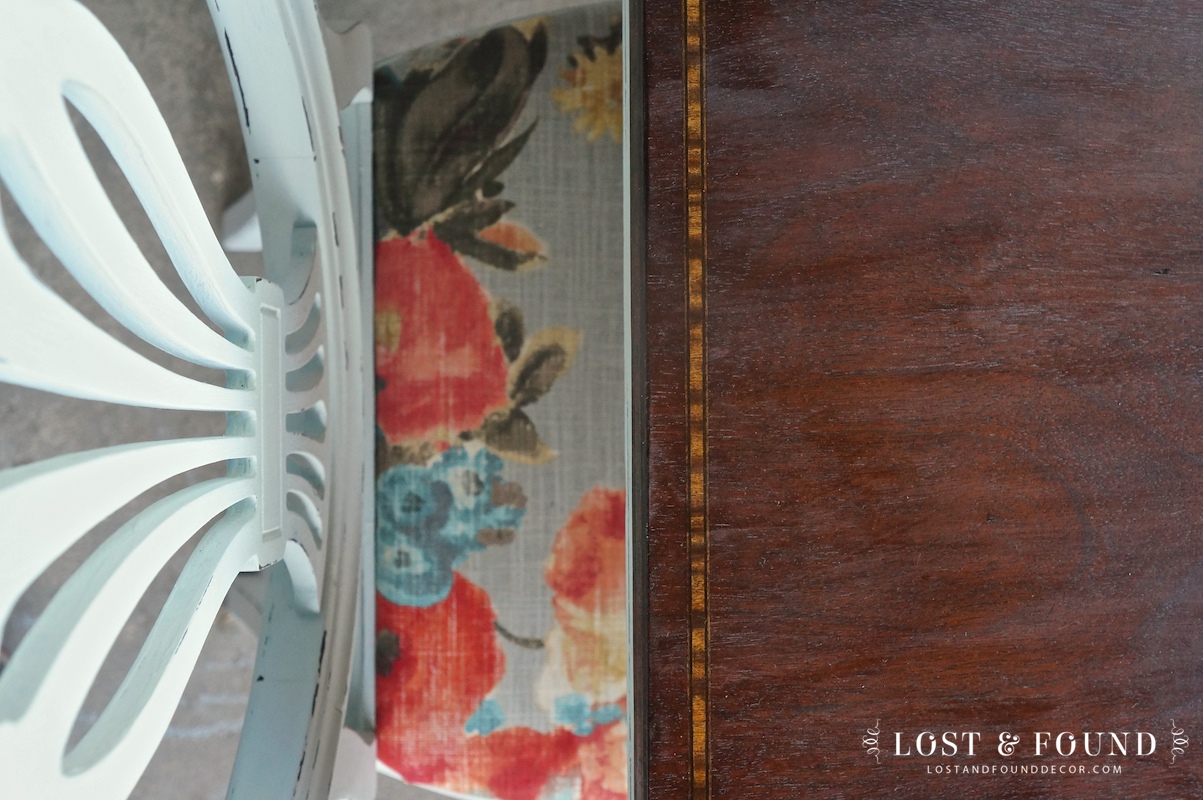
This makeover was as complicated as I was fearing it would be. Sometimes though, you just have to bit the bullet and get started on a project even when it seems overwhelming. Little by little, I finished each stage of the makeover, and the result is now a stunning dining set. And of course, it helps that my kids were gone all week 🙂
You can see the finished table full reveal here now!


Before & After | Dining Set Furniture Makeover
Friday 27th of May 2016
[…] hope you all had a chance to read in my last post about all the prep work this Duncan Phyfe style dining table needed. A makeover was in order and […]
Julie Allen
Tuesday 1st of September 2015
This saved me some hassle! I had done quite a bit of research too but this was what I needed so thank you, thank you!
Melanie
Tuesday 1st of September 2015
Great! I am so glad Julie. I have used the colored pencil trick again since writing this post and it worked great once again. Good luck with your project!
Diane | An Extraordinary Day
Friday 18th of July 2014
Great save! And love that you got creative by switching the arms of the chairs. I can't wait to see the reveal. ;)
Thanks for sharing your makeover tips with us at Project Inspire{d} Melanie!
Barbara Ann
Sunday 13th of July 2014
Super Fantastic! I know there are furniture crayons for repair/concealing scratches. But do not know if they would have worked here. While mom may have made a boo boo, if she hadn't you would have never discovered this person and a new technique. Great job and Thanks for sharing.